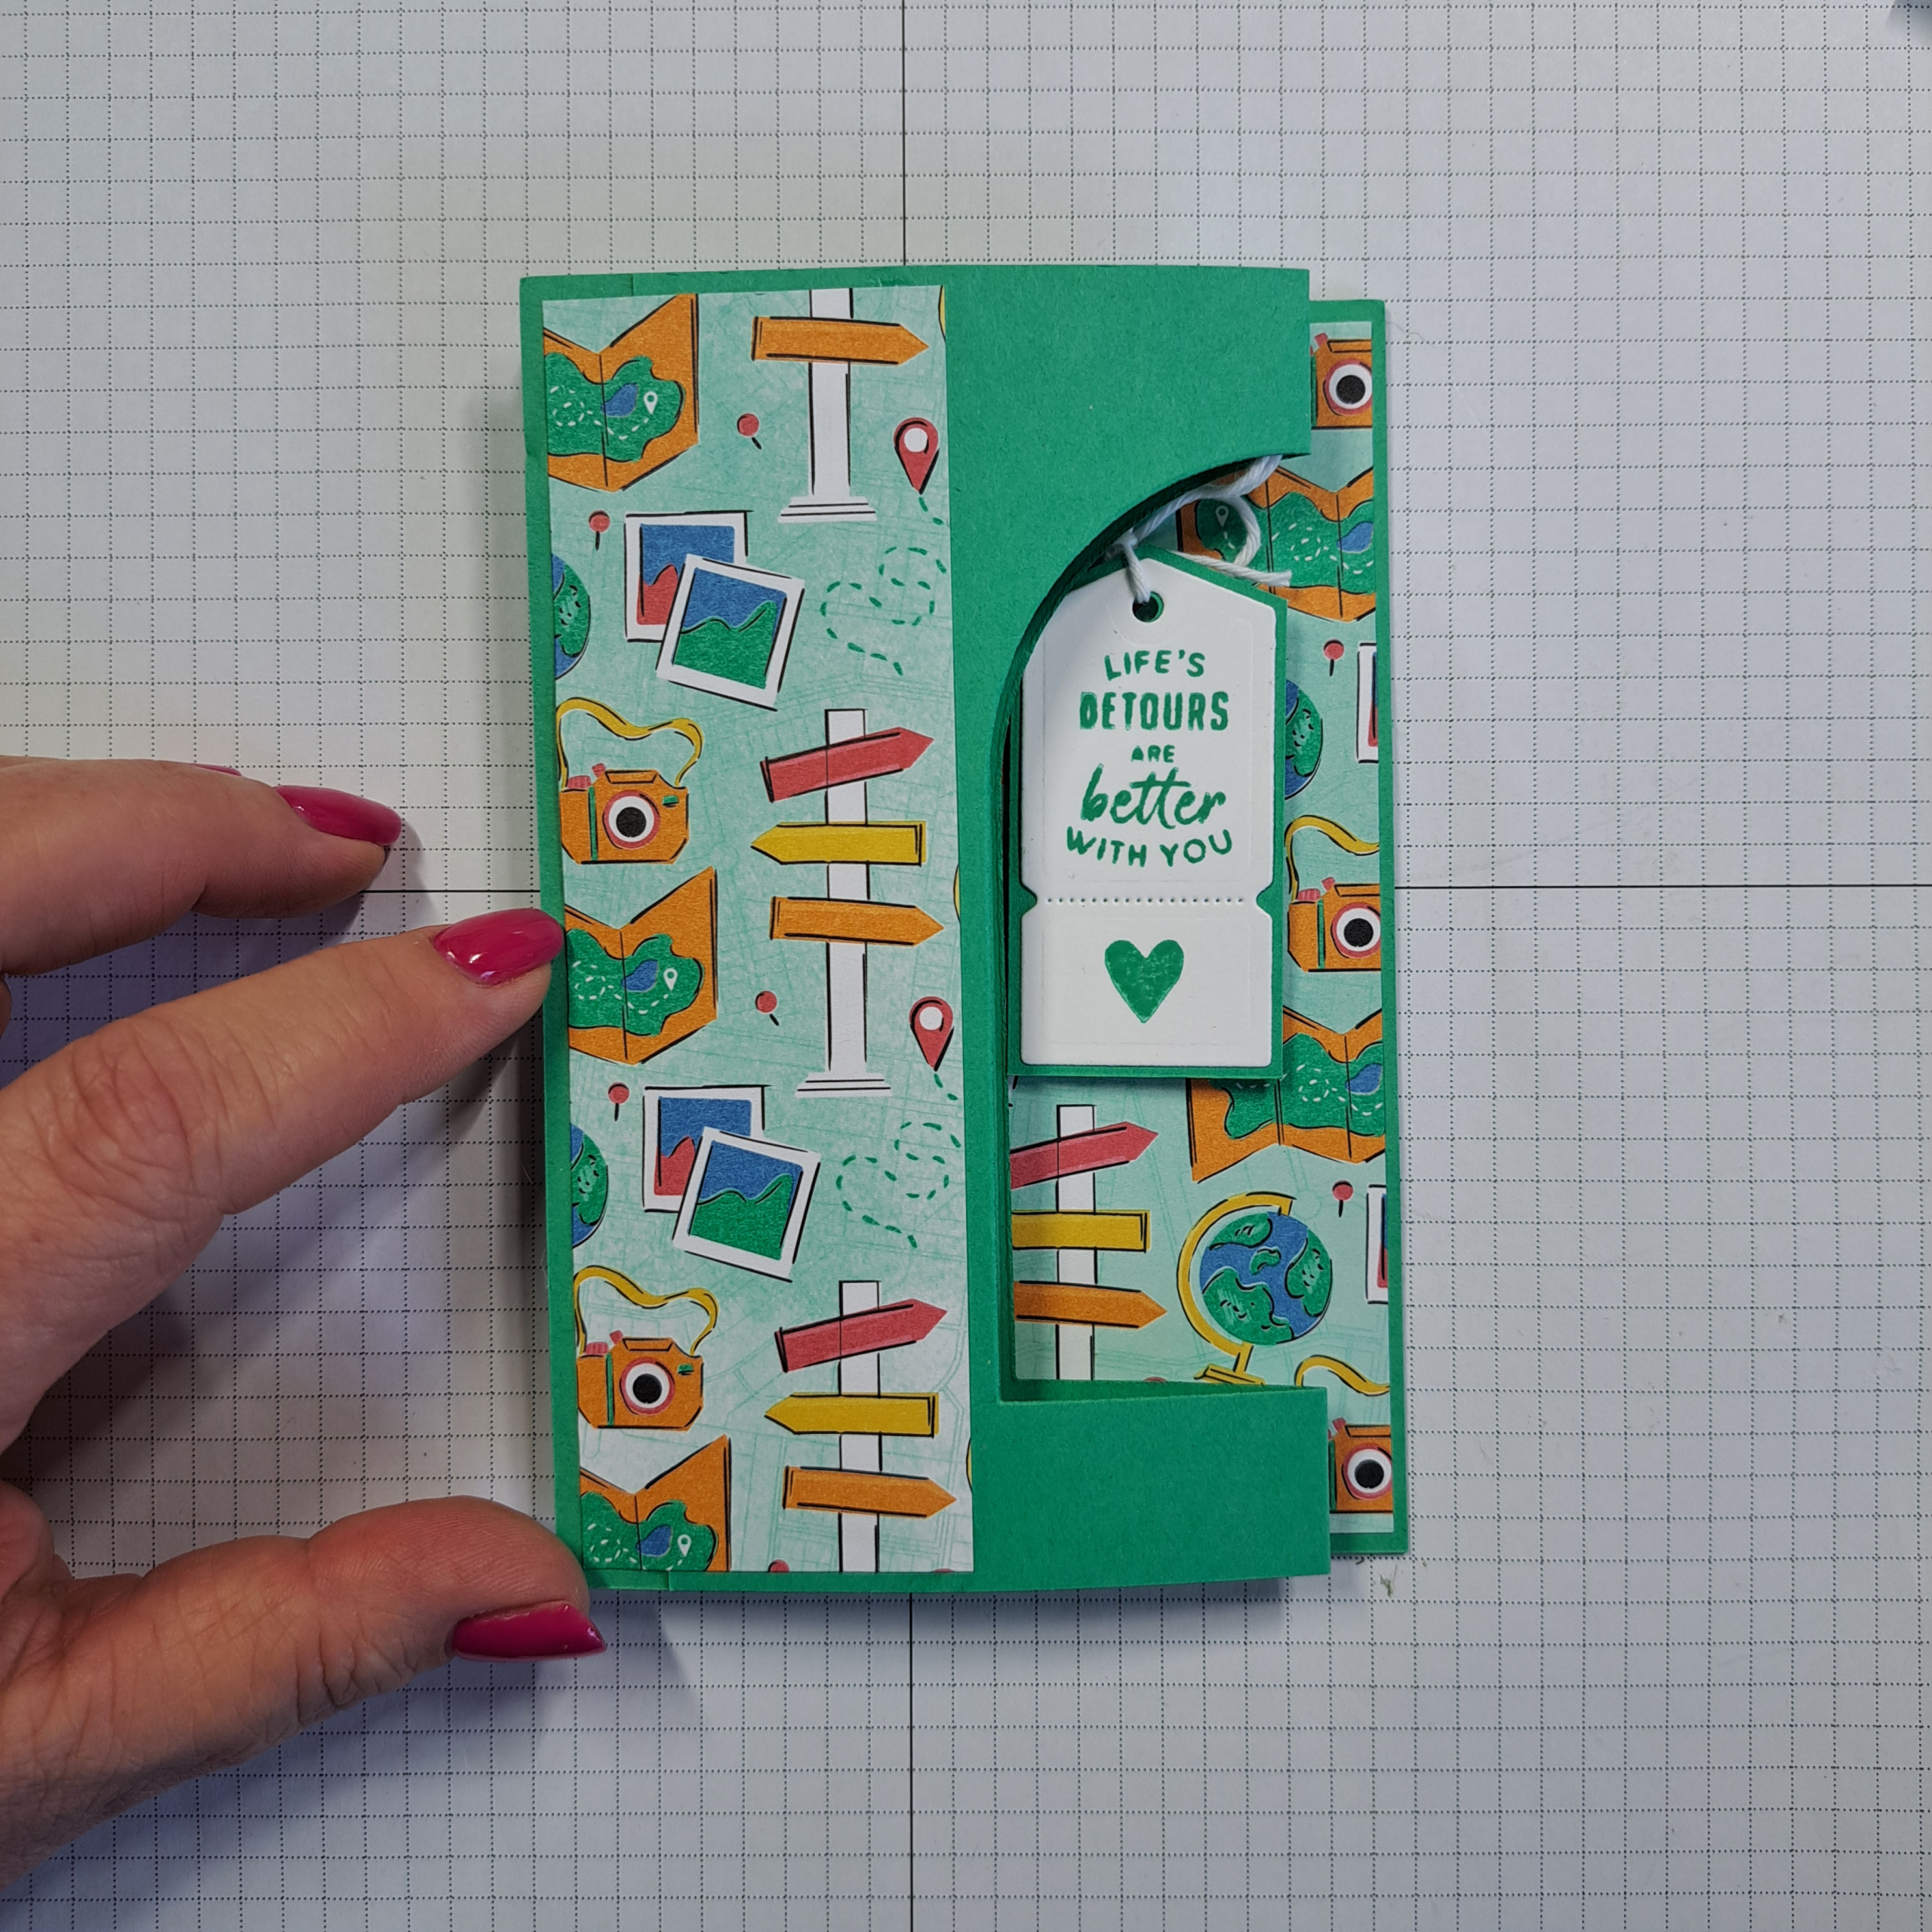
Today I have another fun-fold for you. This particular design is an amalgamation of several different fun folds. I put it together from a memory I had of seeing a similar card but that card was very large and had a custom envelope, that card also seemed rather complicated. So I never got any details about the card or how to make it. And now, of course, a couple of years later, when I thought I might want to try to make the card, I could not find it any where!
Supplies
Tags to Go Cling Stamp Set
Tags to Go Die Set
Everyday Arches Dies
On the Go Designer Series Paper
Shy Shamrock Card Stock
Basic White Card Stock
Shy Shamrock Stampin Pad
Baker’s Twine Essentials Pack
Tear and Tape
Multipurpose Liquid Glue
Paper Trimmer
Cut and Emboss Machine
Directions
Card Base
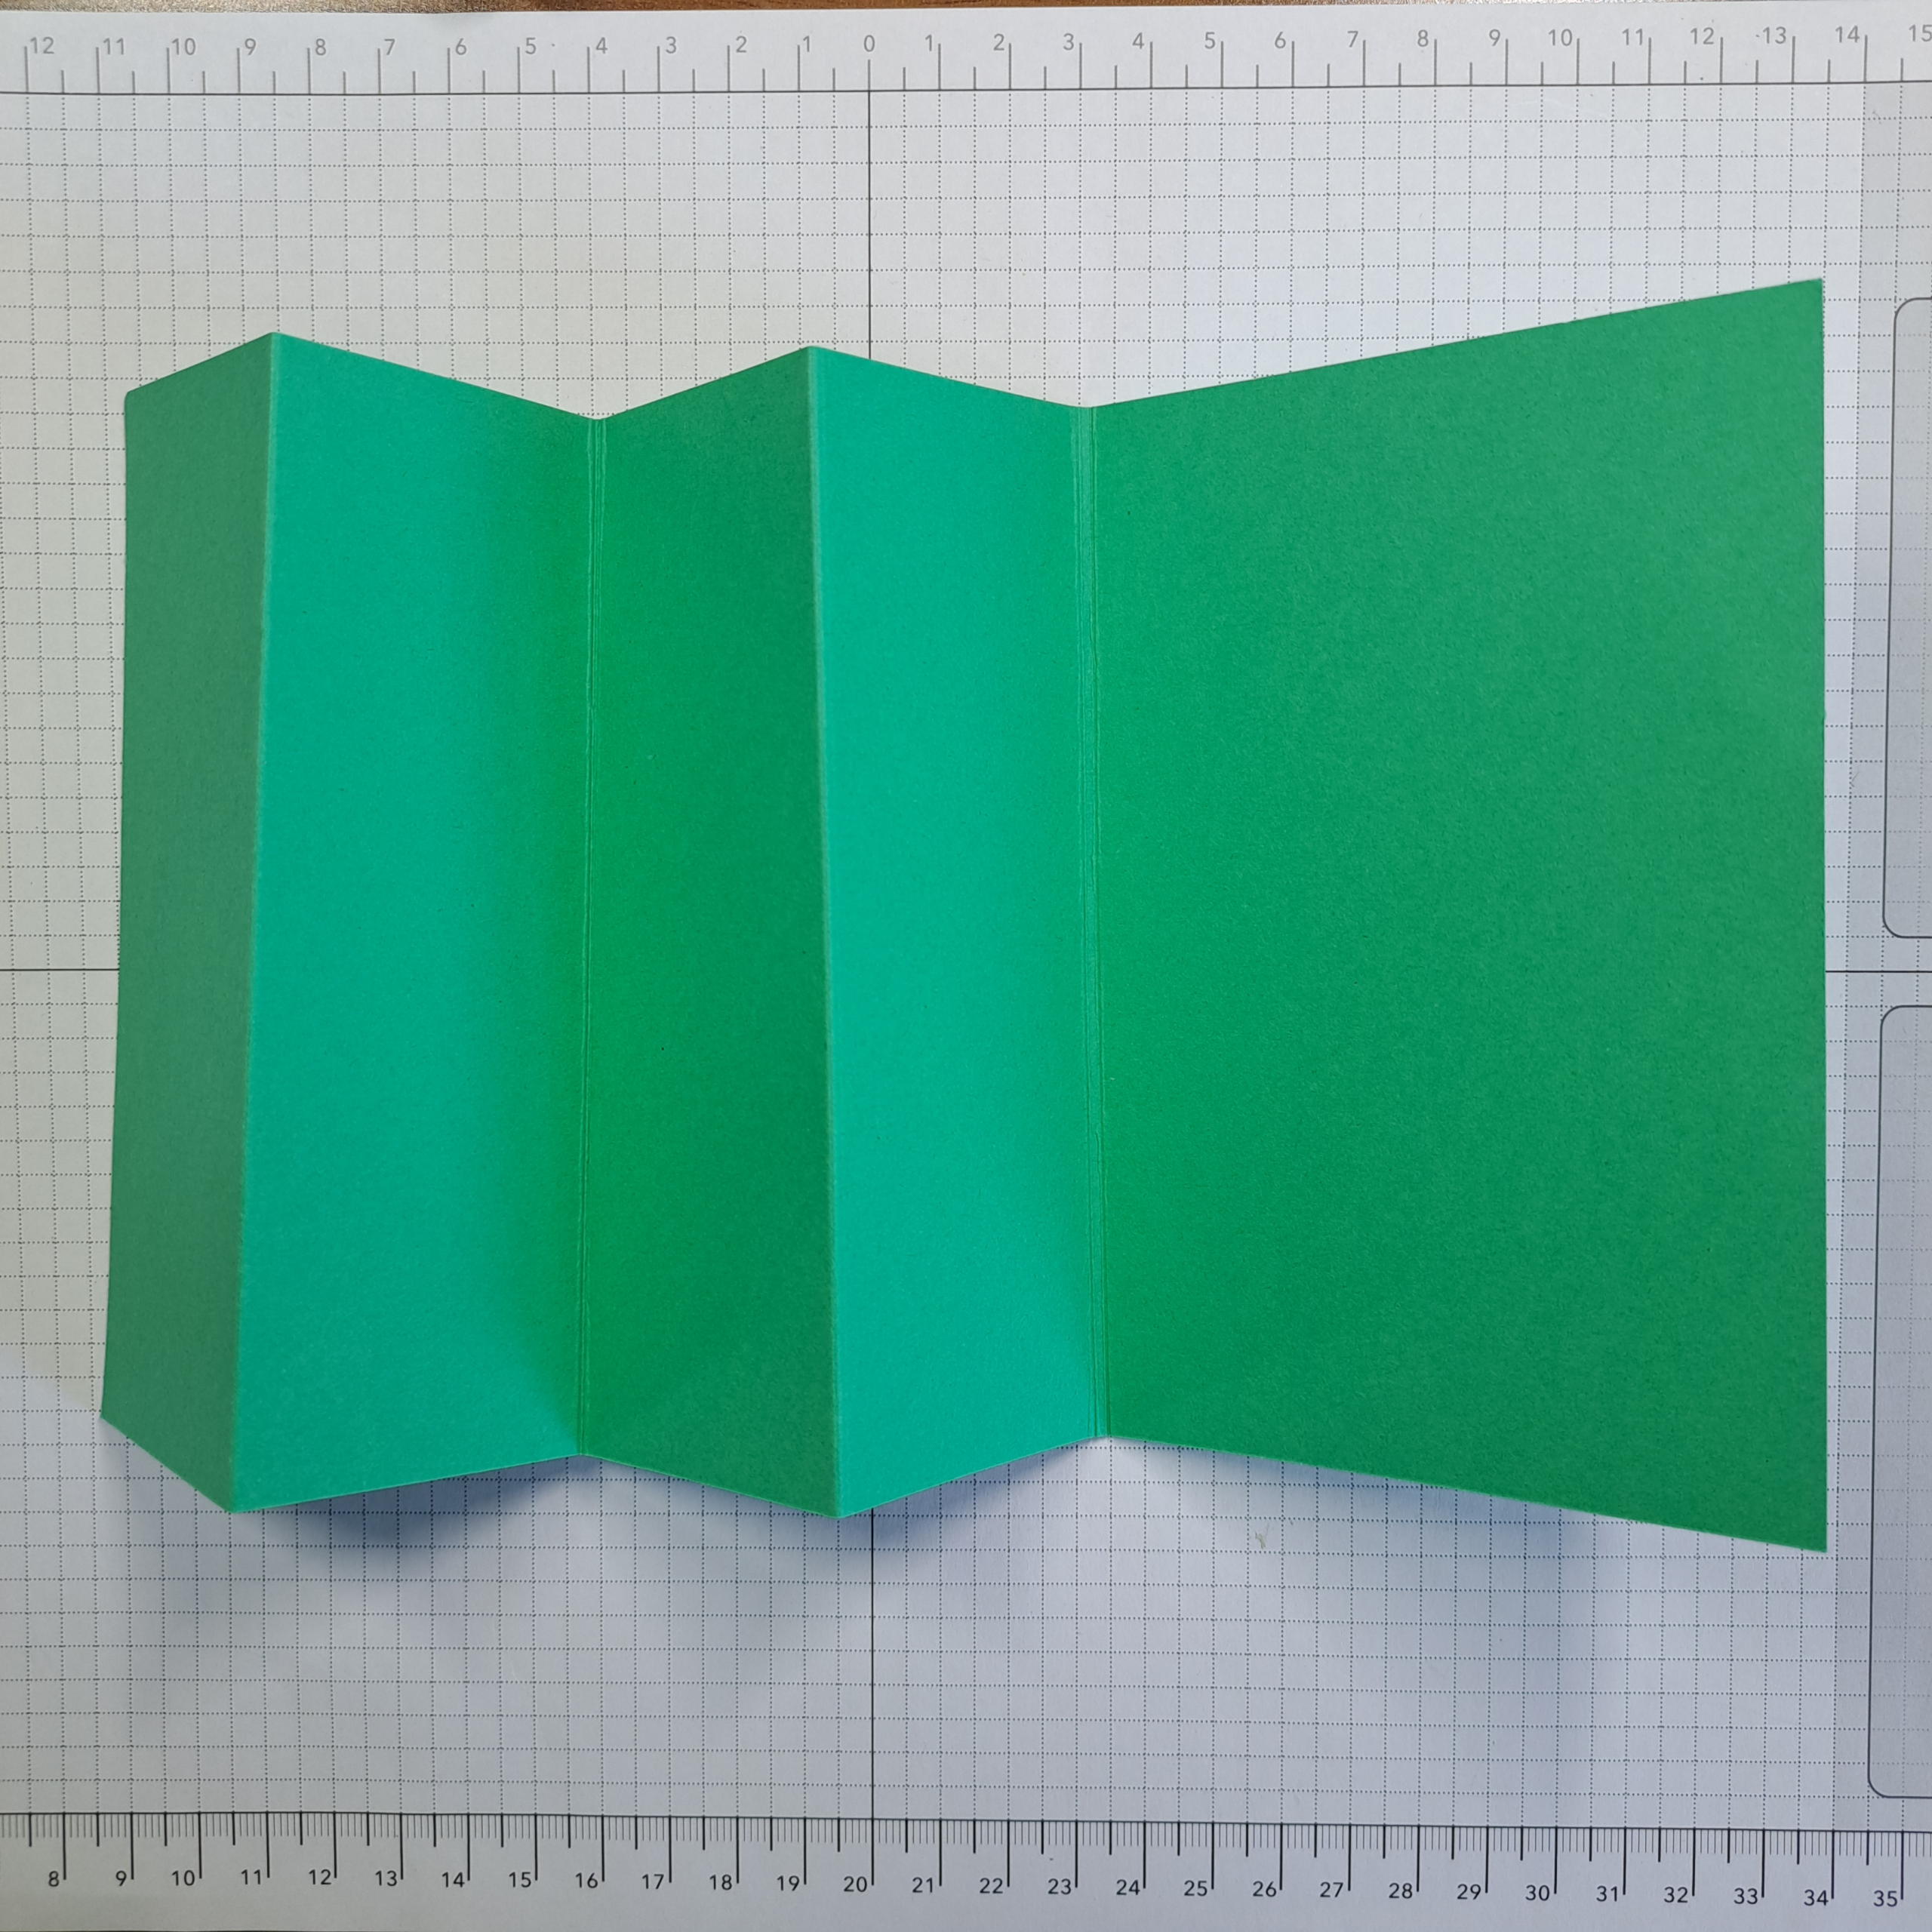
Cut a card base out of the Shy Shamrock card stock to 29.8cm x 14.85cm (11″ x 5-1/2″). Note: The numbers 14.85cm and 5-1/2 are a little arbitrary, they were chosen to yield card sizes that you are used to seeing. As mentioned above, I have seen a similar design to this card that was much larger and had a custom envelope.
Score the card base at 5cm, 10cm, 15cm, 20cm (1-3/4″, 3-1/2″, 5-1/4″, 7″).
Cut a second piece for the card base out of the same Shy Shamrock card stock to 15.2cm x 14.85cm (6″ x 5-1/5″). Score this piece with the long side up, at the half way point 7.6cm (3″)
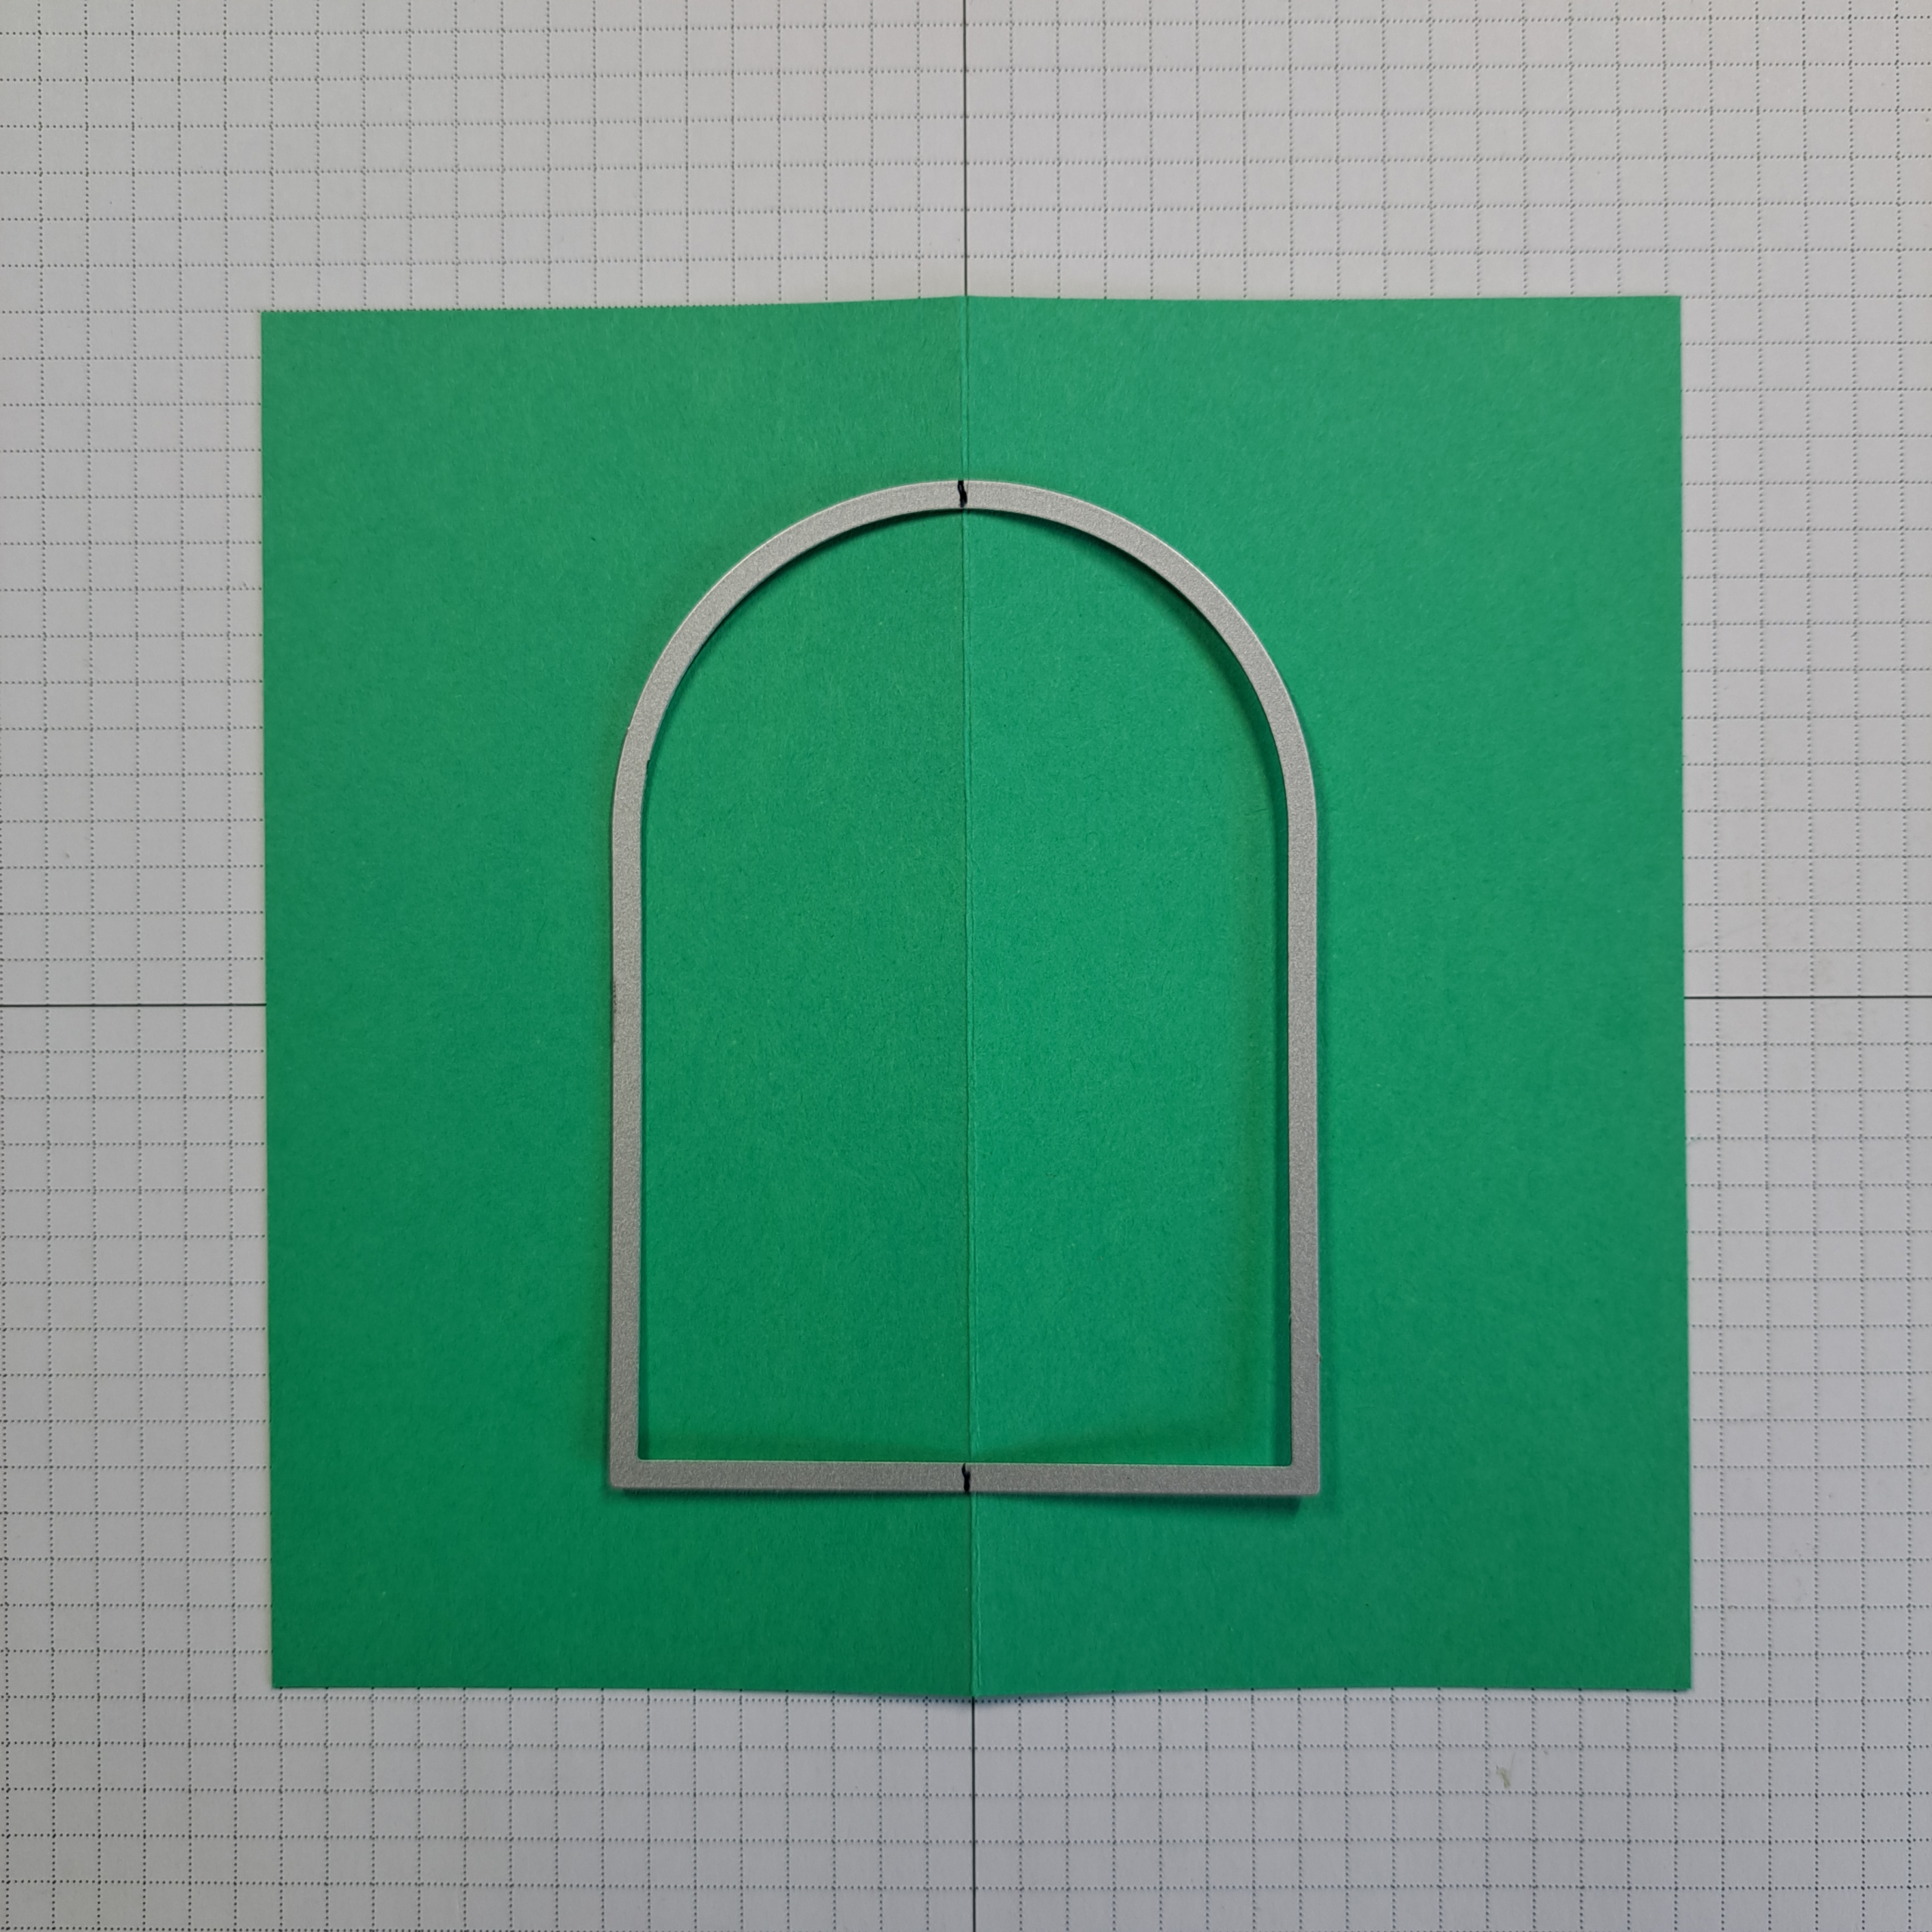
Using the 7.5cm x 10.8cm (3″ x 4-1/4″) arch from the Everyday Arches die set, cut out an arch in the center of the ‘second’ piece. I found it was easiest to do this if I marked my arch half way with a pencil and then lined up the pencil marks to the score line on card stock. I just eye-balled the top-to-bottom position but you can easily measure out the equal distance from top-to-bottom if you wish.
Tip: To find the half-way/apex position at the top of the arch you can use your paper trimmer. Position the flat of the arch at the top of your paper trimmer, align the left corner to the 3.7cm or 1-1/2″ mark. Now using the slot your trimmer’s cutter would travel, mark your arch with a pencil. Be sure you mark both bottom (flat part of the arch) and the top (curved part of the arch).
Greeting Dangle

Die cut two small tags from the Tags to Go die set. Stamp your greeting and the heart from the Tags to Go cling stamp set using Shy Shamrock ink onto the white tags.
Cut a rectangle out of the Shy Shamrock card stock to approximately 6cm x 7.5 (2-3/8″ x 3″). Center one of your white tags onto this piece and cut around it leaving approximately 2.5cm (1/4″) around the tag.
Adhere the second white tag to the back side of the piece. I found it was easier to line up if I used a 1/8″ hole punch and punched out the hole first, before adhering the mini tag to the reverse side.
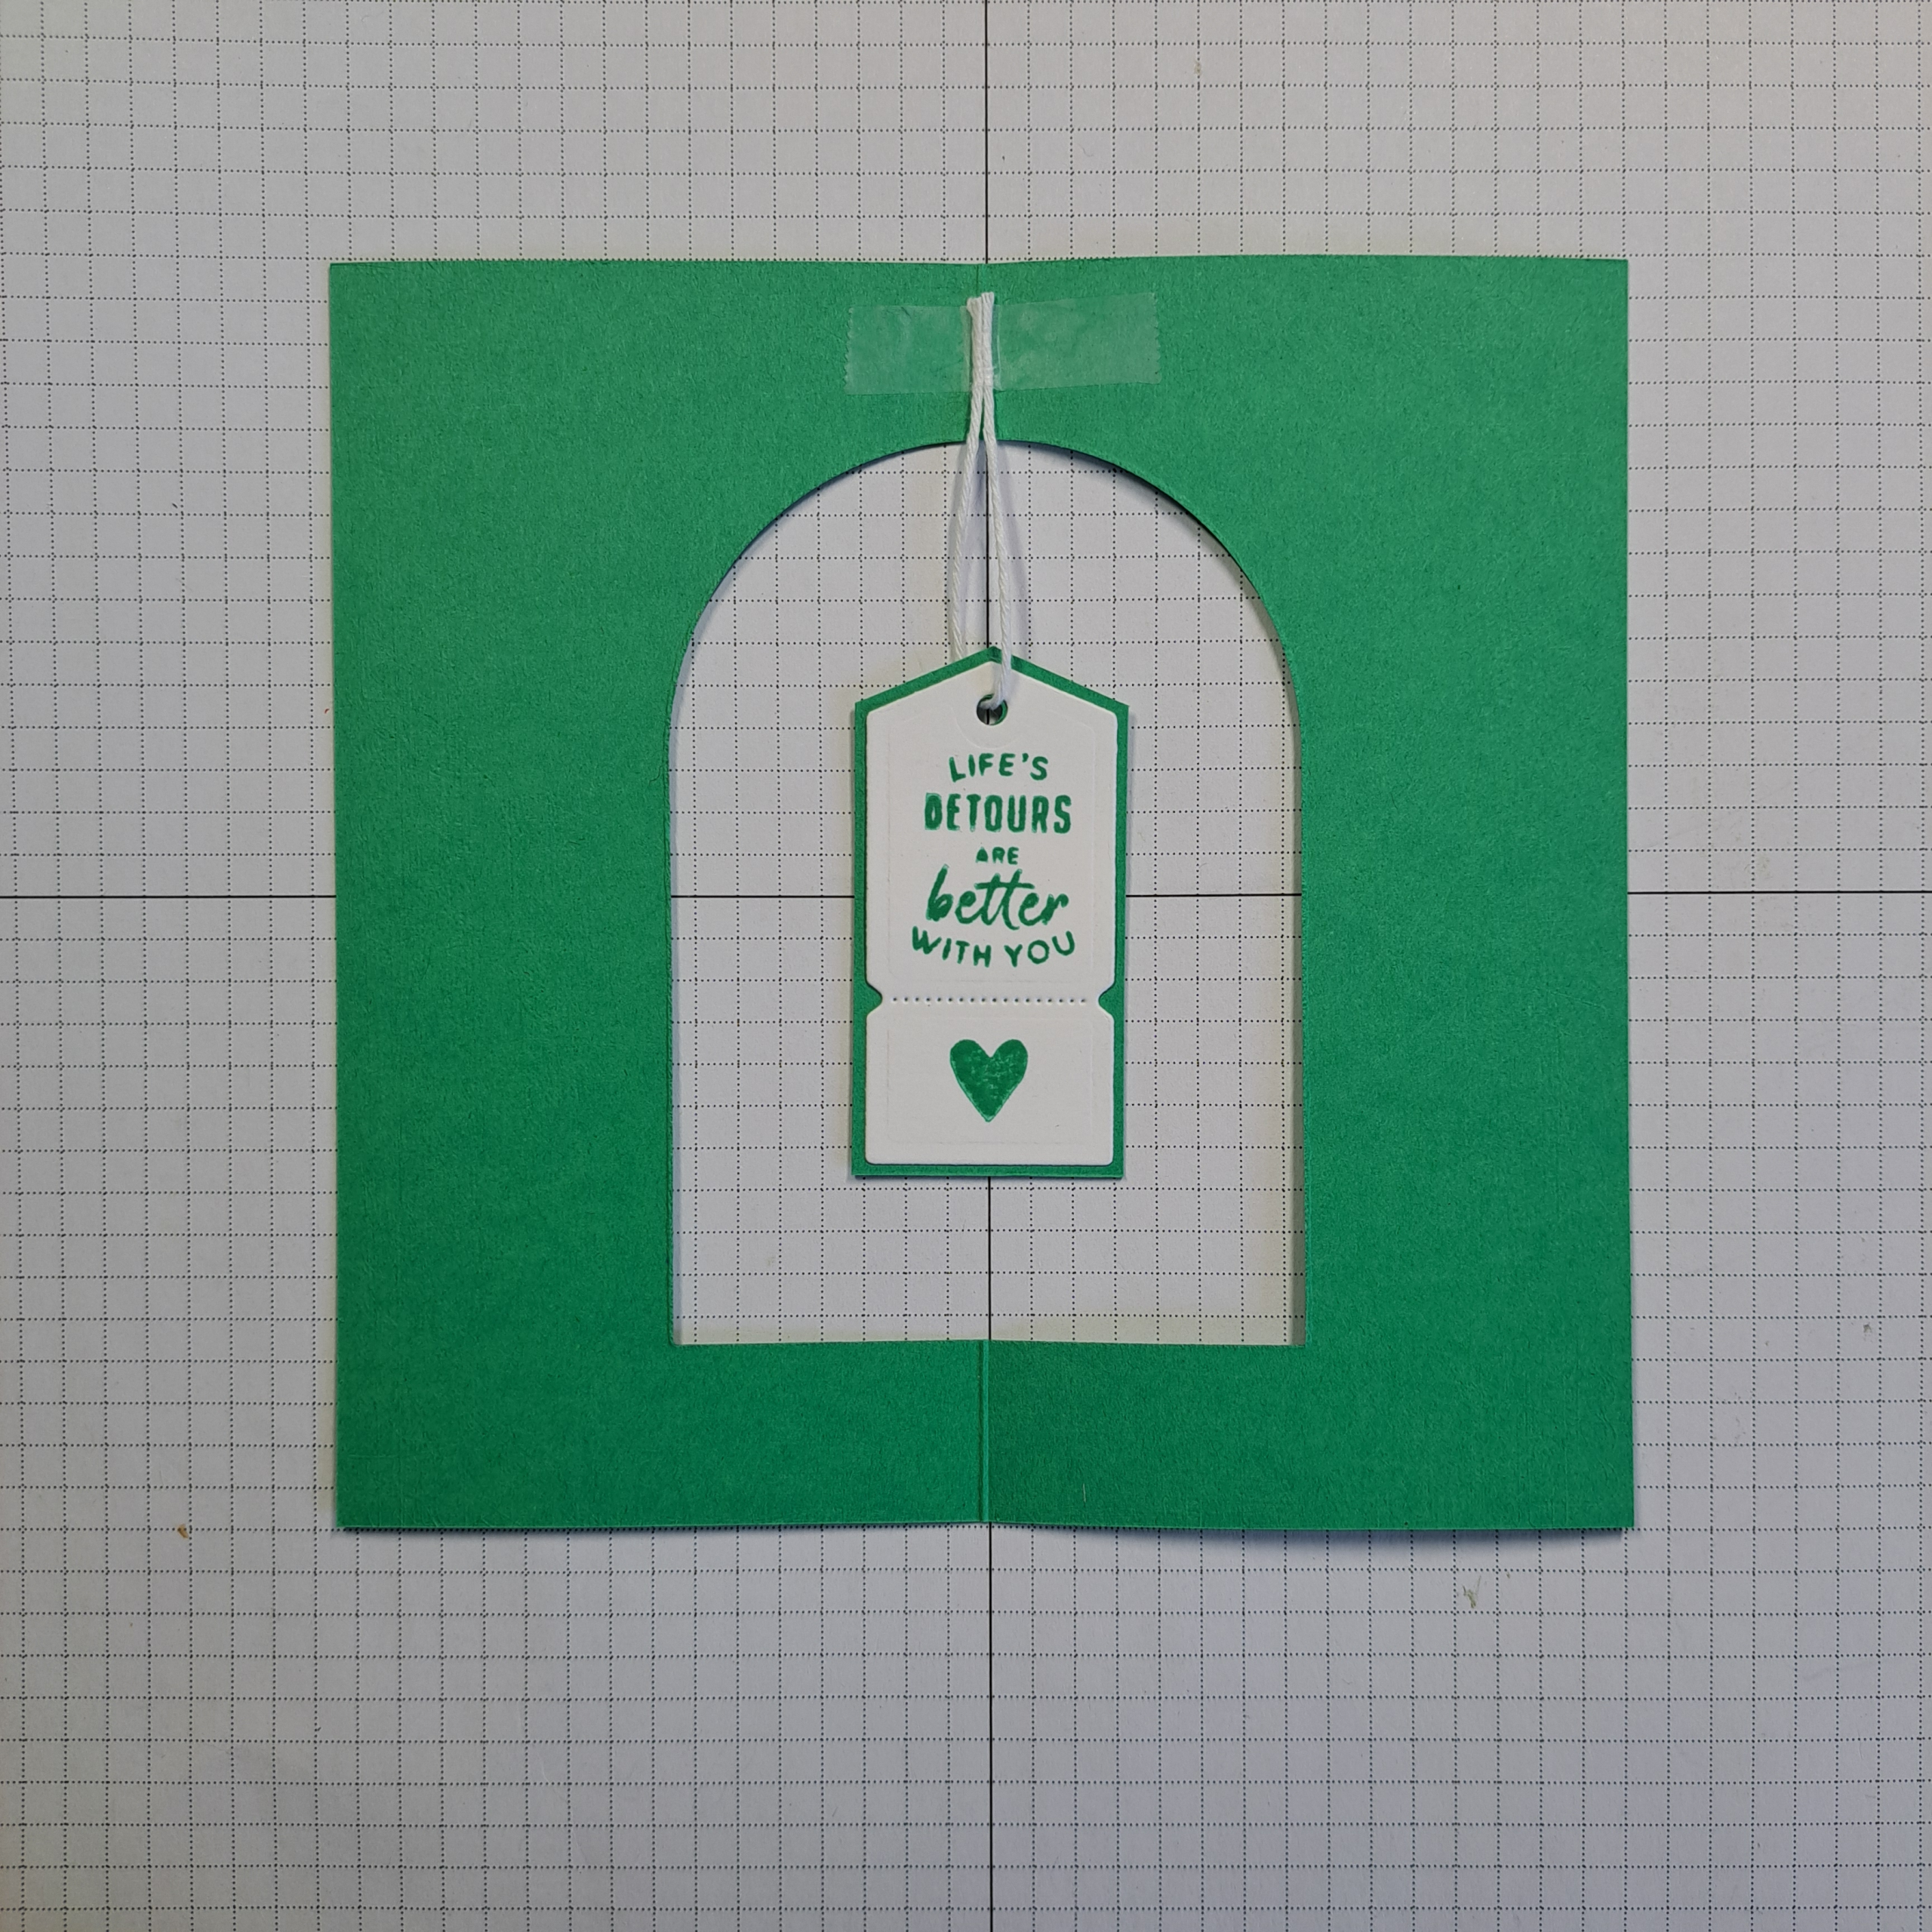
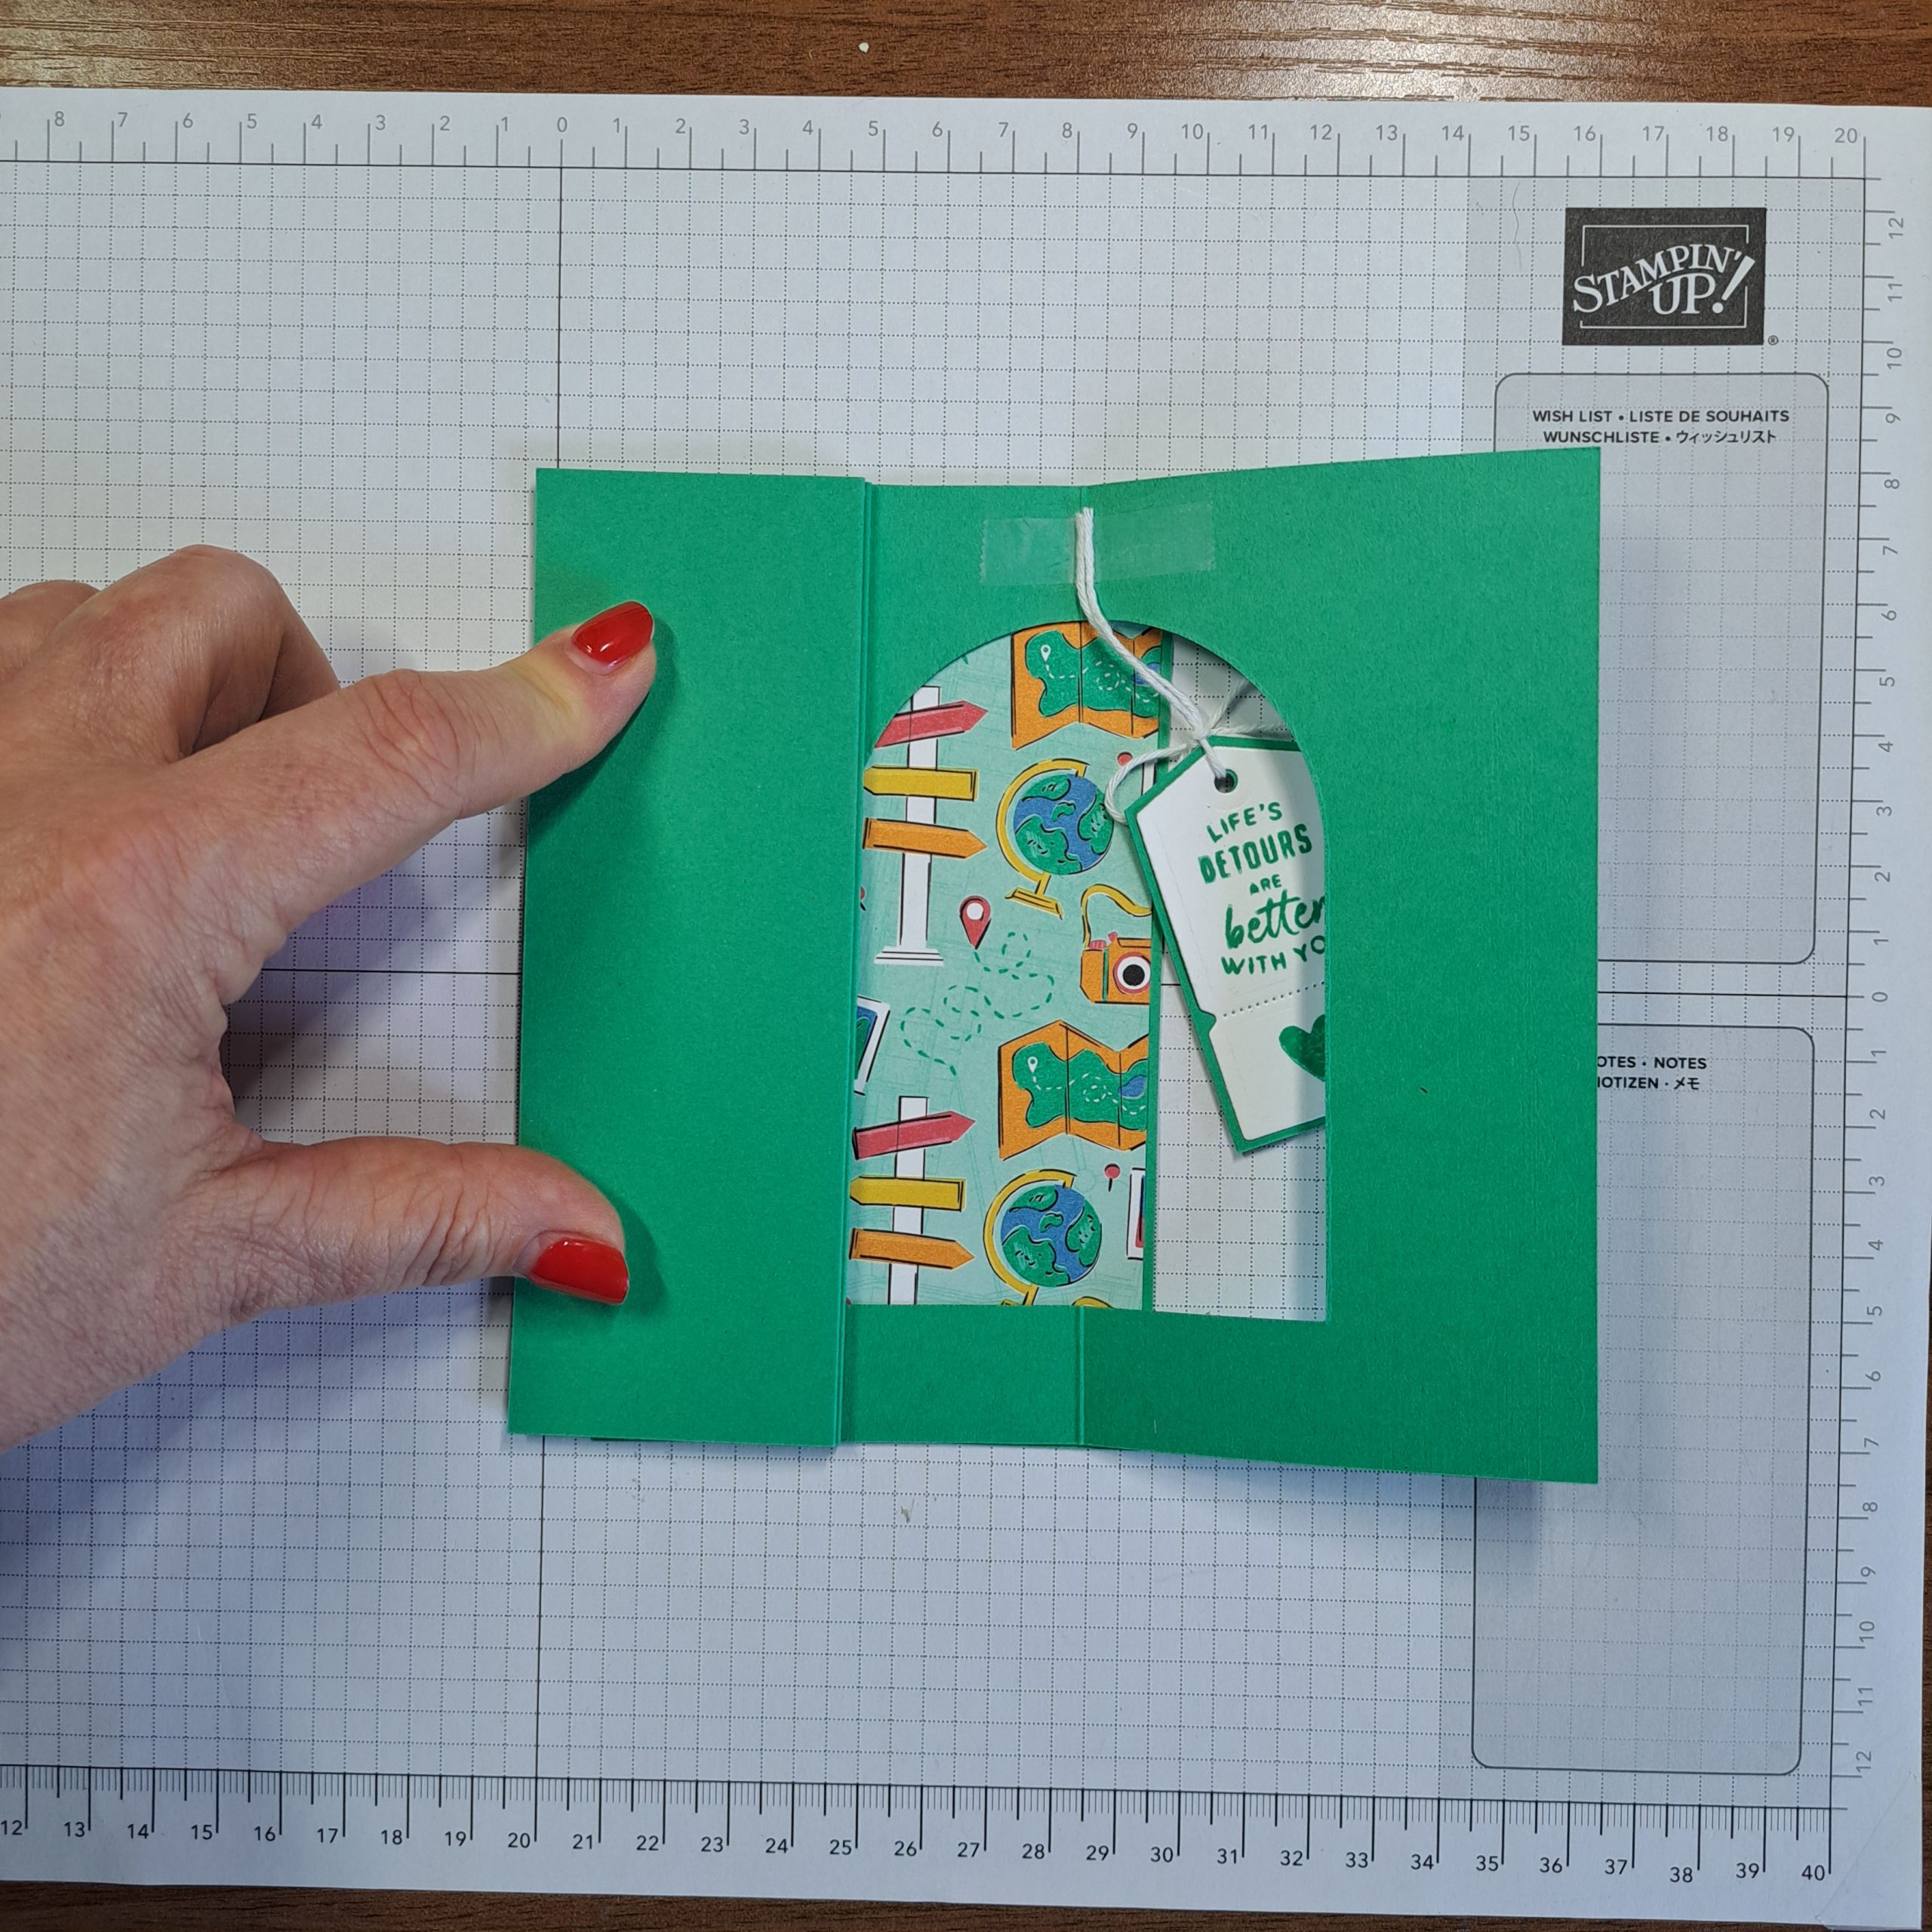
Thread some white baker’s twine through the hole in the tag. Pull the string until it is doubled. Tape the string to the inside of the cut out arch piece. Line the twine up with the fold/score line at the top of the arch. Adhere down, I used a piece of cello tape as I did NOT want any left- over sticky residue.
I took another small piece of the baker’s twine and tied a bow around the anchor threads and let the tails hang down. A small dot of glue was added to the center of the bow to keep it in place and to keep it from coming un-tied. (See finished photo.)
Designer Series Paper
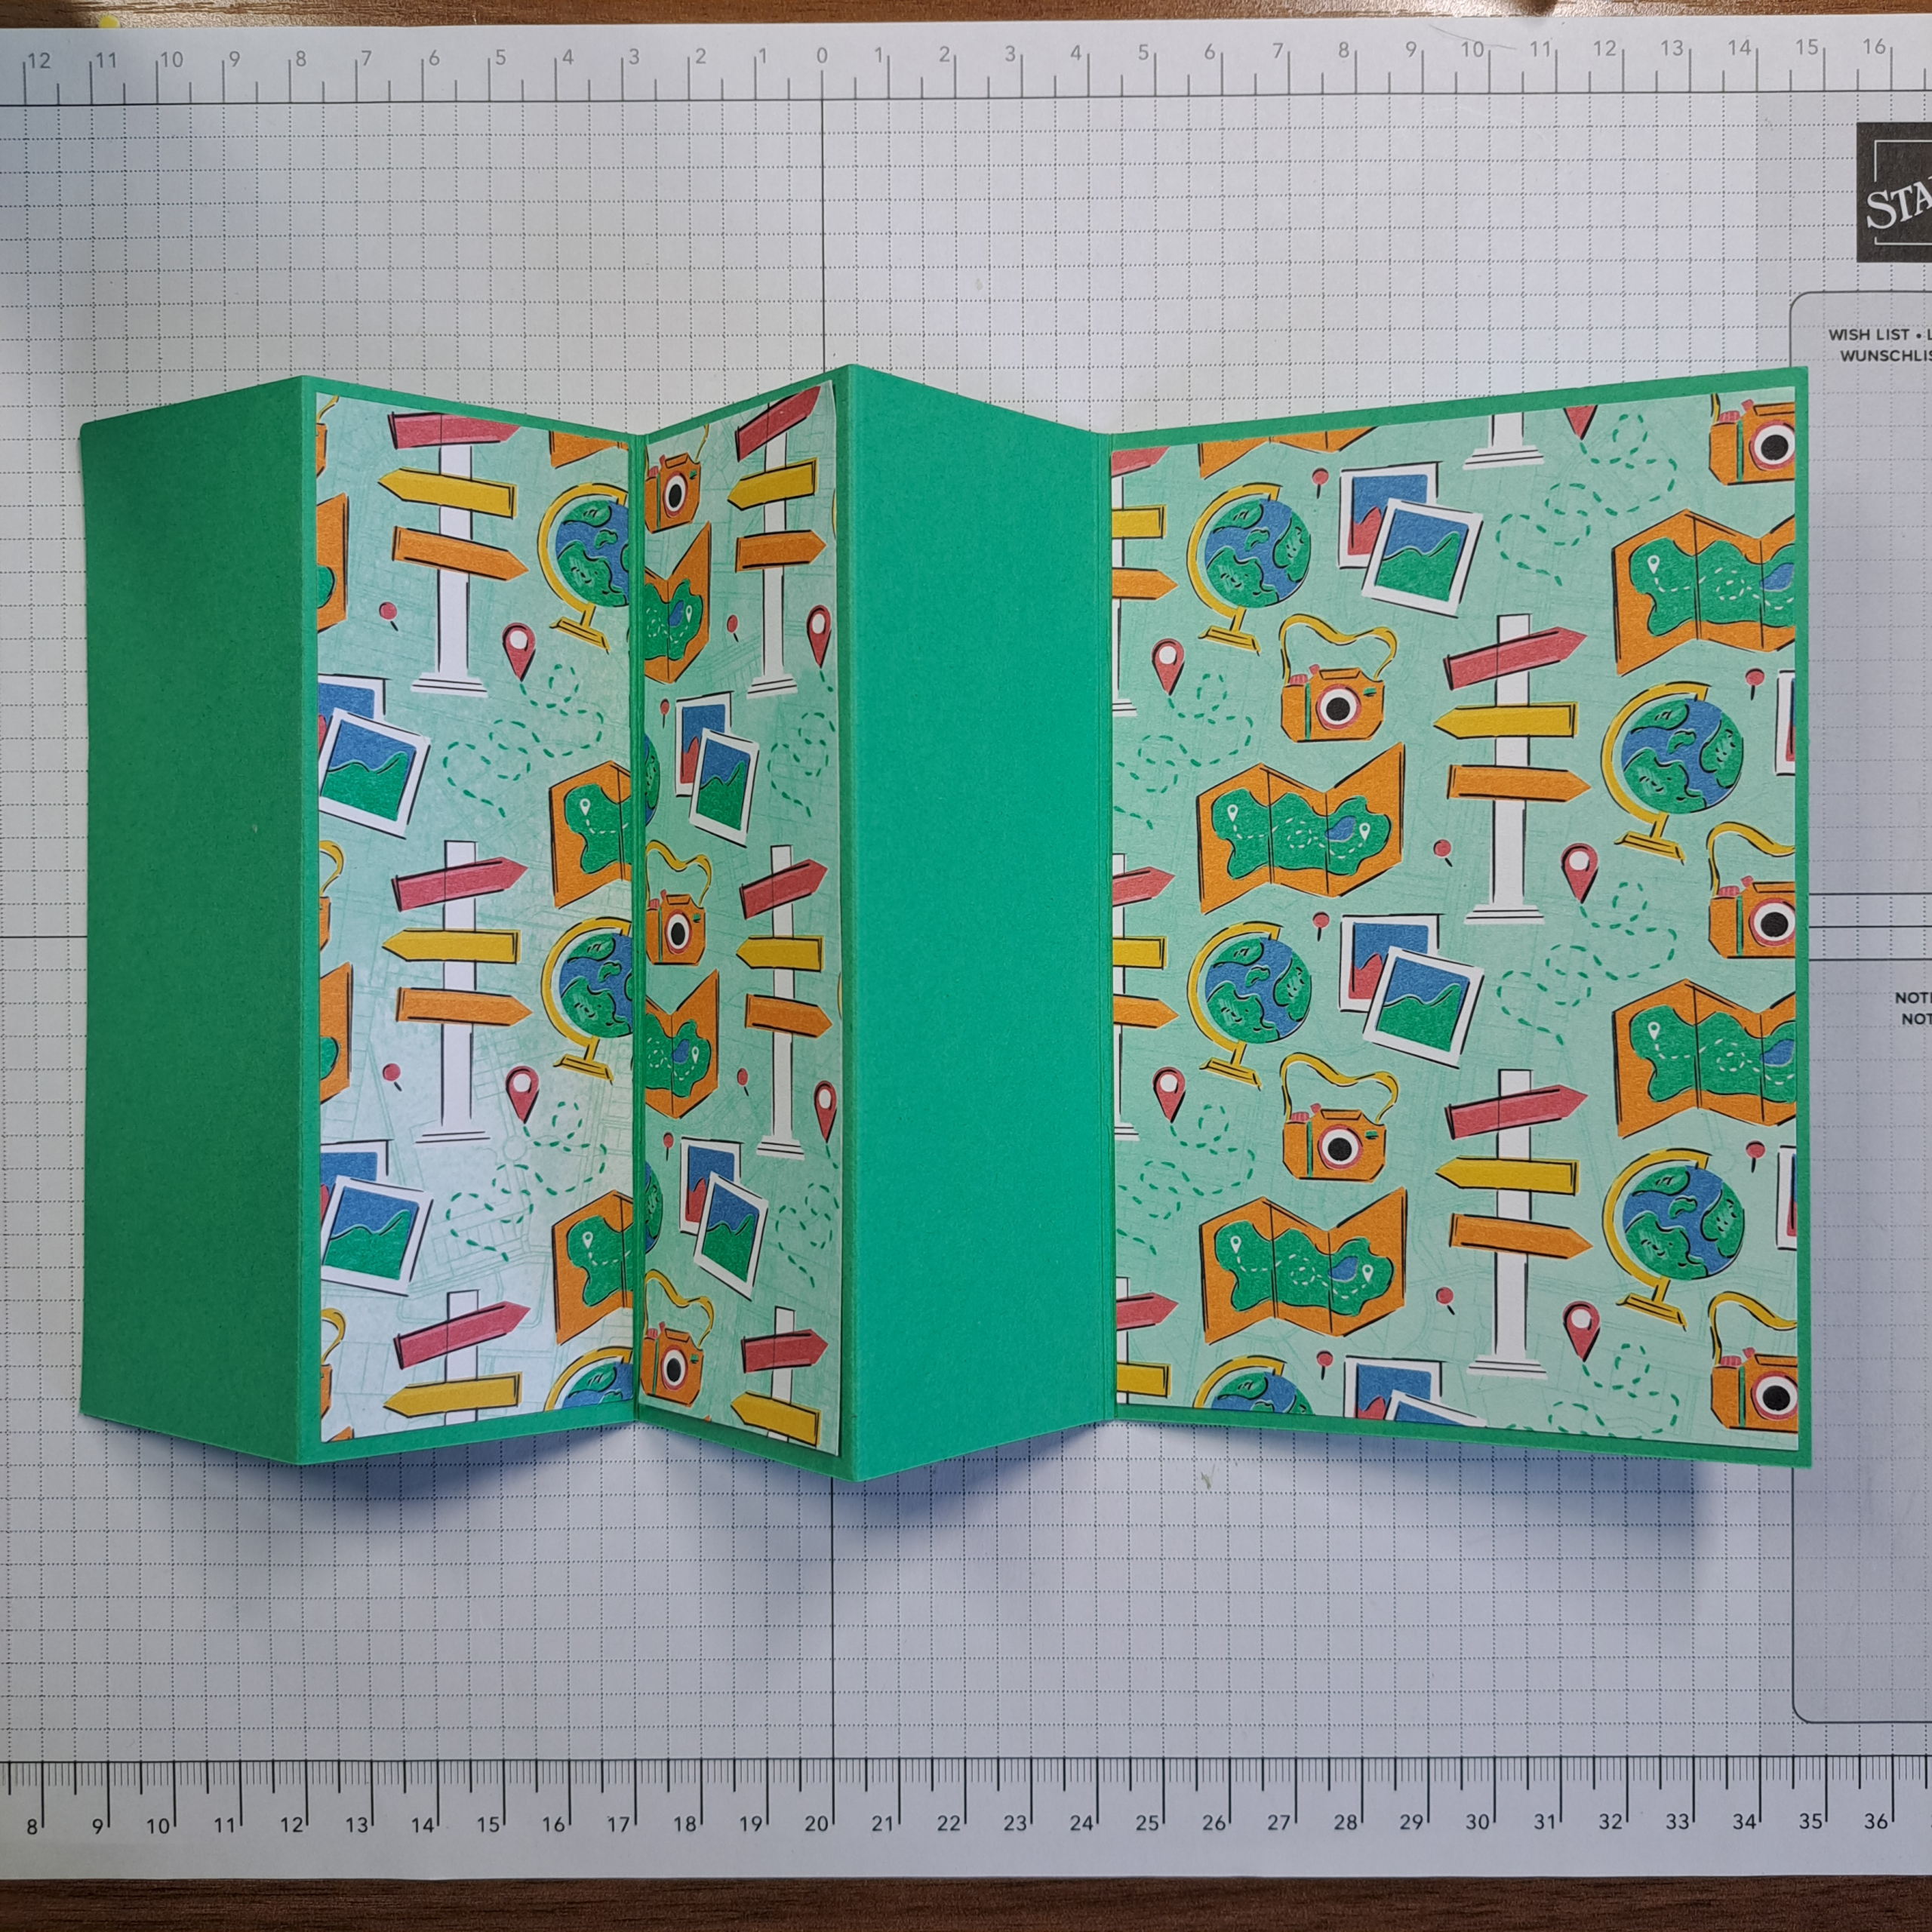
Cut four strips of your designer series paper to 4.5cm x 14.35cm (1-1/2″ x 5-1/4″).
Cut one rectangle of paper to 9.9cm x 14.35cm (3-3/4″ x 5-1/4).
Adhere the large rectangle to the right (inside) of the card base. Next adhere two of the narrow rectangles to what will be the inside of the arch. See photo.
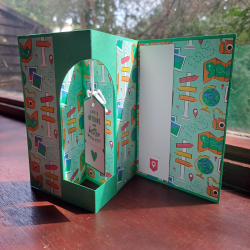
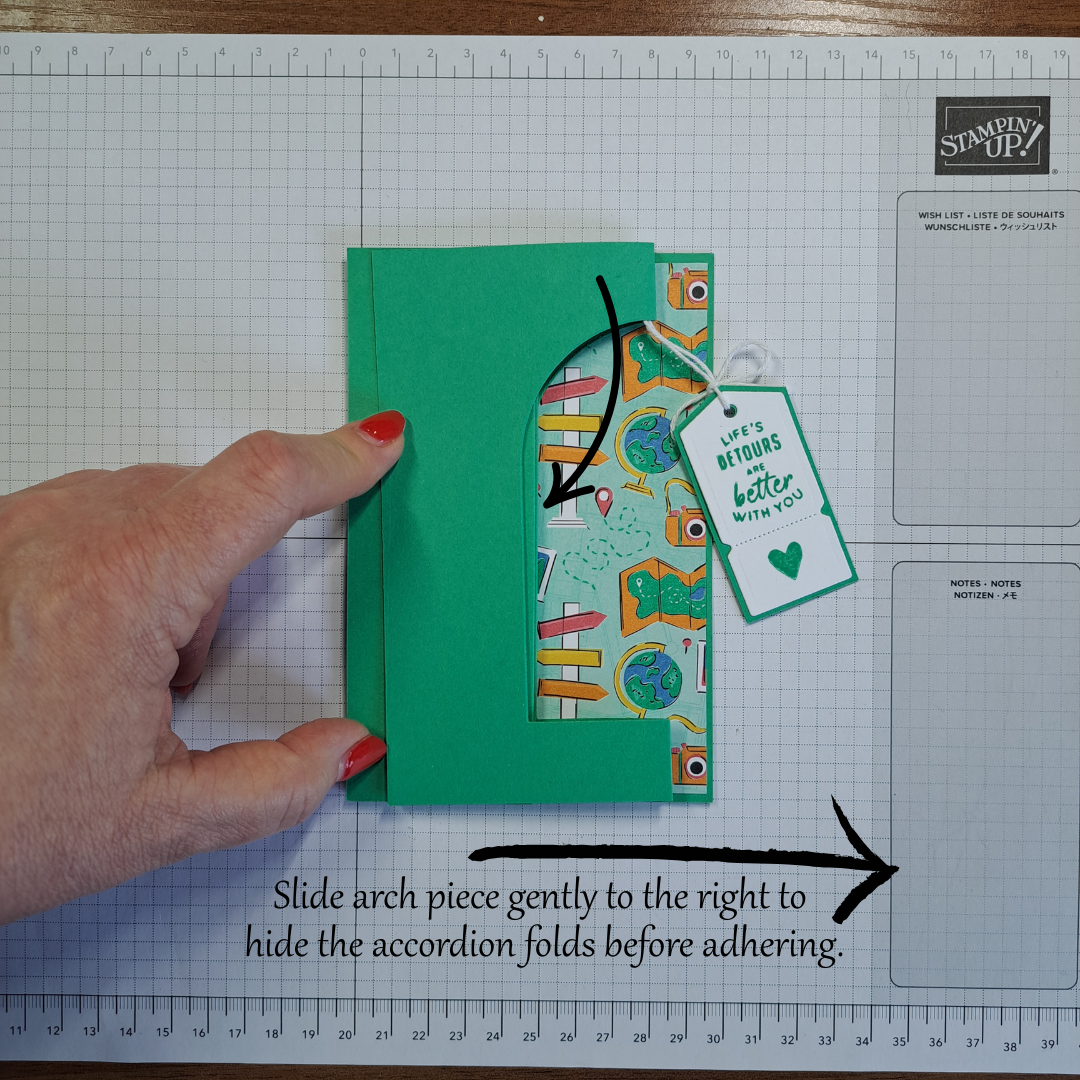
Dry-fit the arch first. Place the right side on top of the back of the card. Fold up the accordian pieces and place the left side of the arch on top. Move the arch so that you do not see the accordion folds peeking out in the center.
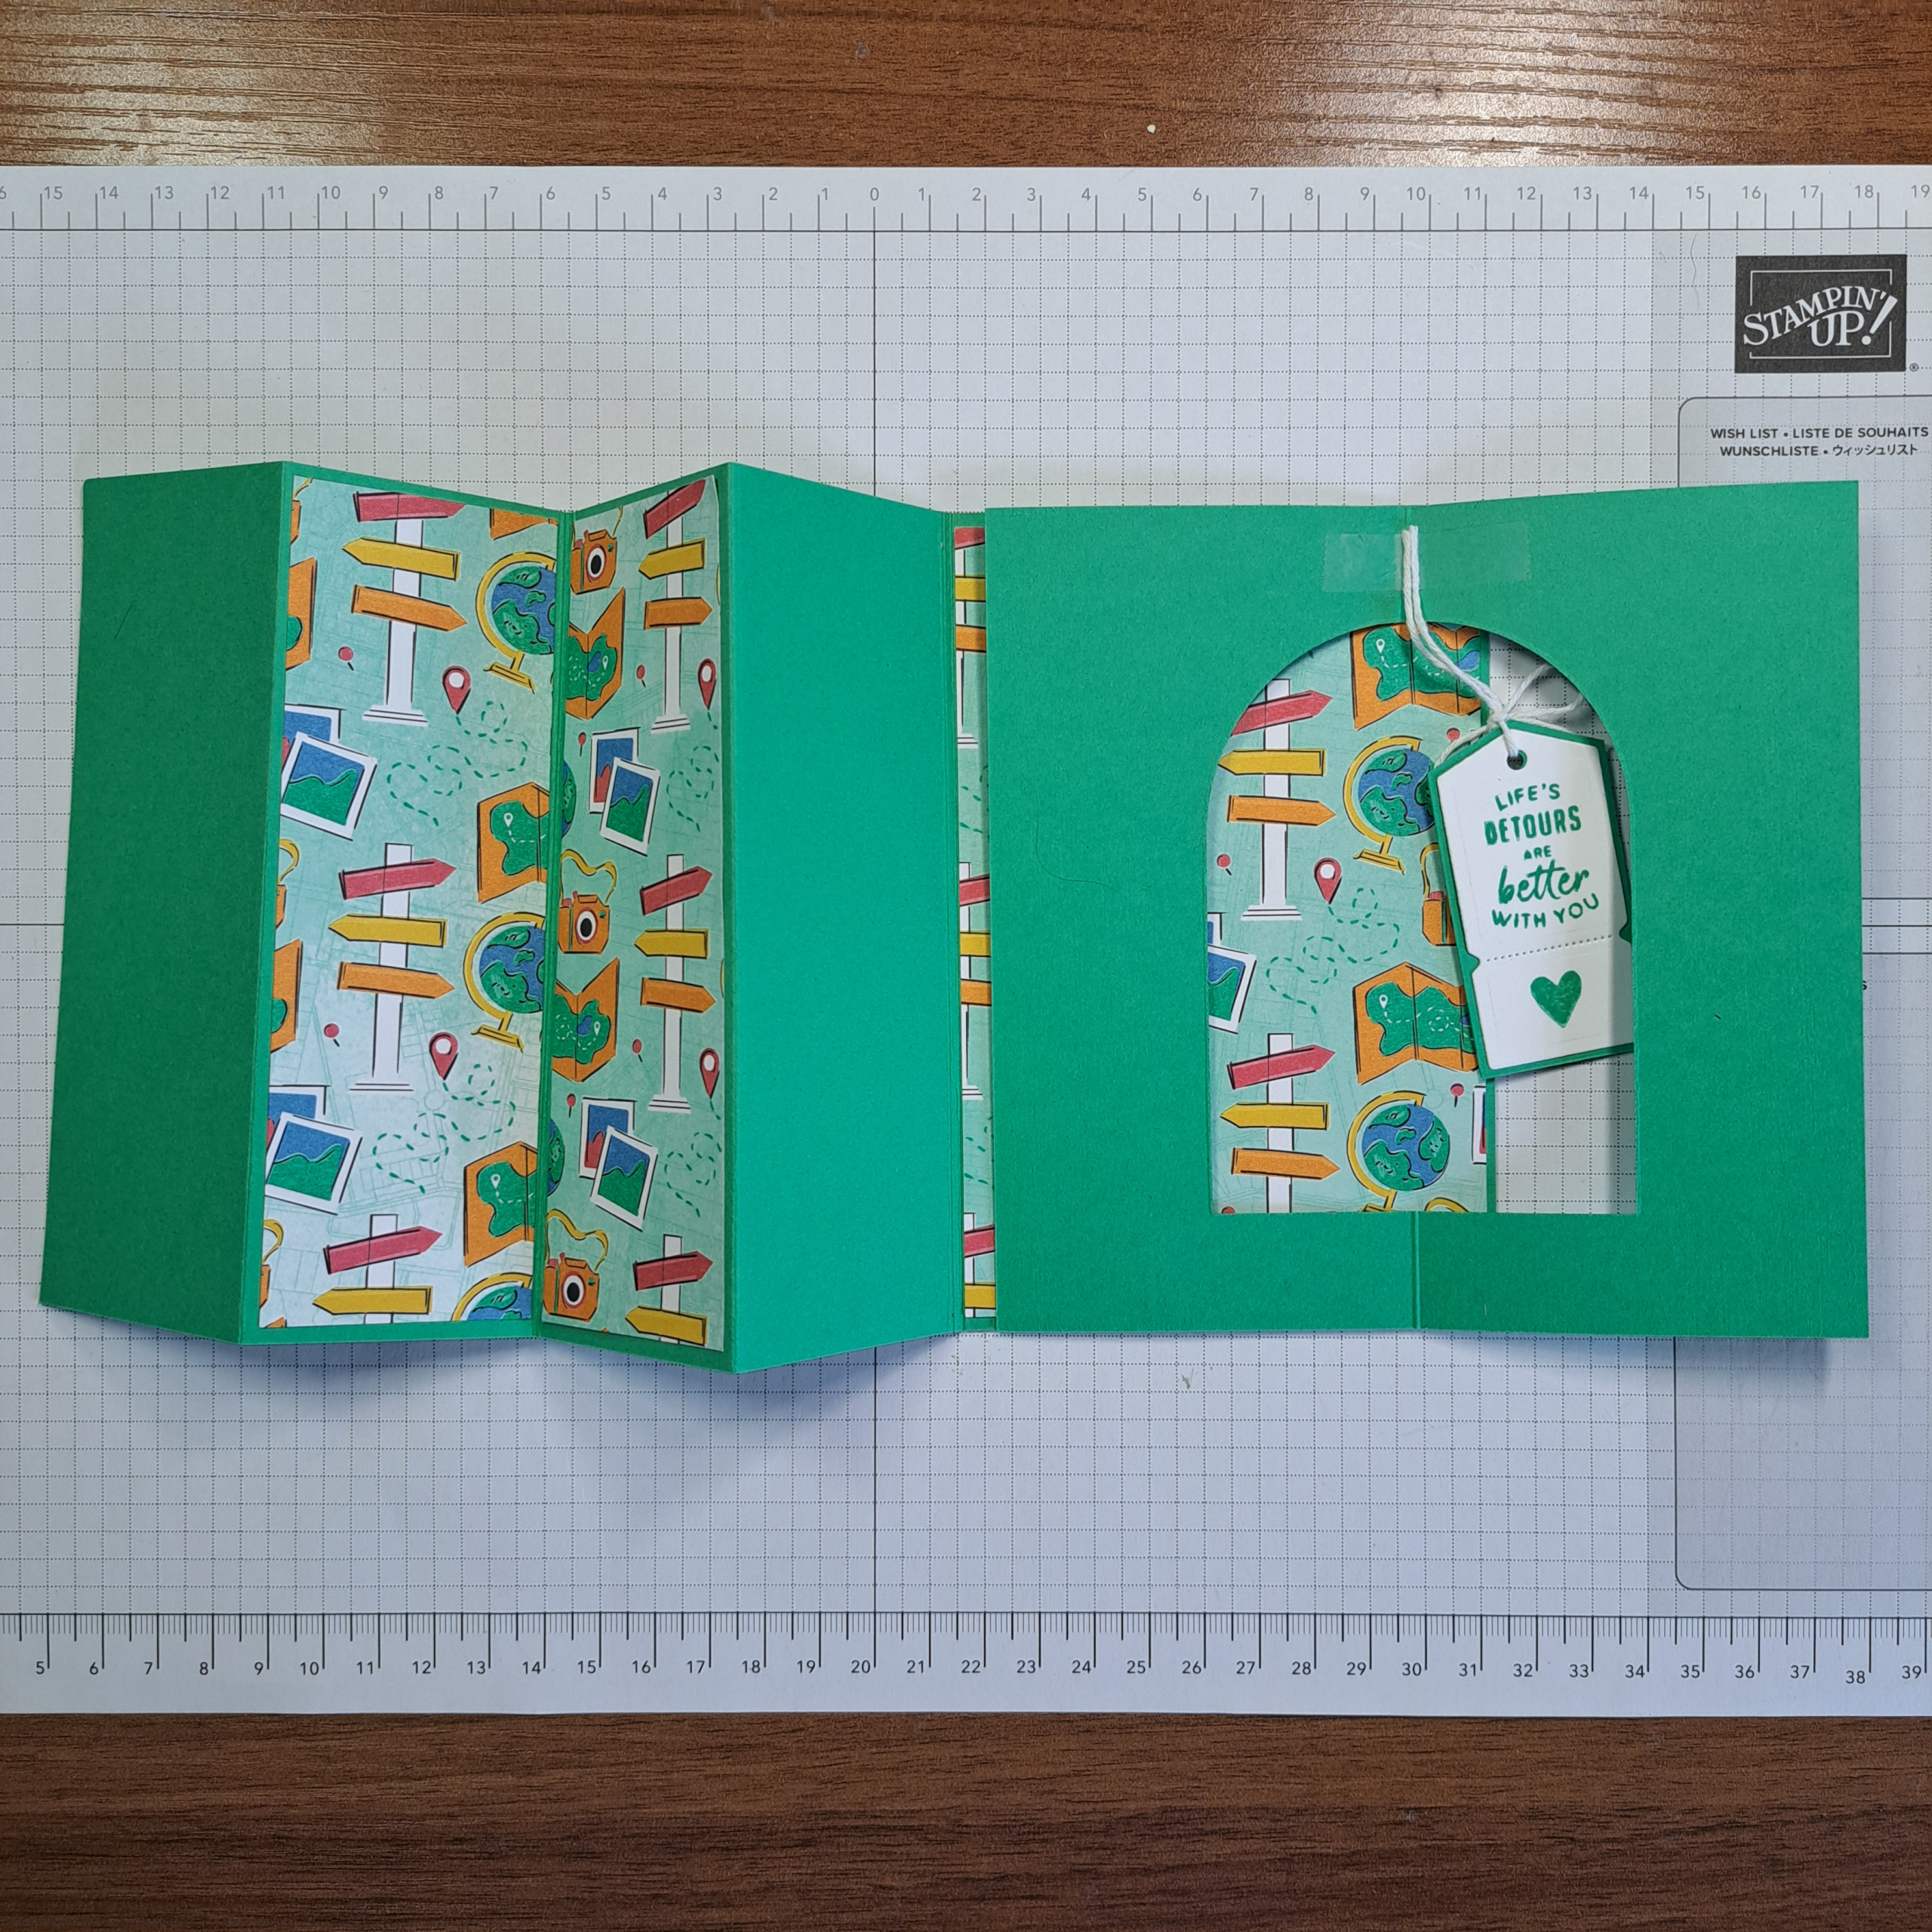
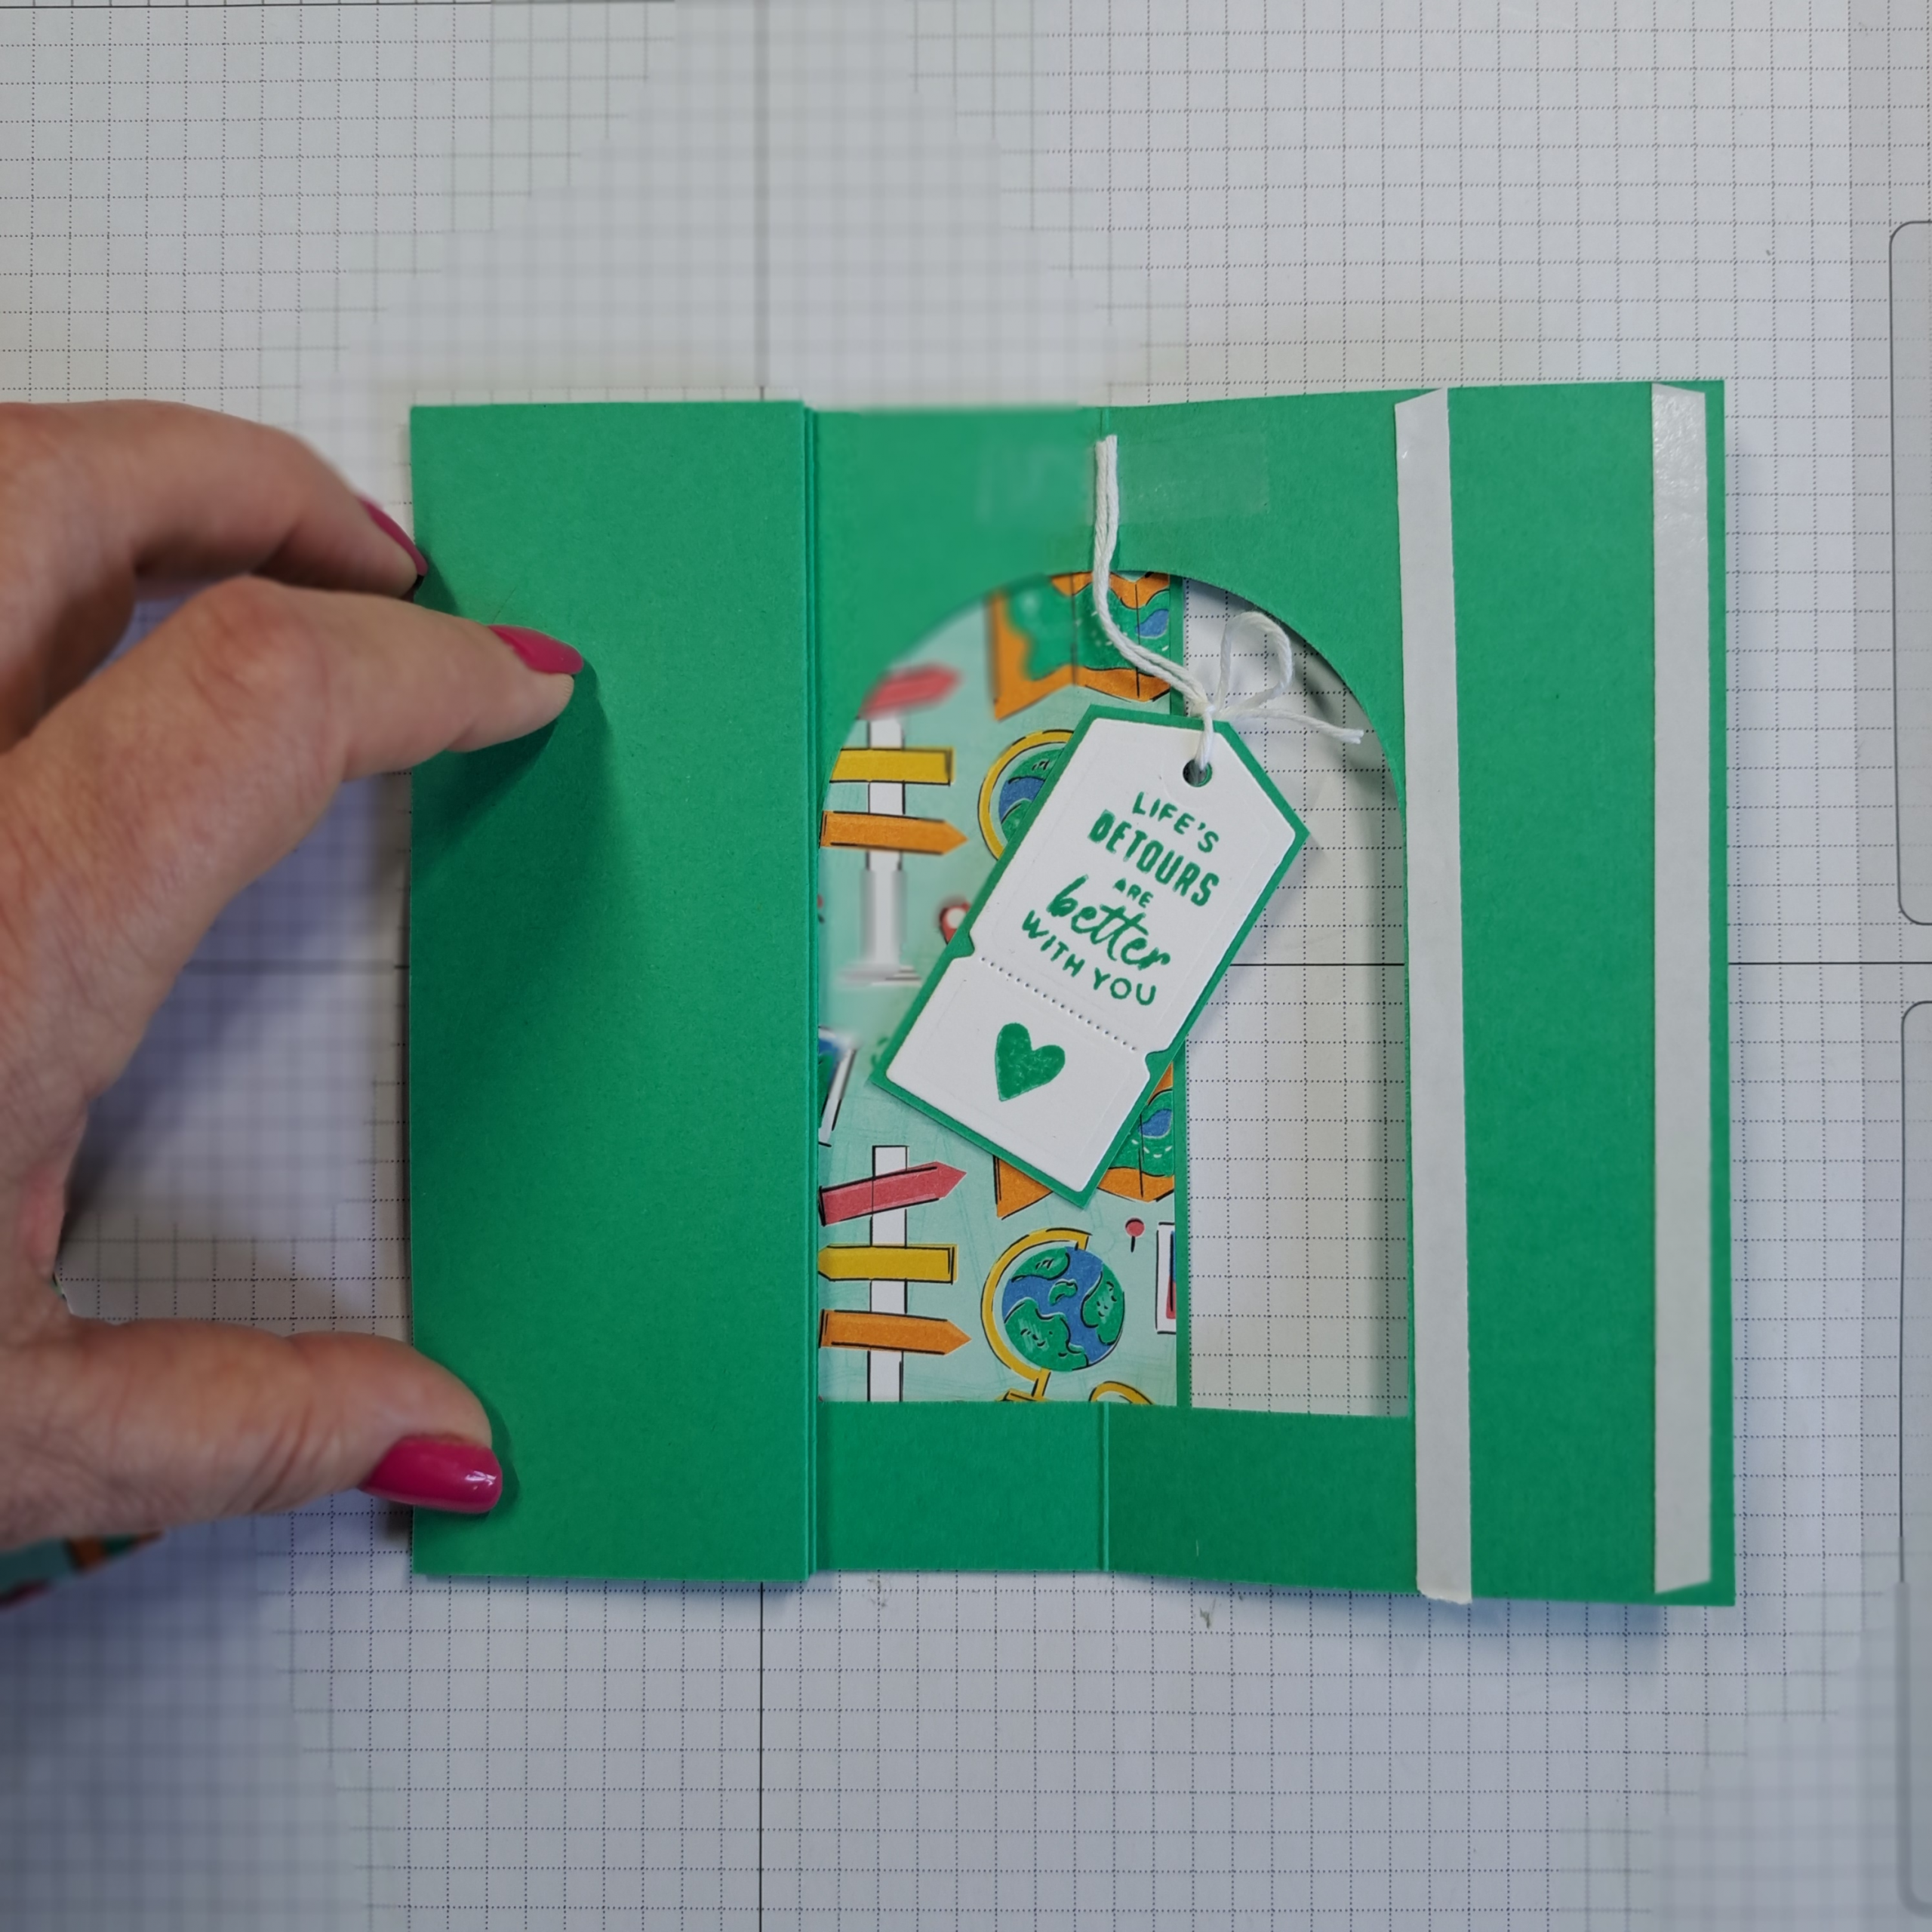
Holding the card in position, carefully open out the left side of the arch piece. Place two strips of Tear and Tape onto the inside of the arch piece, gently fold the left side down to glue the arch to the top of the accordion stack. You can also use multipurpose liquid glue for this step, just be sure you hold the arch in place until the glue has set before going to the next step .
Open the arch and the accordion stack to the left so the right inside of the card is completely exposed. Add your Tear and Tape (or glue) to the inside of this side of the arch piece and fold down to glue in place.
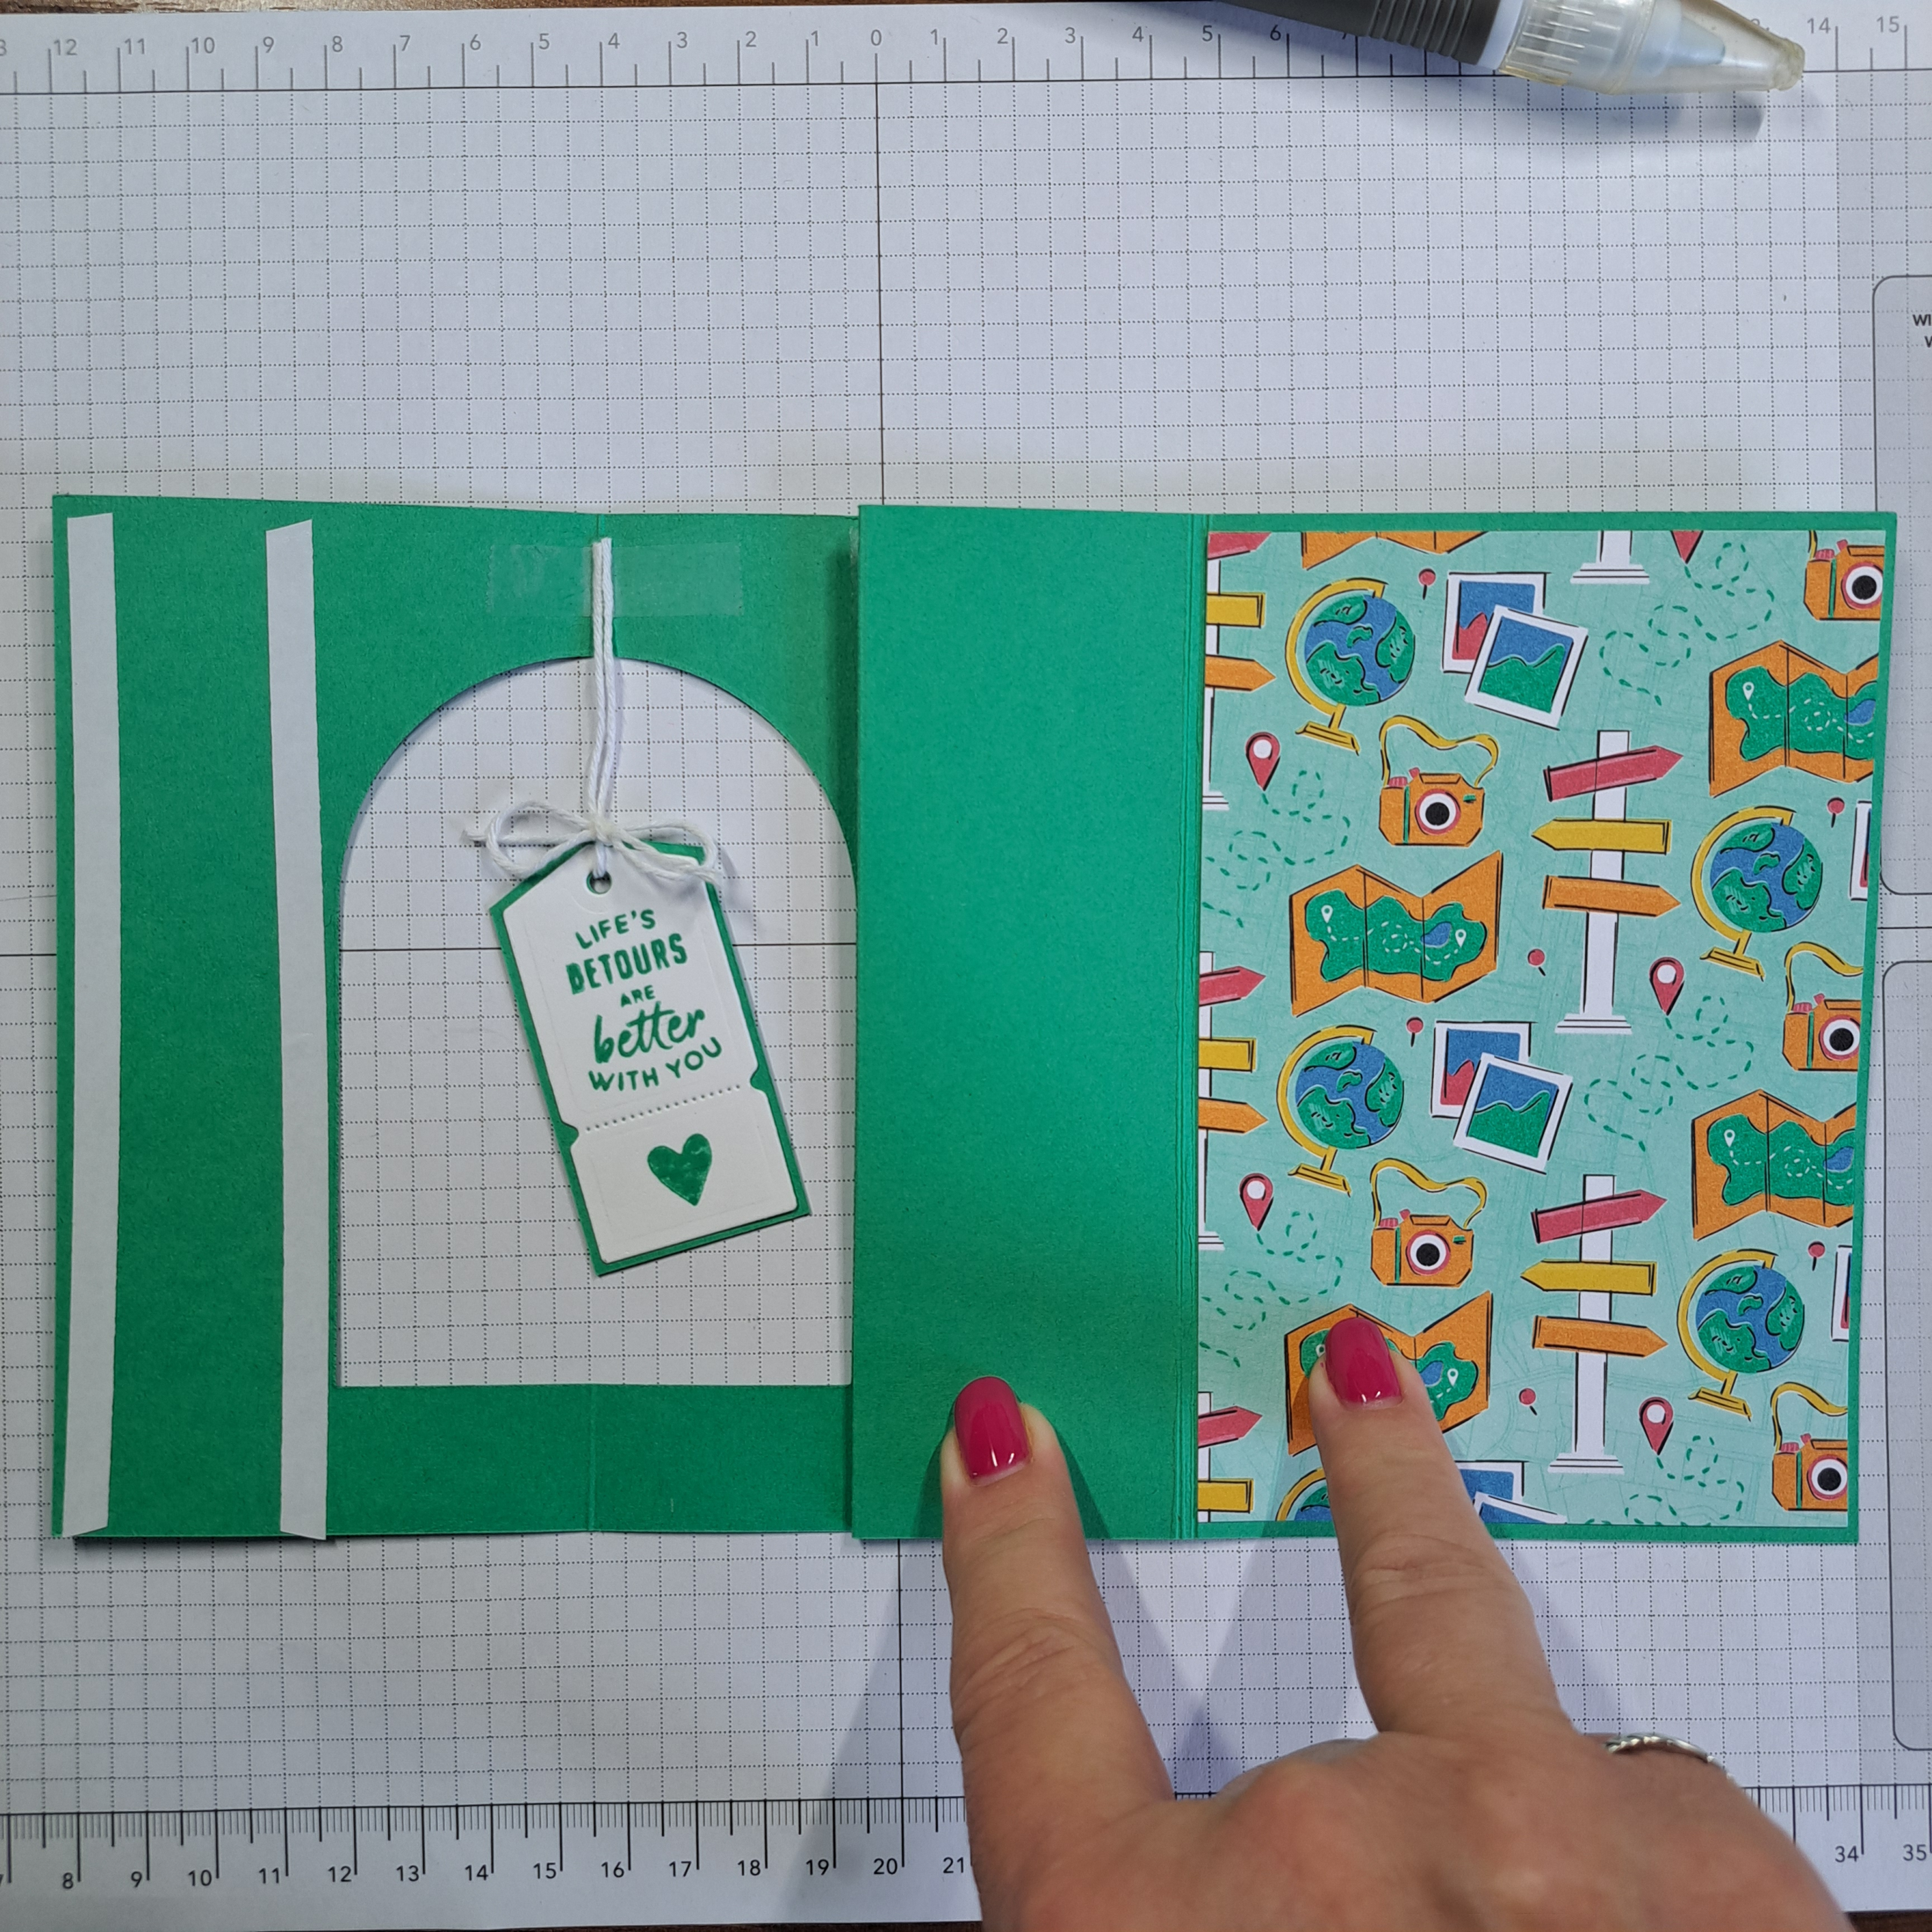
Place the remaining two more writing two 4.5cm x 14.35cm (1-1/2″ x 5-1/4″) rectangles, on on the front of the arches piece and one on the back, matching the up to the accordion below. There should be a narrow border of Shy Shamrock showing all the way around the DSP pieces.
You can finish off this card by adding a large rectangle of white piece of card stock, 9.9cm x 14.35cm (3-3/4″ x 5-1/4) to the back to have a space to write. Or you can add a narrow piece of white card stock, 4cm x 13.85cm (1-1/2″ x 5-1/4″) to the inside to write on. You can also add any number of embellishments to the card. Also, if you purchased the On the Go Suite, a couple of the puffy stickers included in the Suite would look great on the card front.
Thank you for reading today. I hope you enjoyed this fun trip using the To Go Suite from Stampin’ Up. If you give this fun fold card a try please leave a photo in the comments below or post a pic on social media and tag me @LoriOthen
Product List![Tags To Go Cling Stamp Set (English) [ 165569 ]](https://assets1.tamsnetwork.com/images/EC042017NF/165569s.jpg "Tags To Go Cling Stamp Set (English) [ 165569 ]")
![Tags To Go Dies [ 165576 ]](https://assets1.tamsnetwork.com/images/EC042017NF/165576s.jpg "Tags To Go Dies [ 165576 ]")
![Everyday Arches Dies [ 164629 ]](https://assets1.tamsnetwork.com/images/EC042017NF/164629s.jpg "Everyday Arches Dies [ 164629 ]")
![On The Go 12" X 12" (30.5 X 30.5 Cm) Designer Series Paper [ 165566 ]](https://assets1.tamsnetwork.com/images/EC042017NF/165566s.jpg "On The Go 12\" X 12\" (30.5 X 30.5 Cm) Designer Series Paper [ 165566 ]")
![Shy Shamrock A4 Cardstock [ 163796 ]](https://assets1.tamsnetwork.com/images/EC042017NF/163796s.jpg "Shy Shamrock A4 Cardstock [ 163796 ]")
![Basic White A4 Cardstock [ 166781 ]](https://assets1.tamsnetwork.com/images/EC042017NF/166781s.jpg "Basic White A4 Cardstock [ 166781 ]")
![Shy Shamrock Classic Stampin Pad [ 163808 ]](https://assets1.tamsnetwork.com/images/EC042017NF/163808s.jpg "Shy Shamrock Classic Stampin Pad [ 163808 ]")
![Baker's Twine Essentials Pack [ 155475 ]](https://assets1.tamsnetwork.com/images/EC042017NF/155475s.jpg "Baker's Twine Essentials Pack [ 155475 ]")
![Tear & Tape Adhesive [ 154031 ]](https://assets1.tamsnetwork.com/images/EC042017NF/154031s.jpg "Tear & Tape Adhesive [ 154031 ]")


![Stampin' Cut & Emboss Machine [ 149653 ]](https://assets1.tamsnetwork.com/images/EC042017NF/149653s.jpg "Stampin' Cut & Emboss Machine [ 149653 ]")