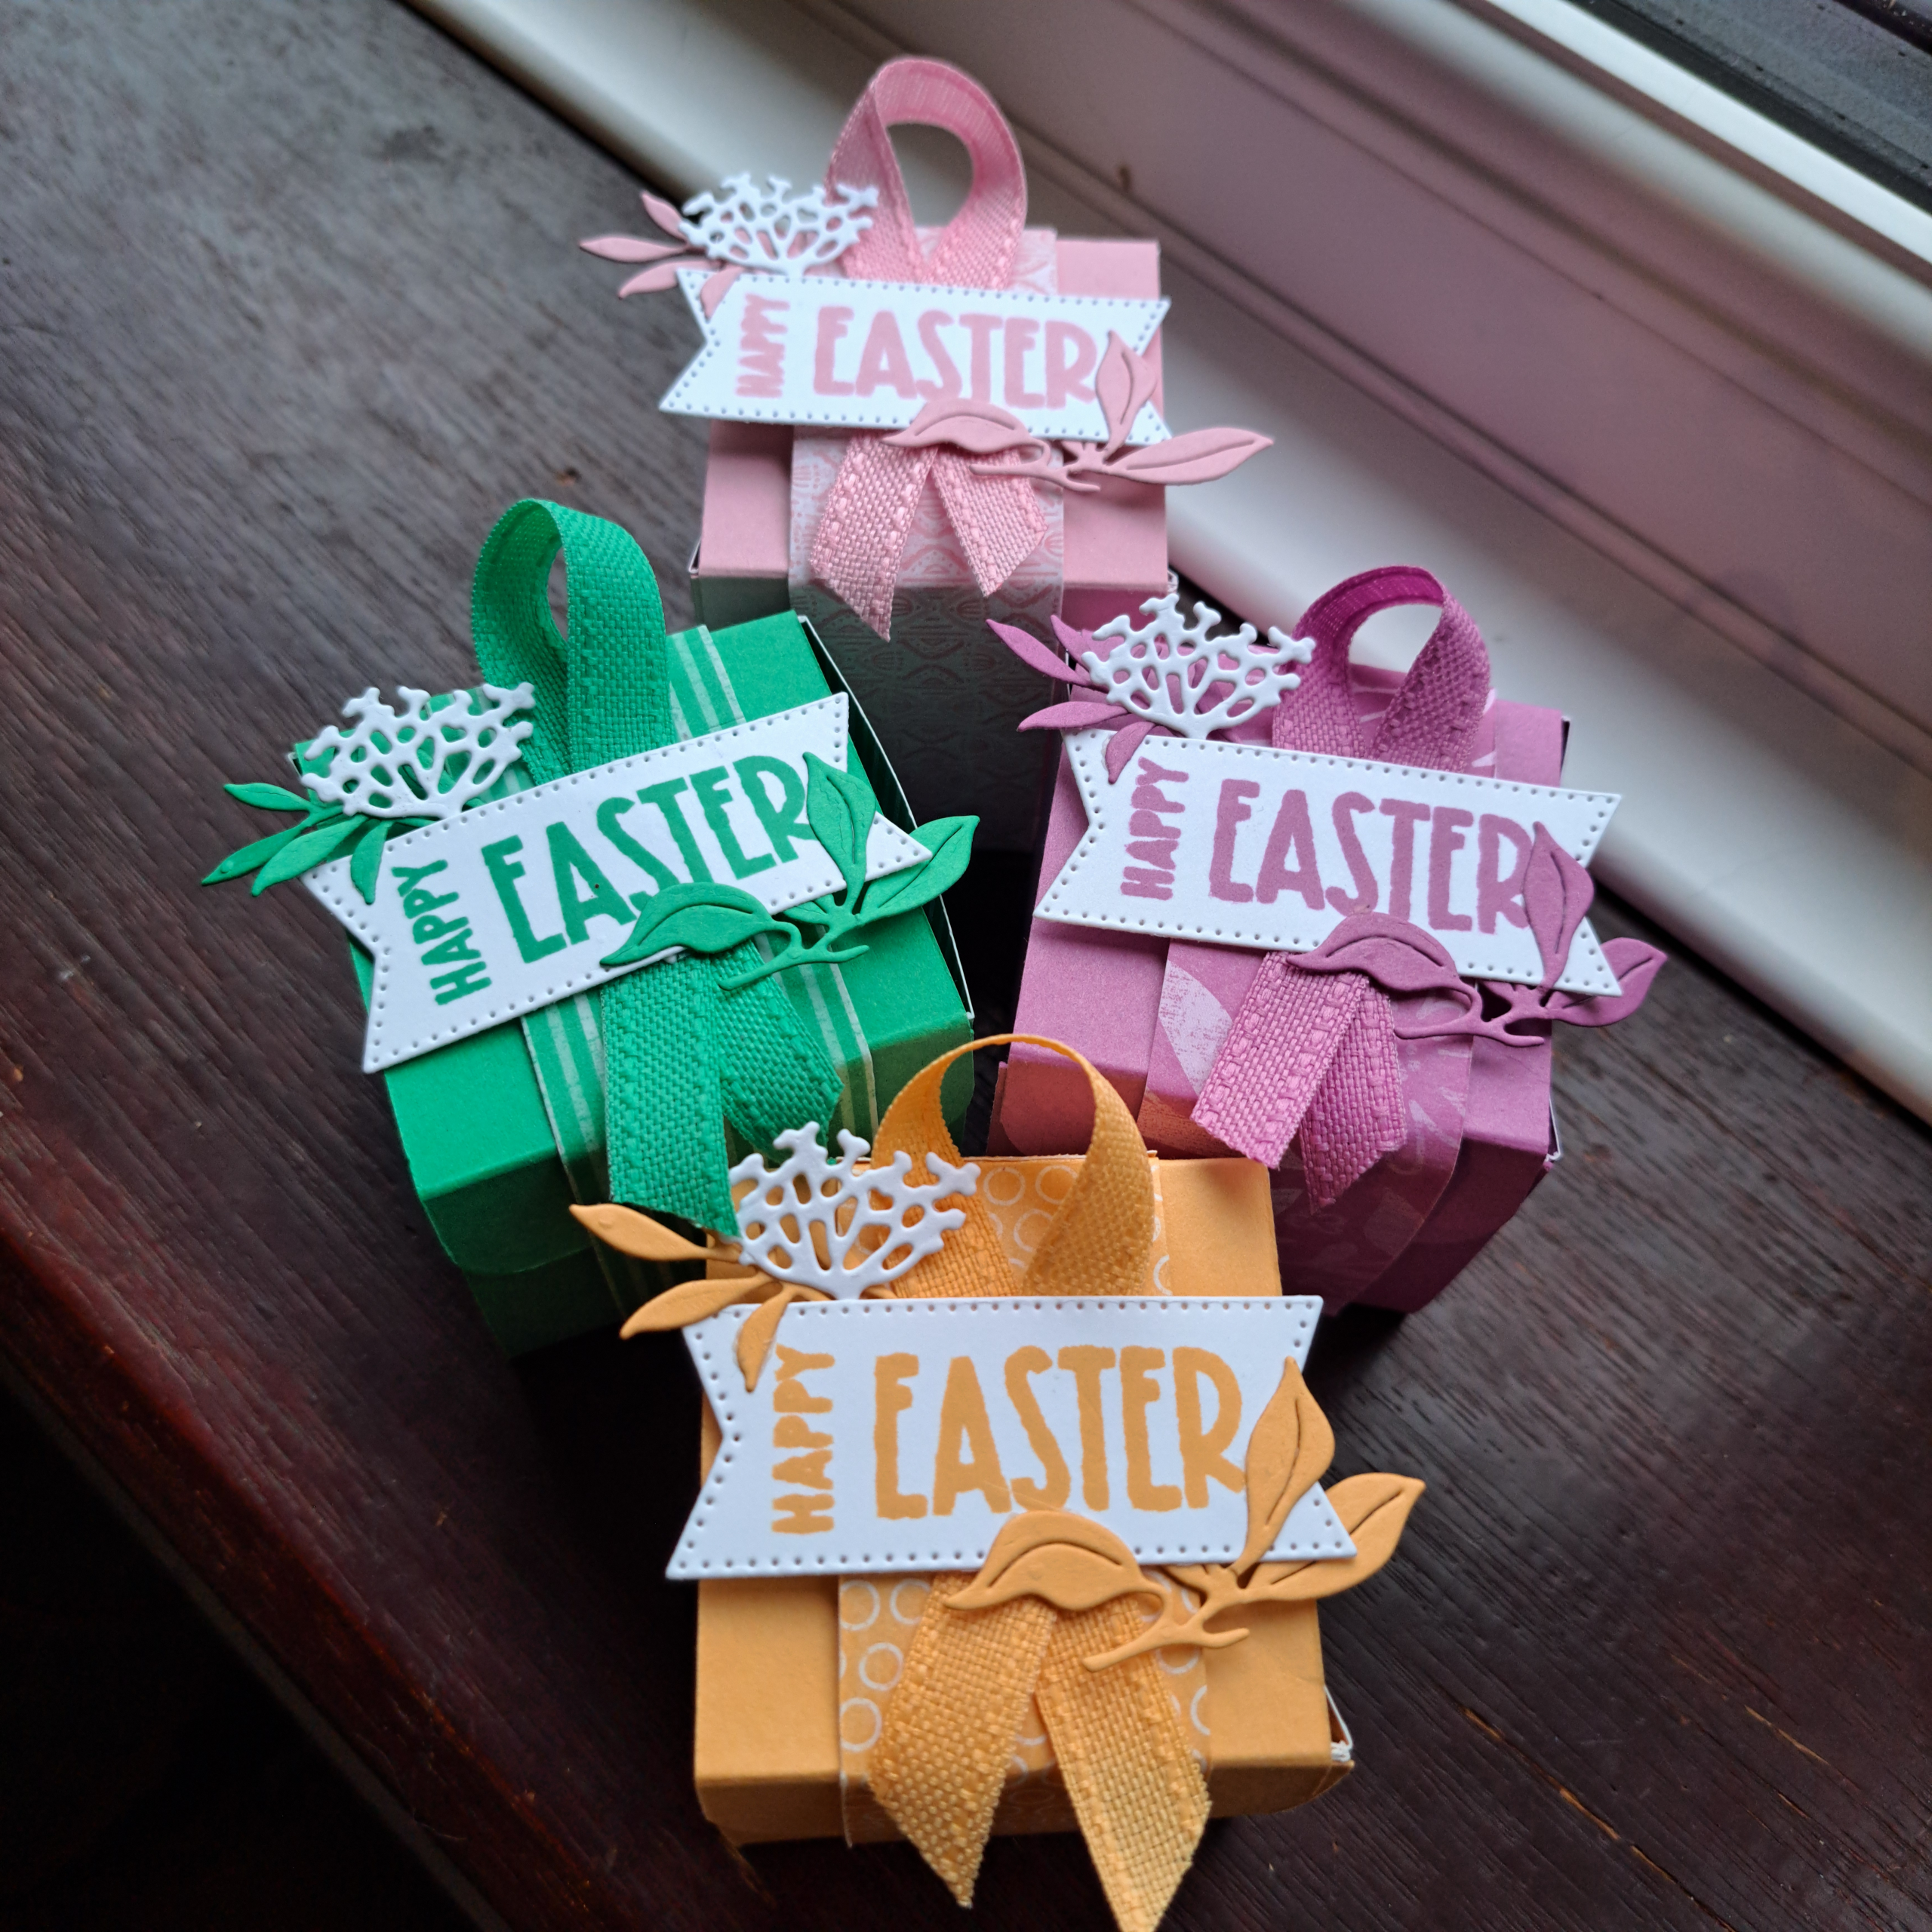
My husband asked if I could make some sort of Easter themed treat for his team. I eagerly agreed since it is the end of the year for the Annual Catalogue and the time when the In Colors change for the new ‘crafting’ year. I had a pile of papers and ribbons and a favorite stamp and die set about to about to expire. So I went in search for a project. This is what I came up with. I am NOT the designer of this cute little box. This is the brain child of Clare Ottaway of Created the Ottaway. I have linked her video below for you.
Supplies
Reason to Celebrate Photopolymer Stamp Set
Gallery Blooms Dies
Styles Shapes Dies
2024-26 In Color 6″ x 6″ Designer Series Paper*
Pretty in Pink Card Stock
Basic White Card Stock
Pretty in Pink Stampin’Pad
Pretty in Pink 3/8″ Bordered Ribbon
Multipurpose Liquid Glue
Tear and Tape
Paper Trimmer
Cut and Emboss Machine
Directions
To Make the Box
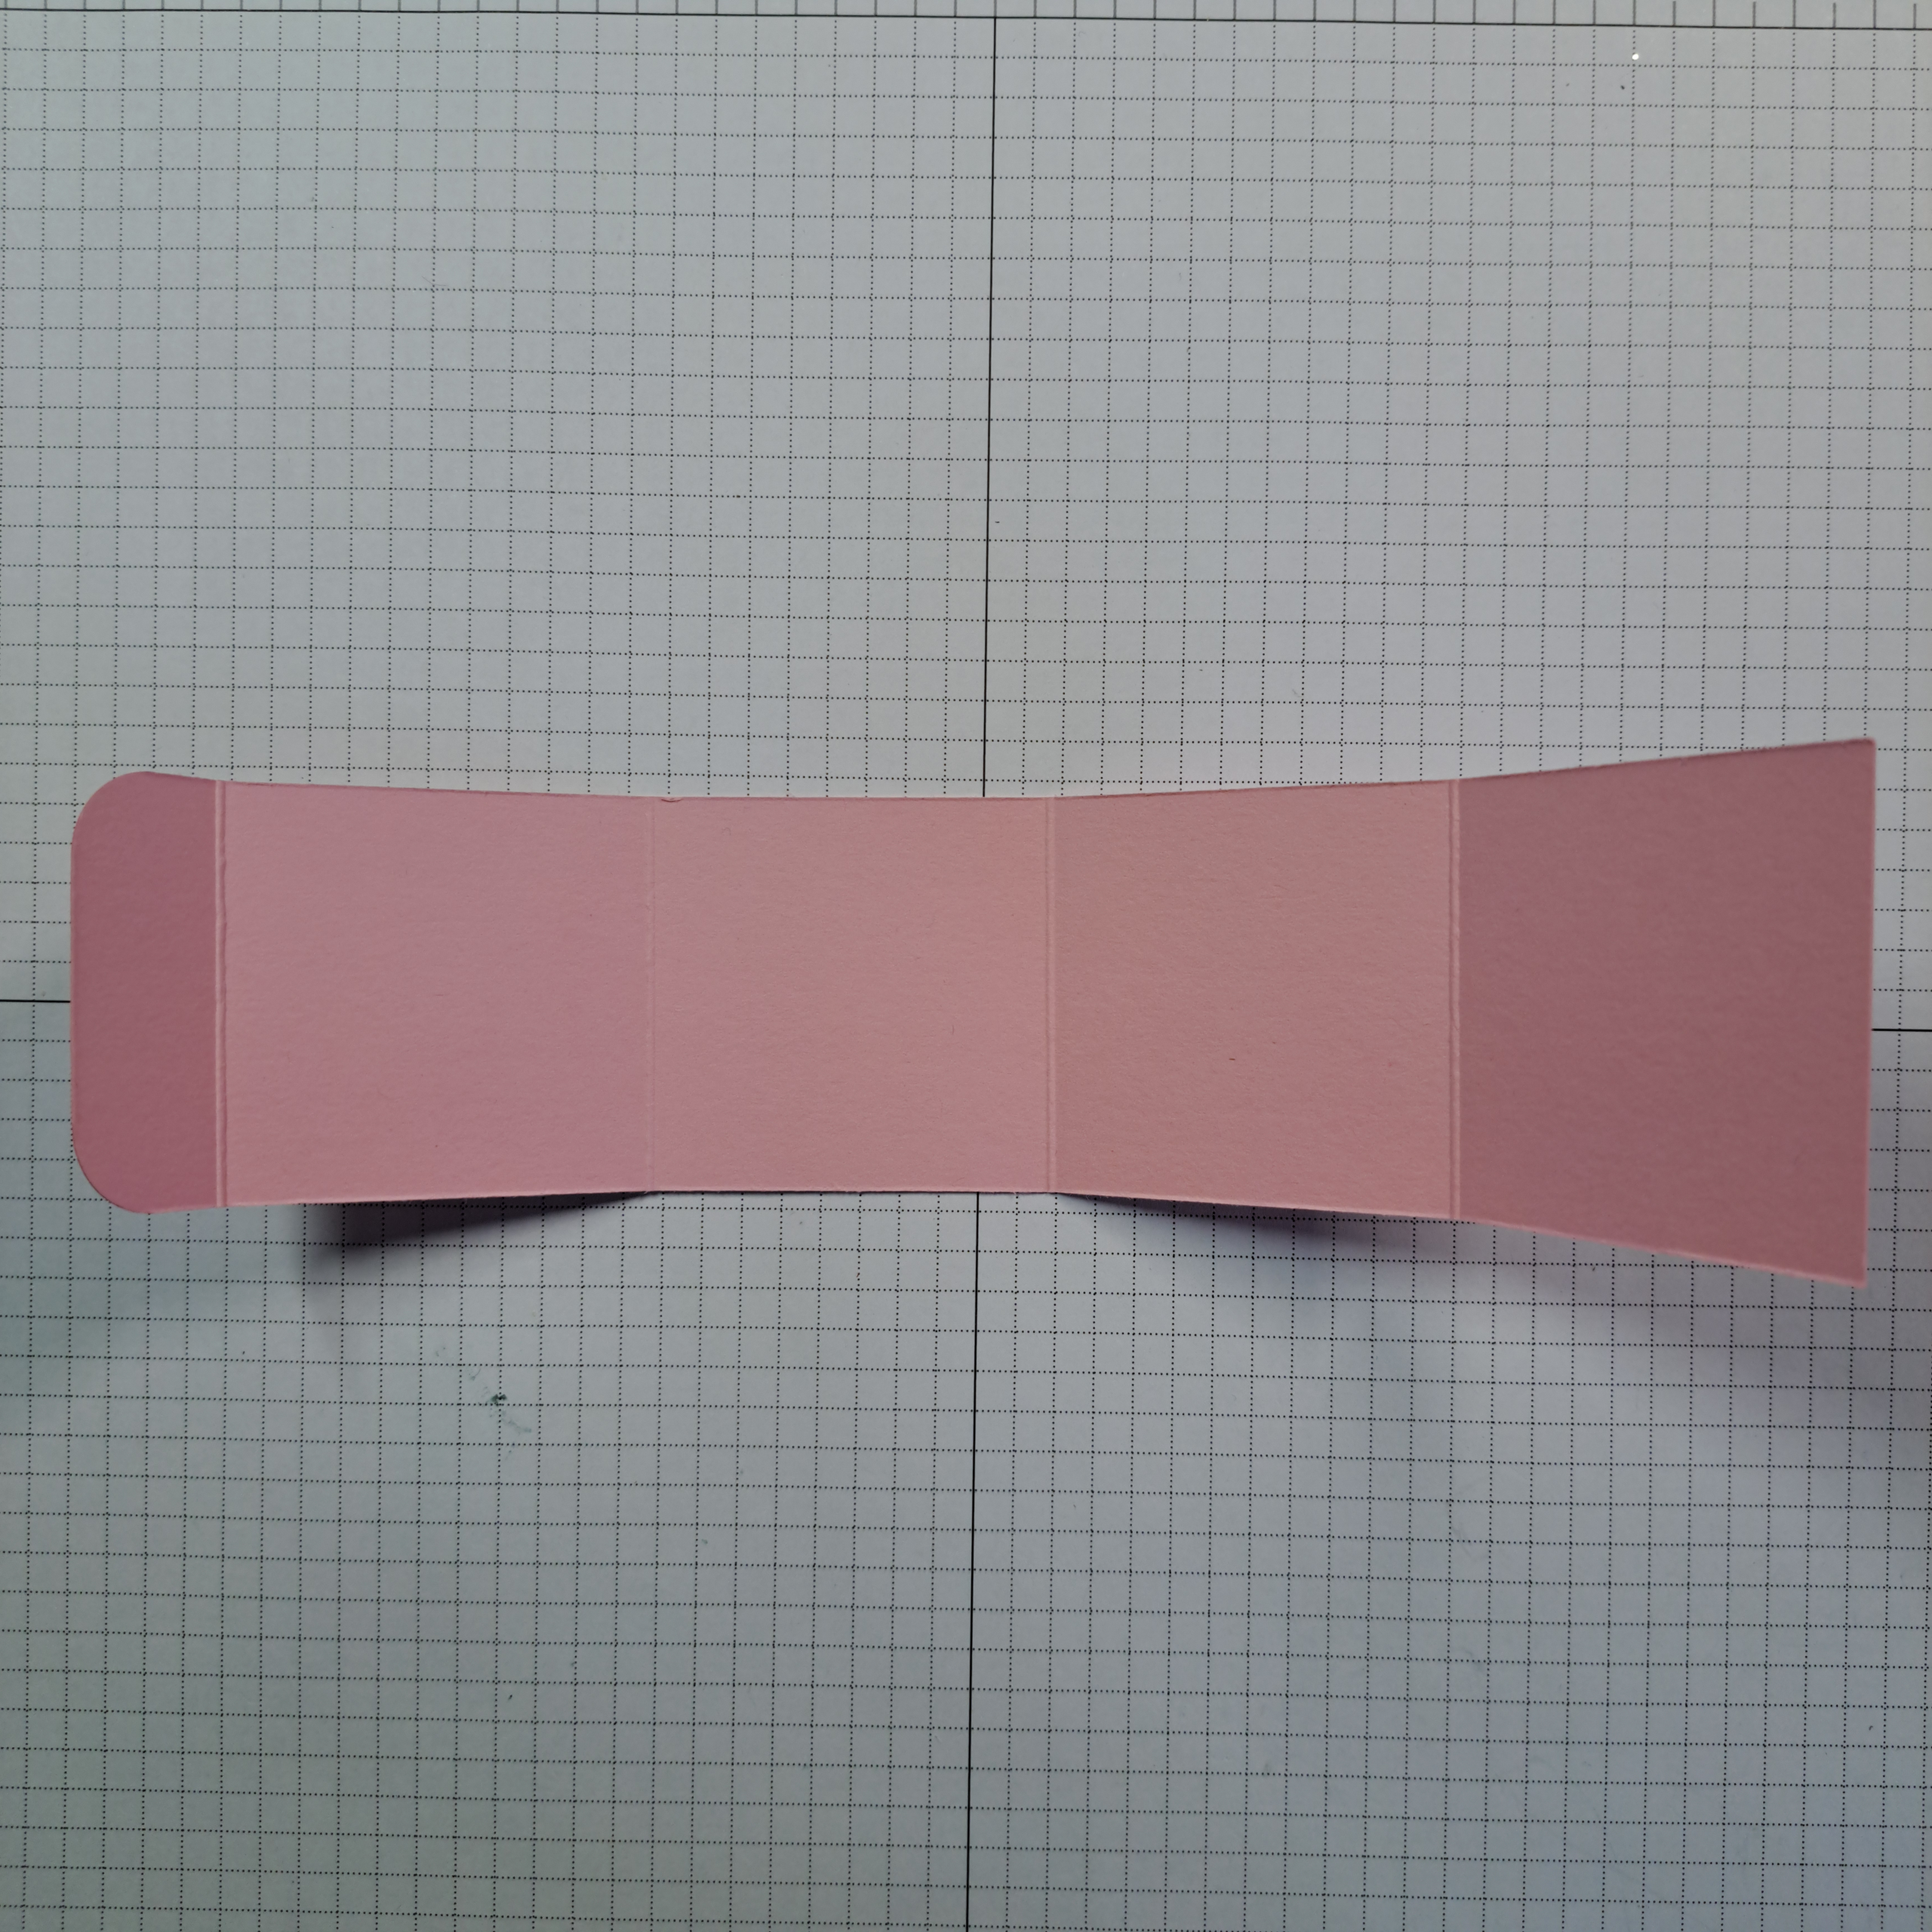
Cut your card stock into a strip measuring 5.1cm x 22.2cm (2″ x 8-3/4). Turn the strip so that the long side is at the top of your paper cutter or scoreboard. Score this scrip at 5.1cm, 10.1cm, 15.2cm and 20.3cm (2″, 4″, 6″ and 8″).
Fold and burnish the fold lines. Be sure that you have your folds going in the same direction; think about a circle. Using a corner round or scissors round the corners on the end where the closure flap is located. See photo.
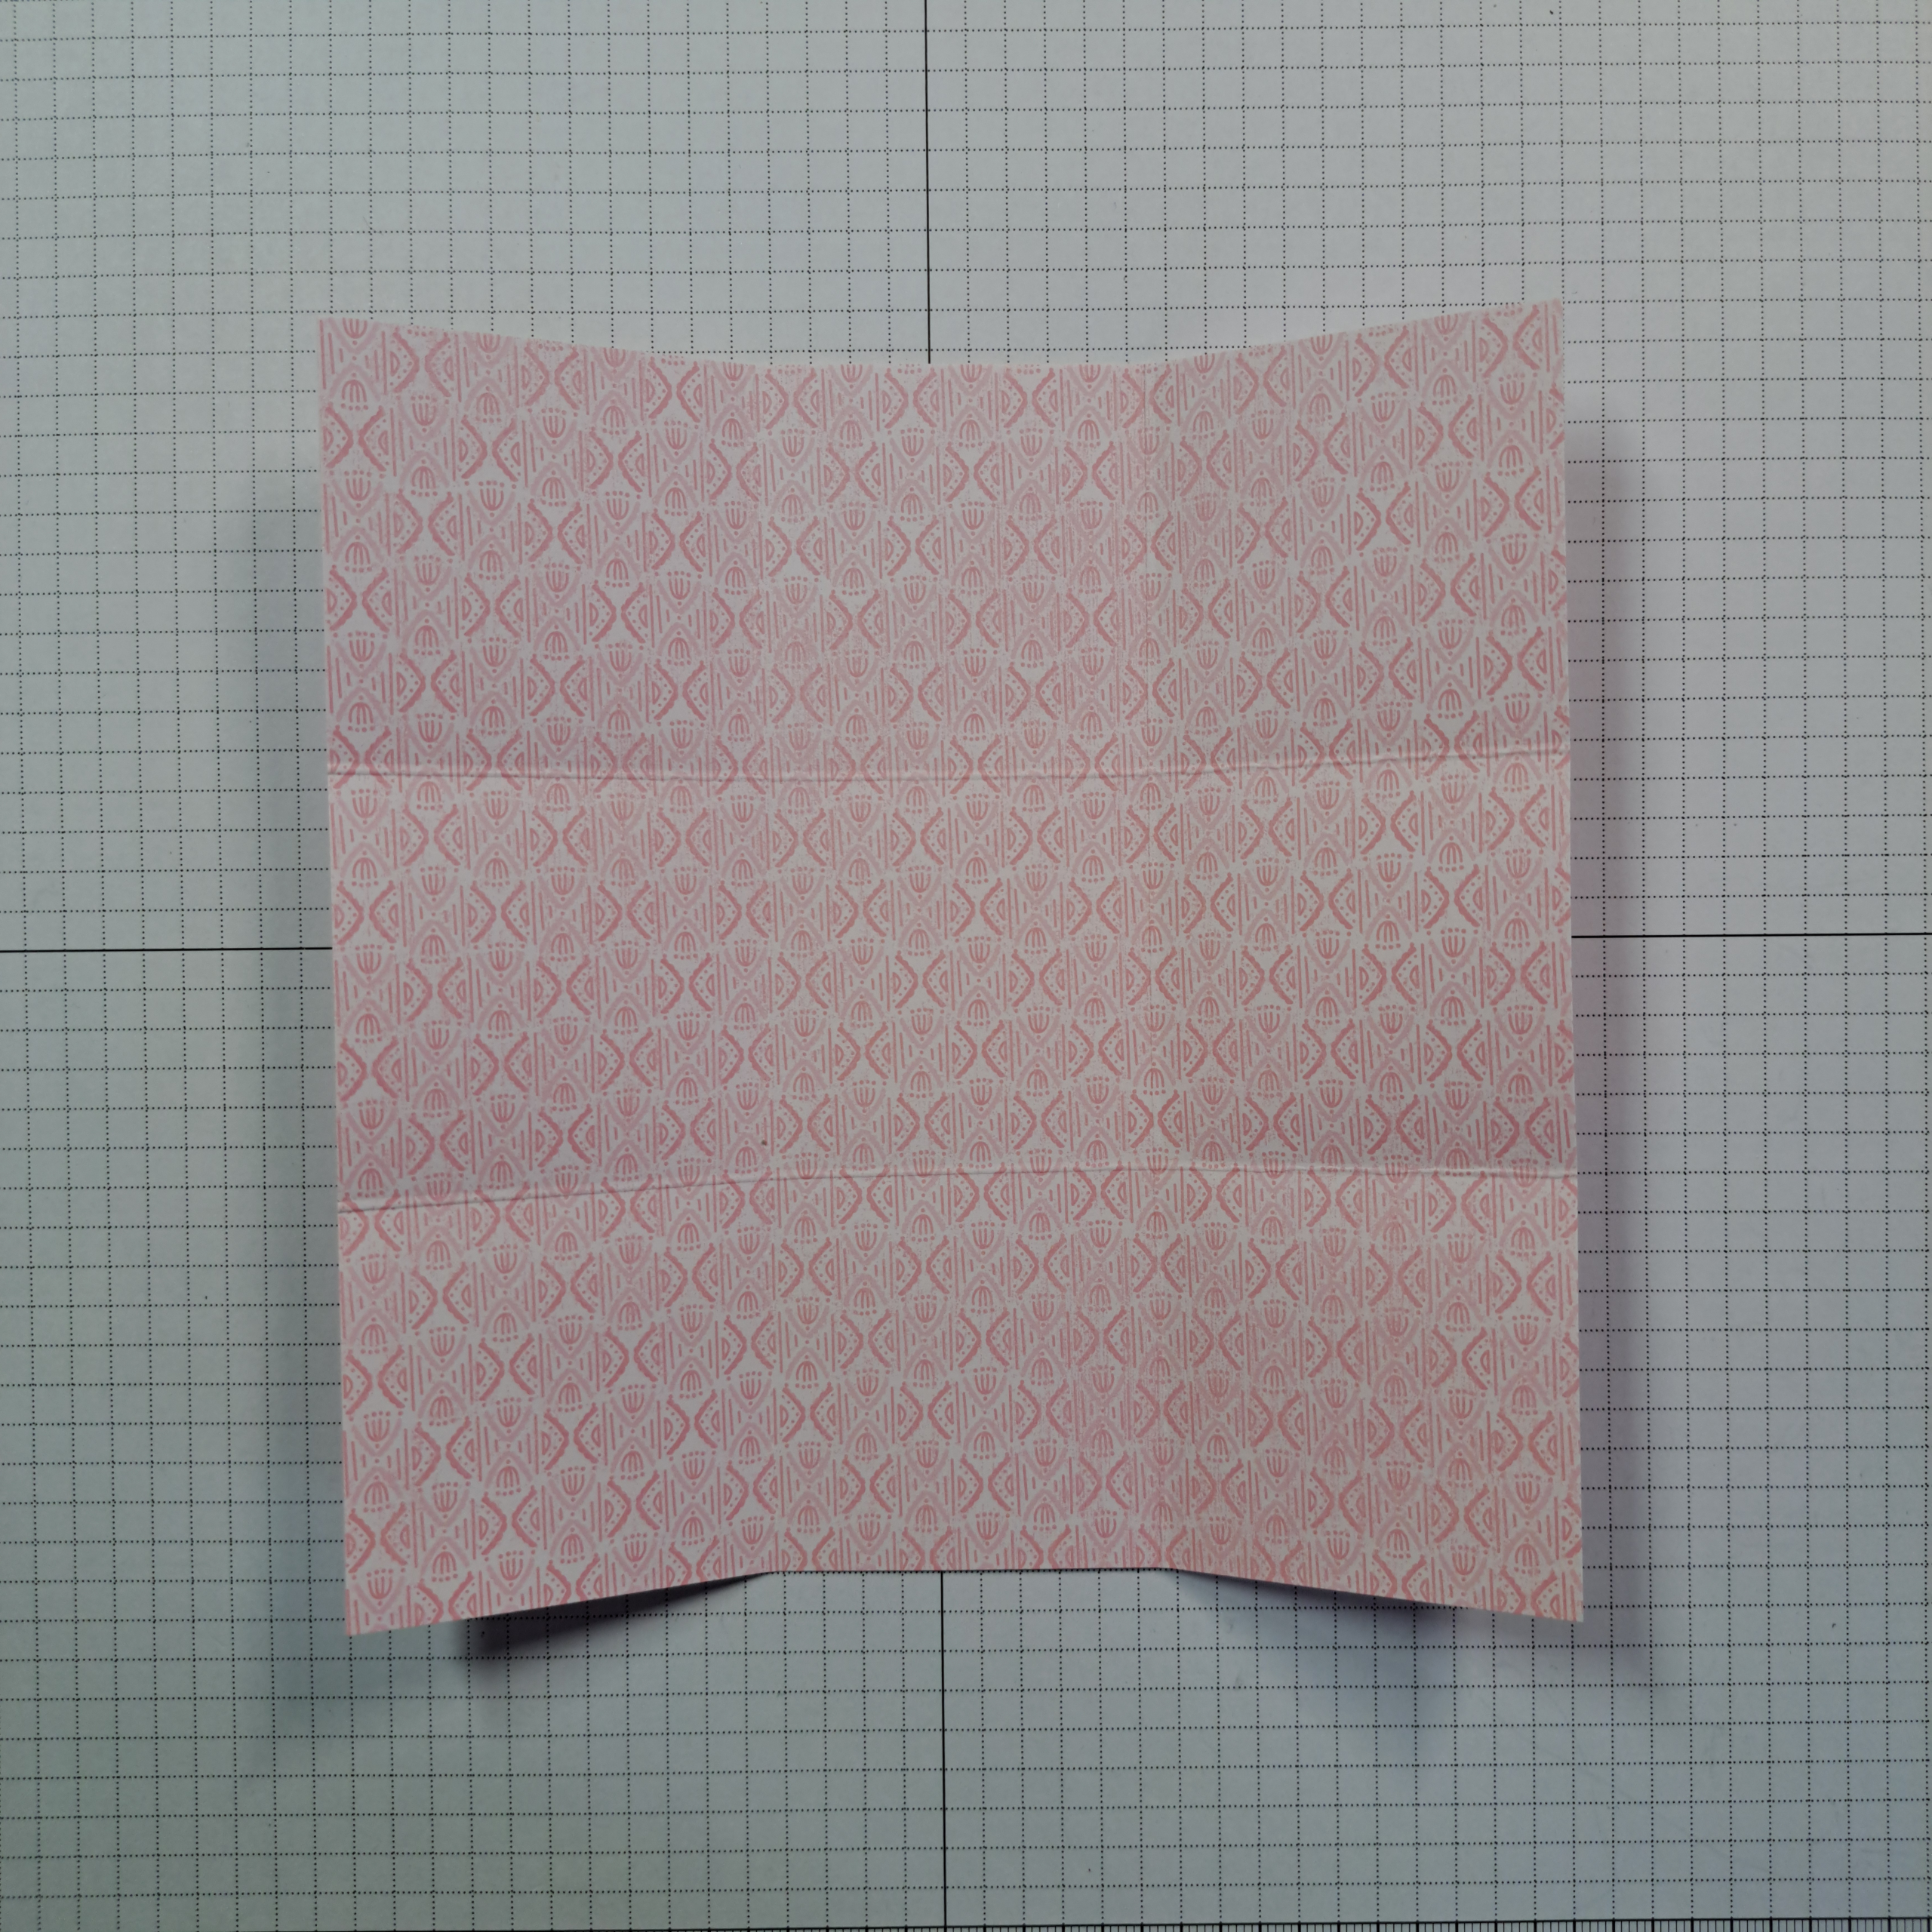
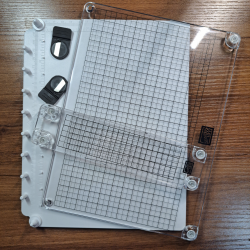
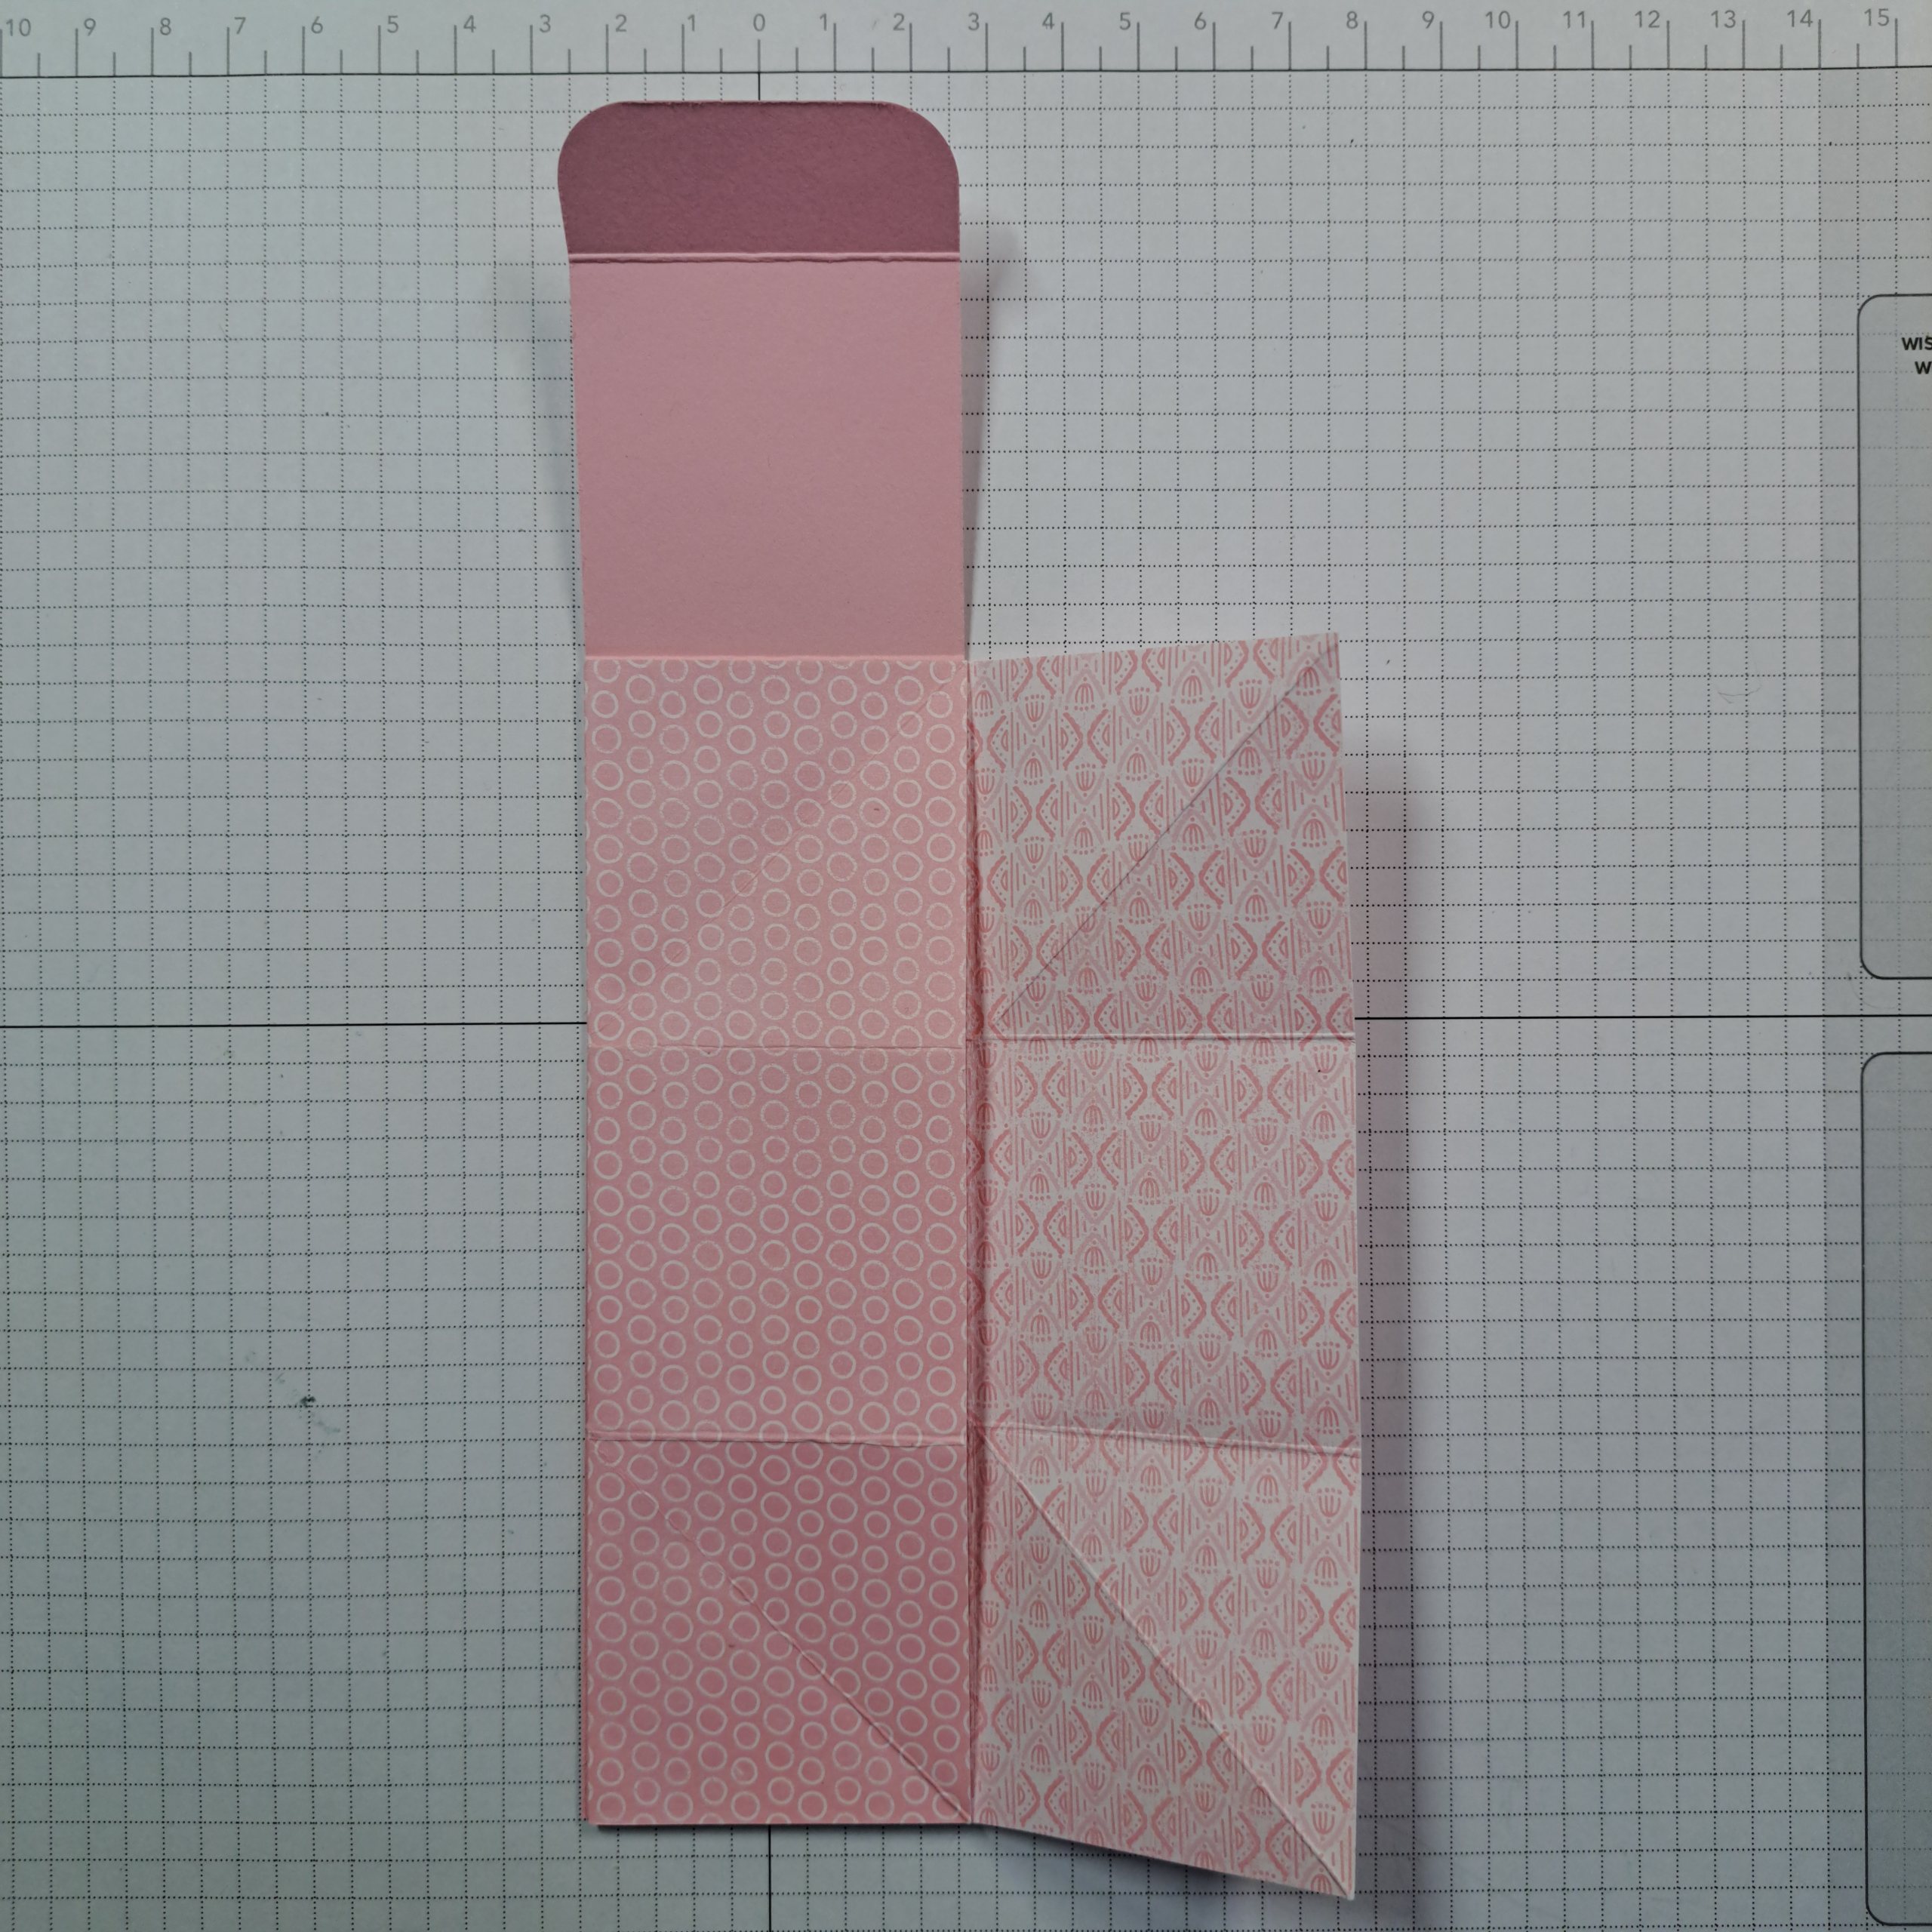
On a piece of 15.2cm x 15.2cm (6″ x 6″)Designer Series Paper score at 5.1cm (2″) and again at 10.1cm (4″). Turn your paper perpendicular and score again at 5.1cm and 10.1cm (2″ and 4″). You should have a nine square grid created with your score lines.
This is the point that you decide which side of your paper will be the inside and which will be the outside. Fold at the score lines to the center of your paper. See photo for reference. If your paper has a direction be sure to place your paper down so the direction for the sides of the box (the only exterior part of the Designer Series Paper to show) is going in the direction you want.
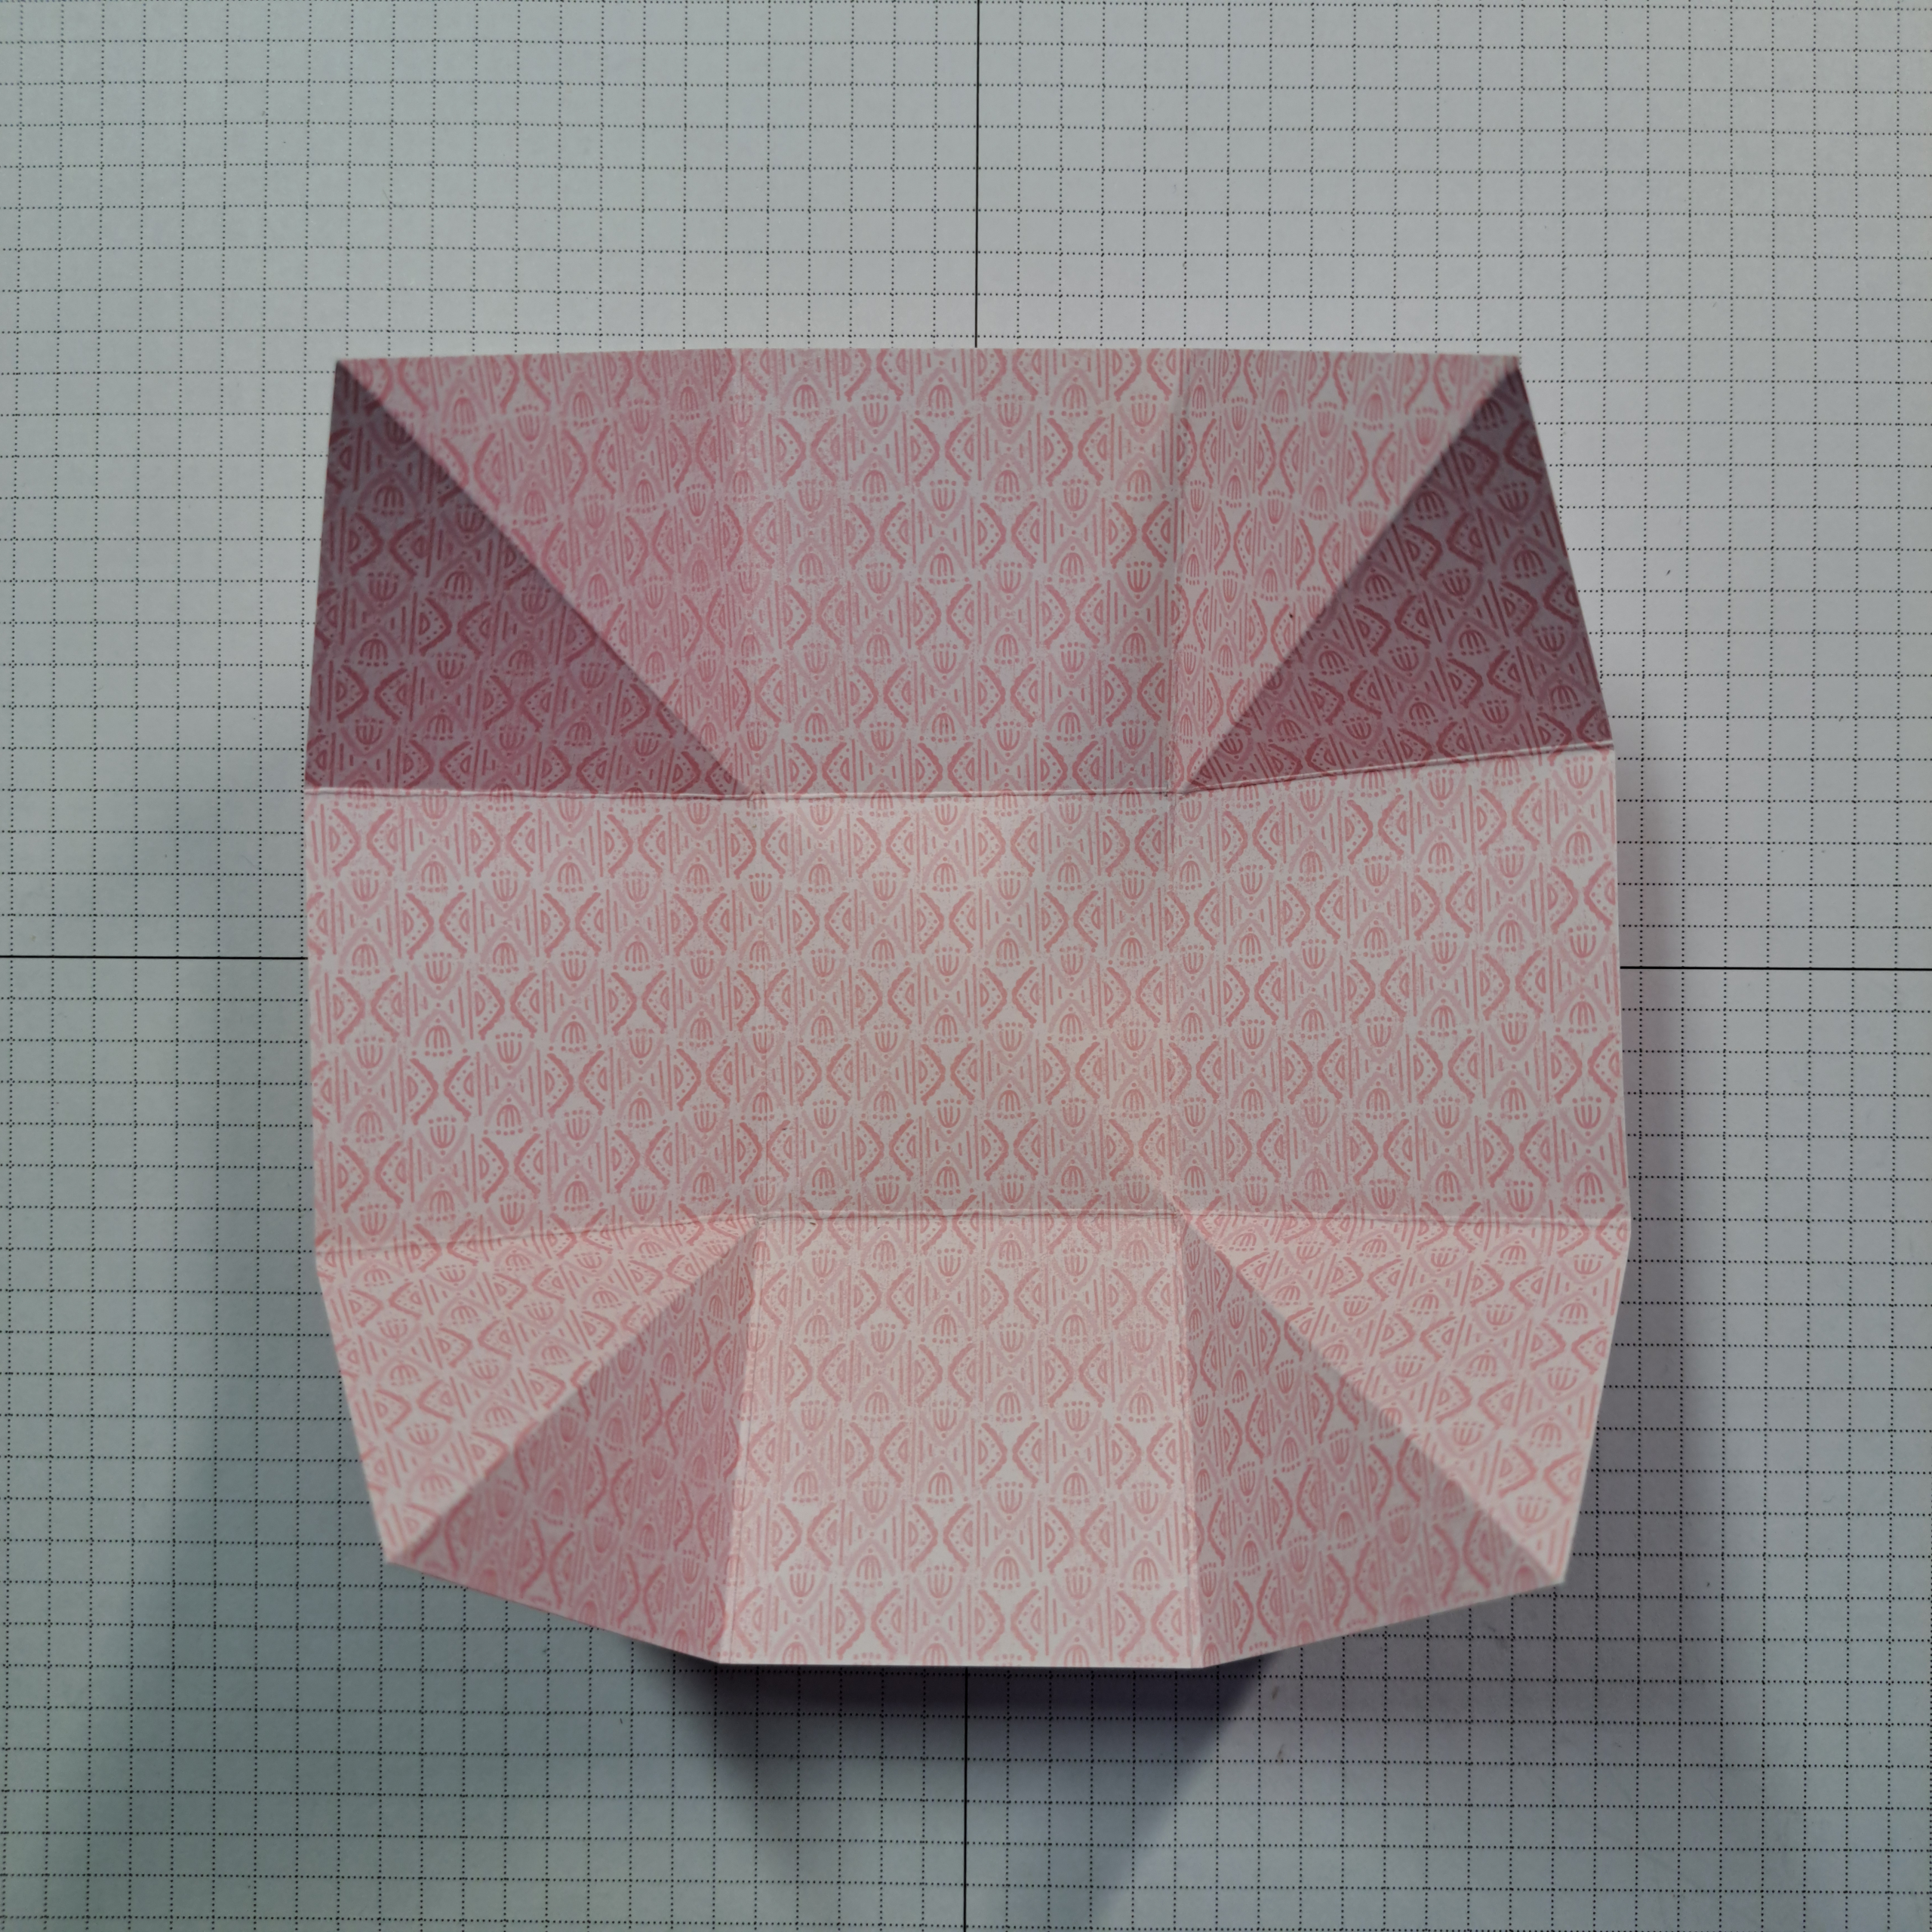
With the inside of the paper facing up, draw four small dots, one at each of the four corners of the center square. Using a metal ruler and a scouring tool or the score slider of your Paper Trimmer, score a line from each of the dots out toward each of the four corners of the paper. See photo.
Fold along the score lines so that you have a mountain fold from the center to the diagonal edge of each of the four corners. I found it easier to flip the paper over and make valley folds here. Be careful to keep the inside box free of fold lines as much as possible, even though this center part will be reinforced with card stock. See Photo. Hopefully you can now see how the box will take it’s shape when finished.
To continue, fold one side over the other so that you have a column of three squares. Flip this piece over and place glue all over the back. Adhere your card stock strip over this piece being sure to line up the flat end and the right and left edges of the card stock to the bottom and right and left edges of the Designer Series Paper.
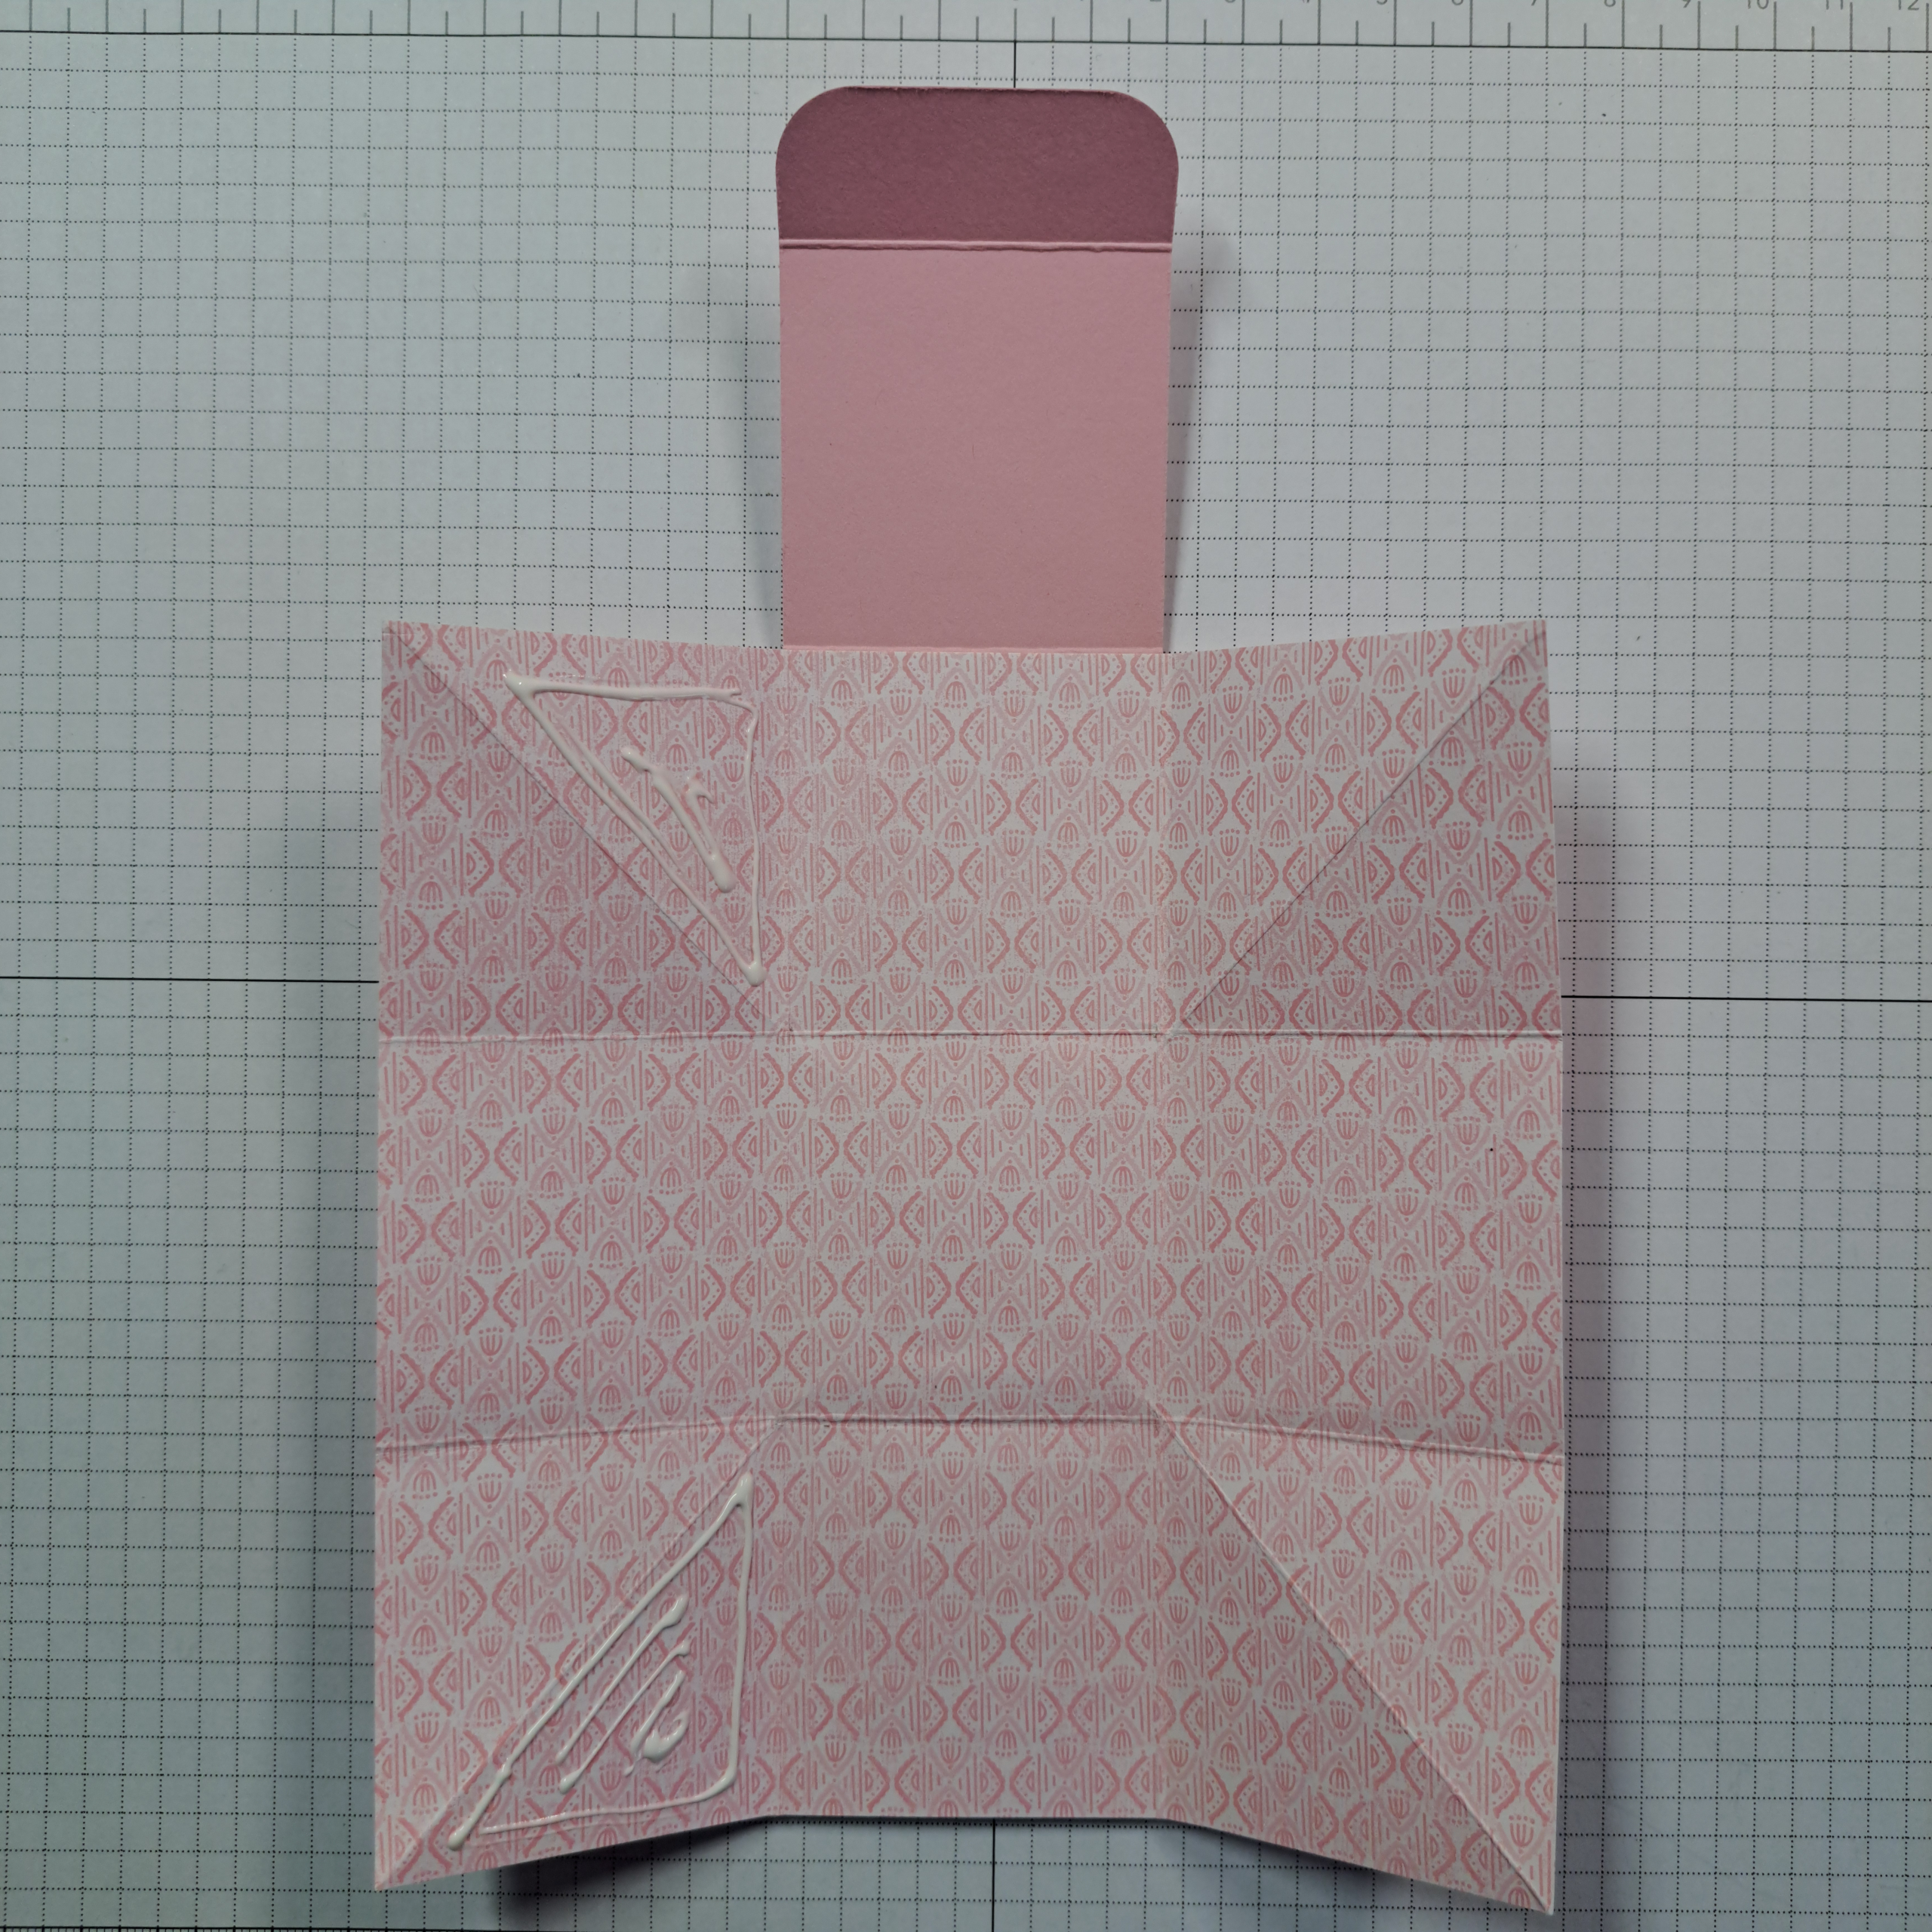
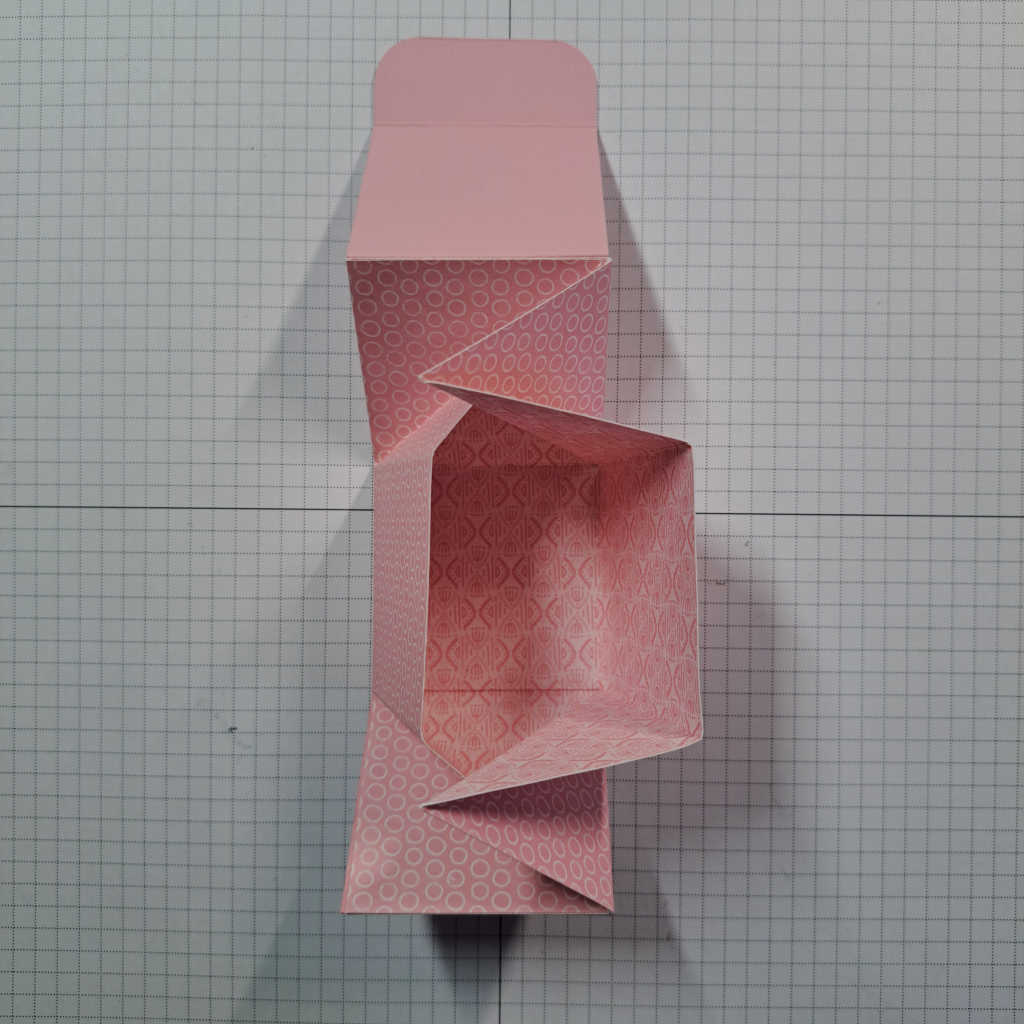
Turn the paper so that the inside is facing you. Place glue on the inside triangles on the top and bottom of the left side. See photo. Fold this side flat to the center of the card. If using liquid glue give this piece a moment to dry before the next step.
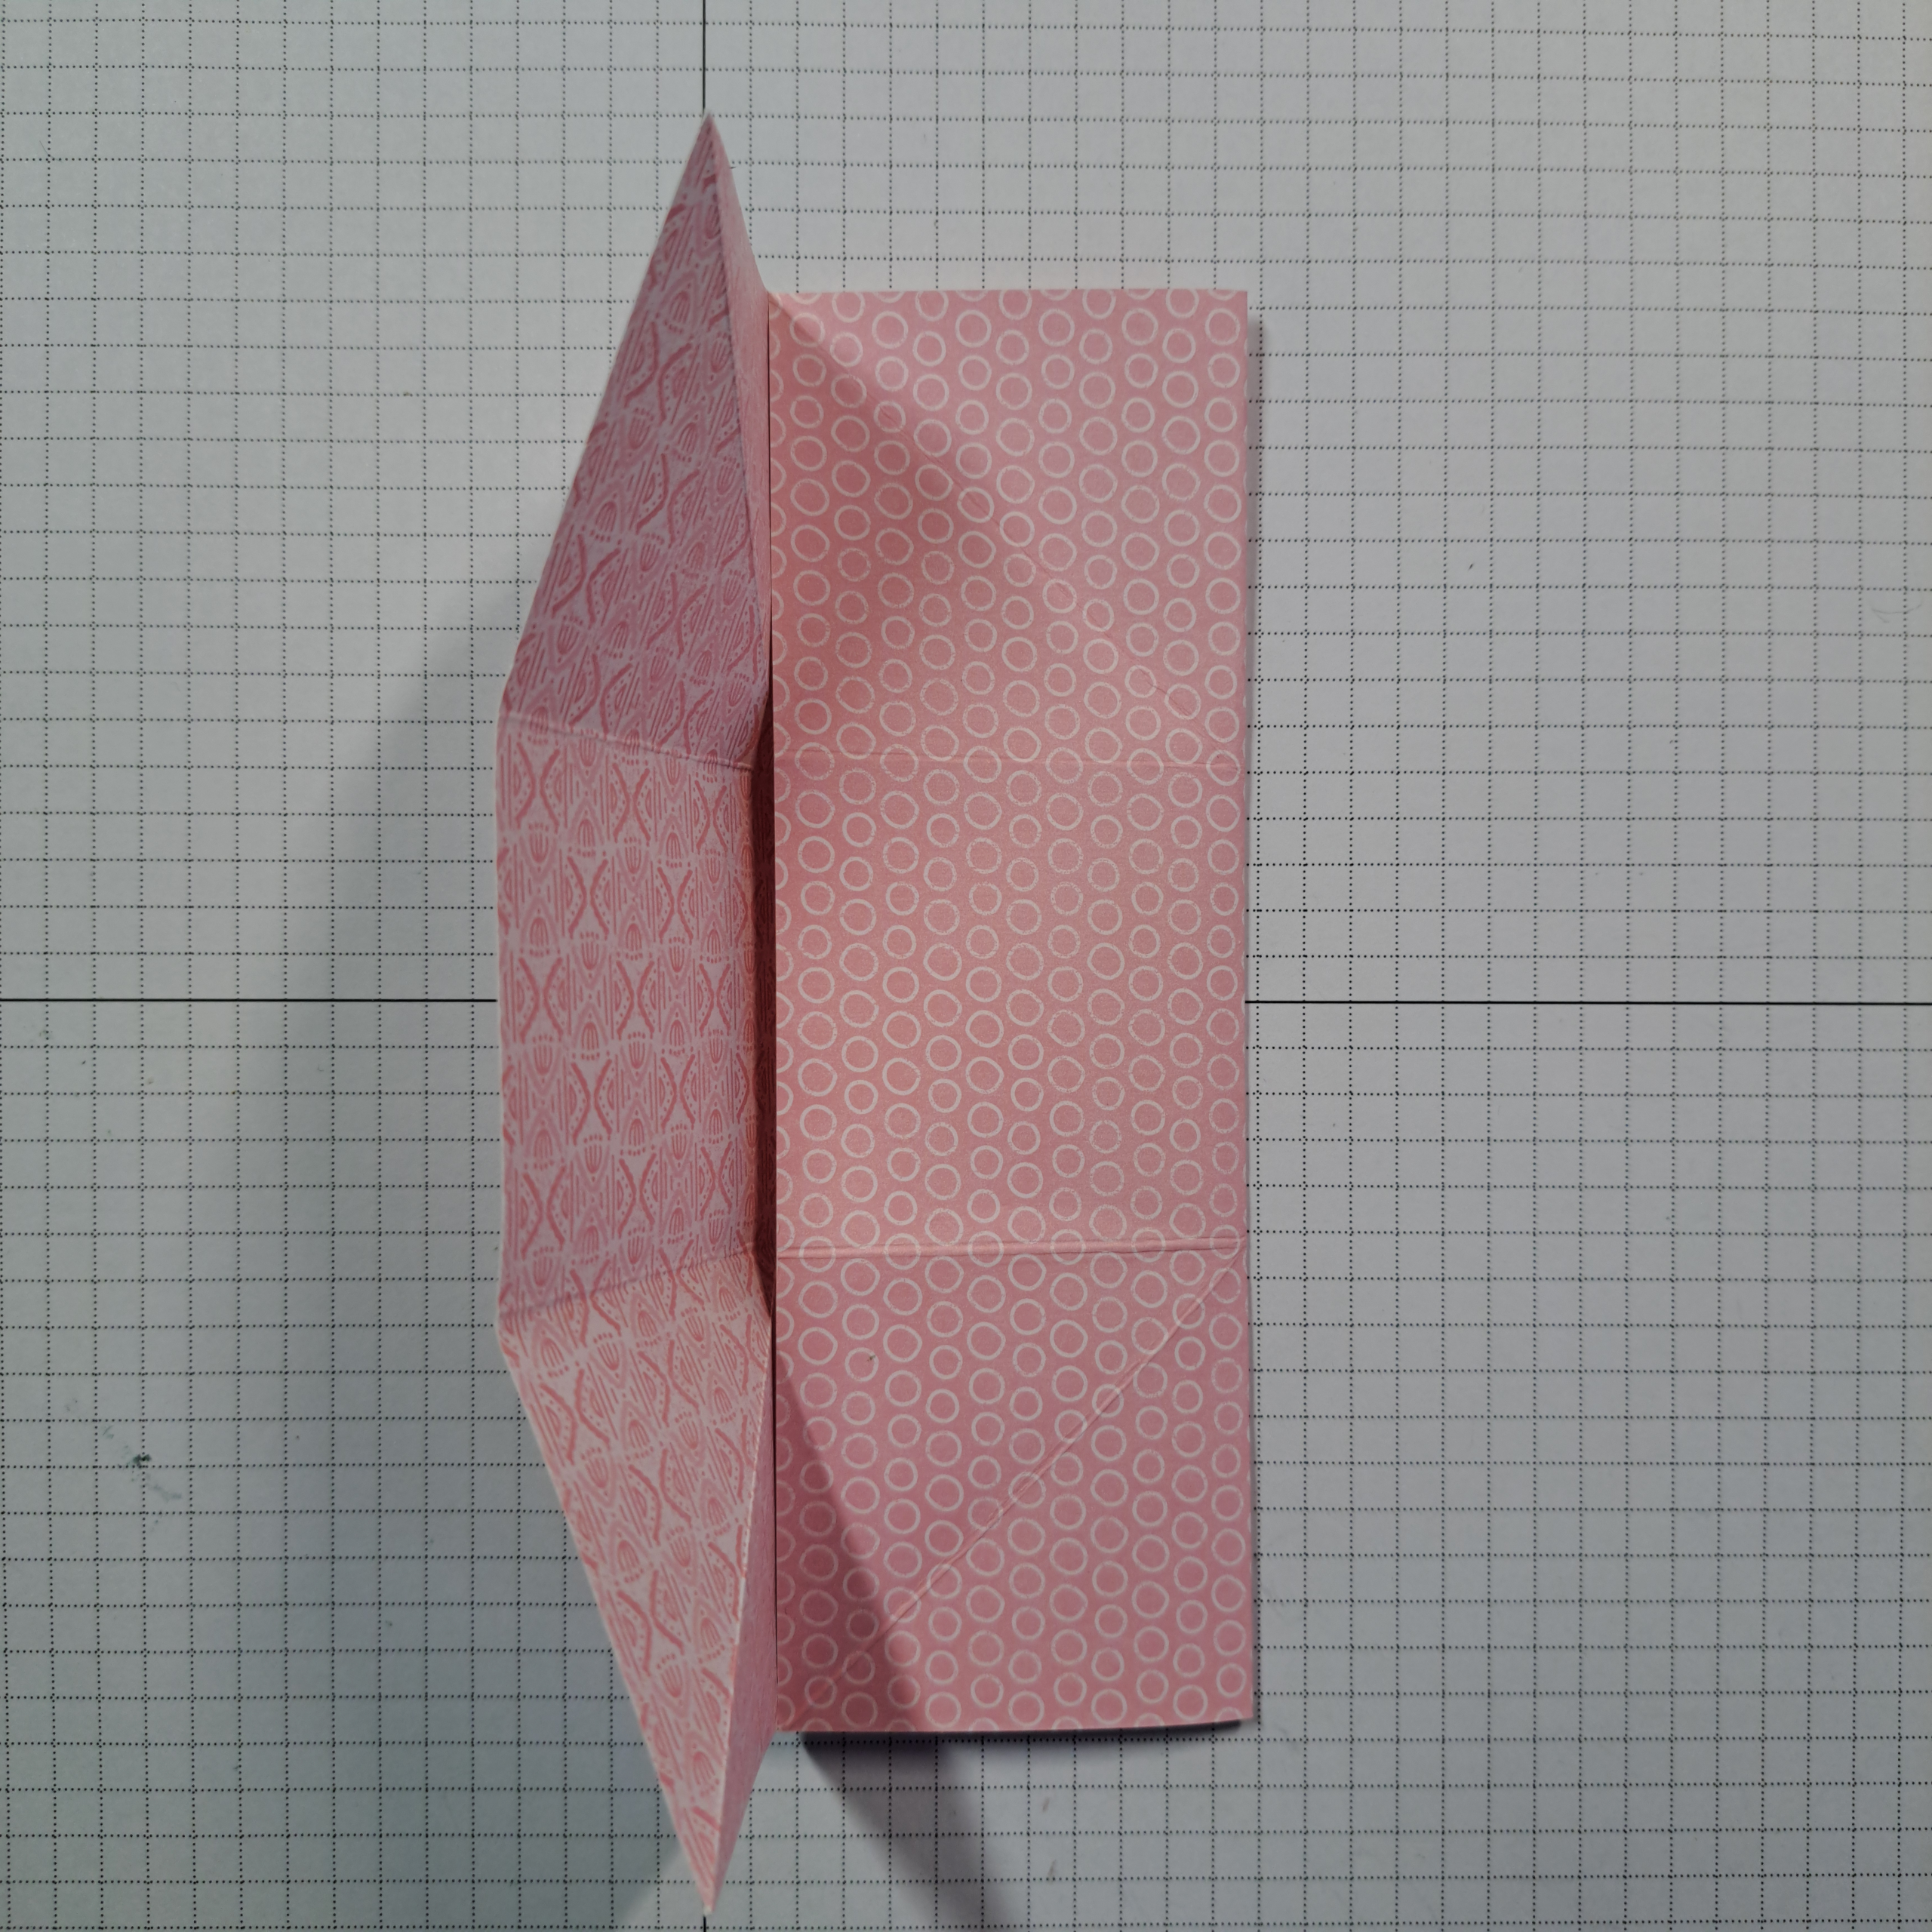
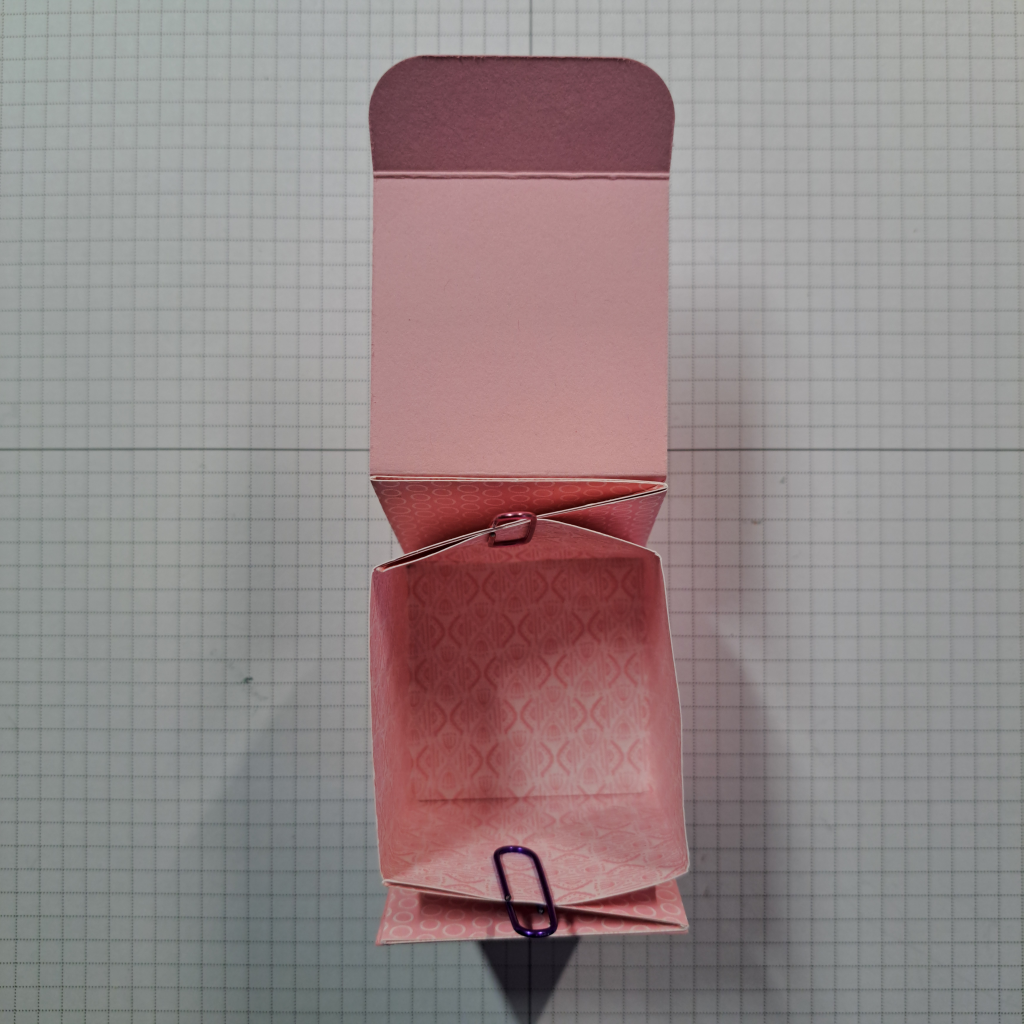
After the adhesive has dried open out the center portion of the folded over piece. To finish forming the box bring the right side up toward the center allowing the diagonal folds to lay along the diagonal folds of the left side. Below is a photo of the box closed up. I used a pair of paper clips to hold everything in place.

Your box is basically done at this point. If you wish to have the box fold flat you can stop here and go on to making the belly band and decorating it. I wanted my box to have a more permanent feel so I glued the inside triangular flaps down.
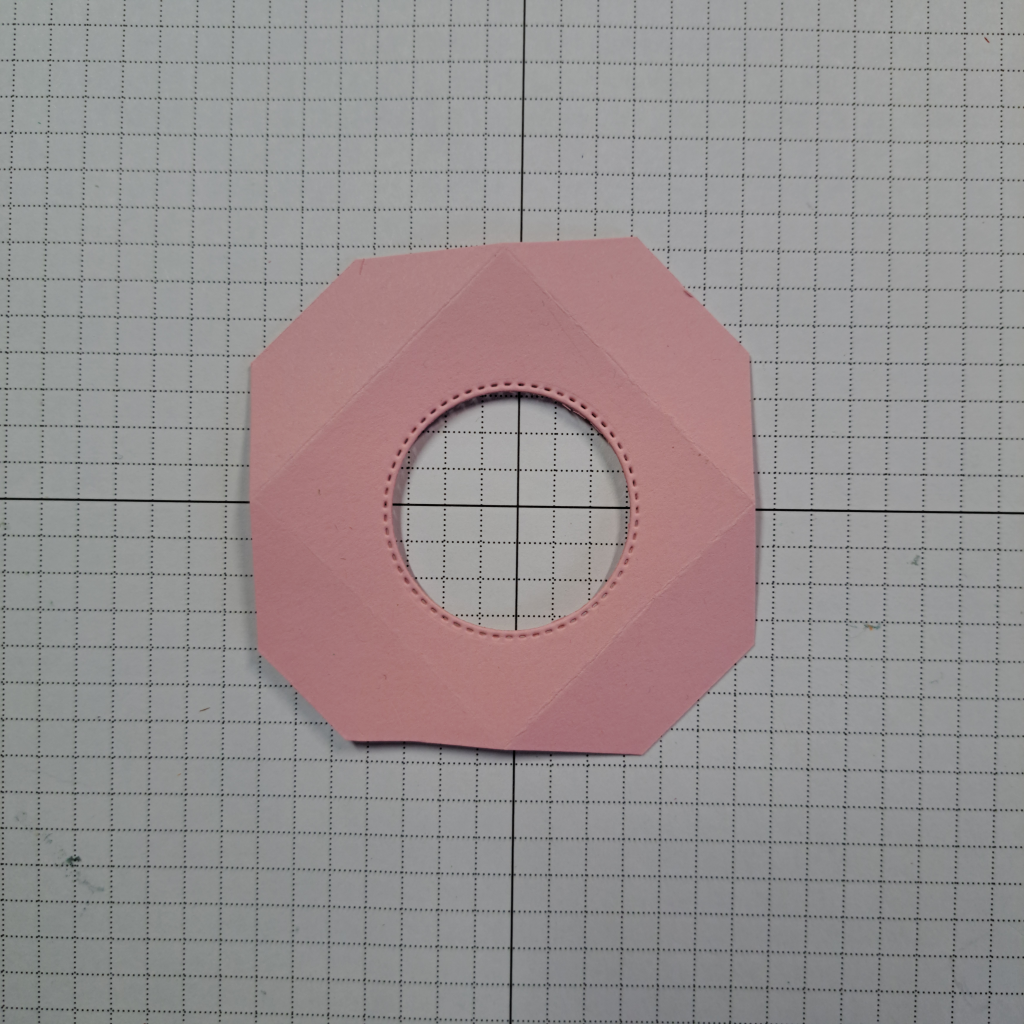
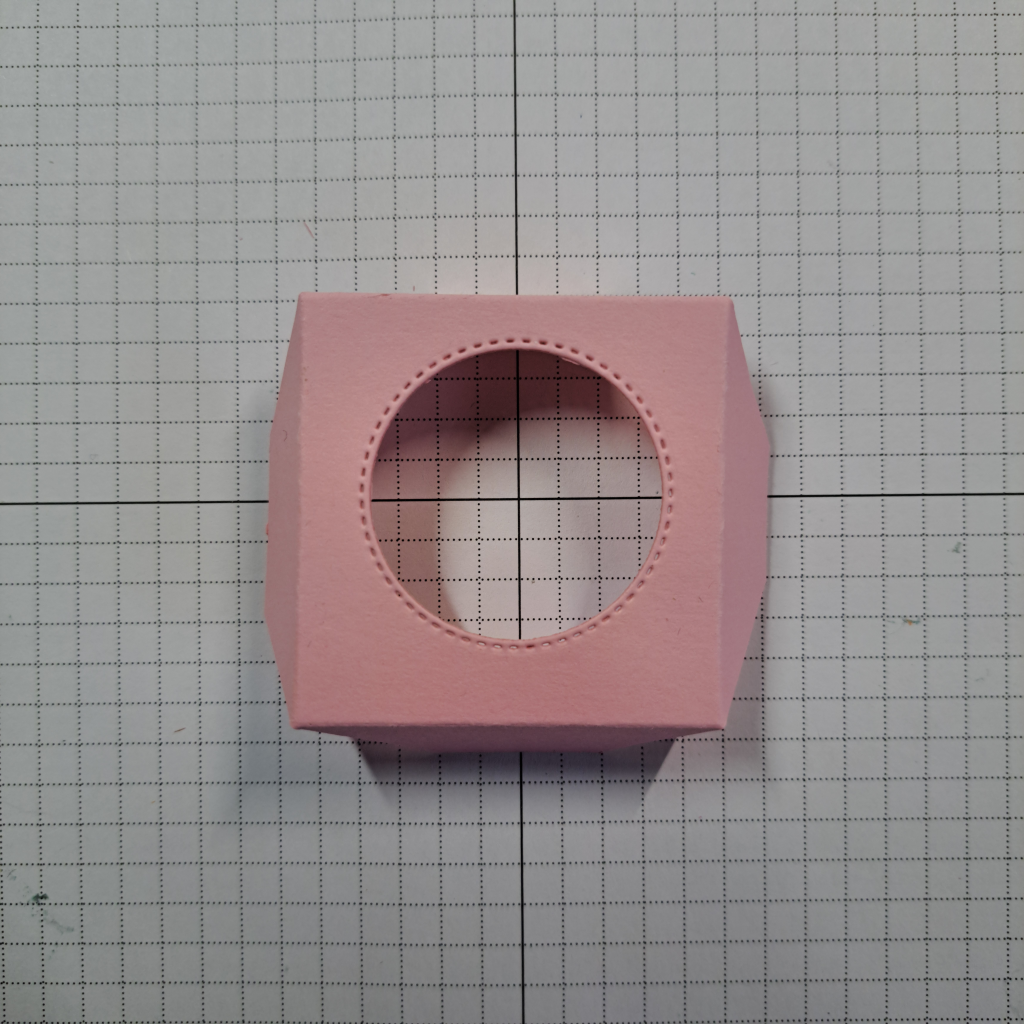
I made these boxes to hold Cadbury Eggs for easter (the same as Clare). To make the insert to hold the egg in place cut a square 7.6cm x 7.6cm (3″ x 3″) out of a coordinating card stock. Score at 1.5cm (1/2″) on each side. Trim off all four corners of piece so that when you fold the sides down the piece will stand up. I cut the center hole with the second to the smallest circle die from the Stylish Shapes die set. This side measures 3.2cm (1-1/4″) on the inside. You can also use a 1-1/4″ punch.

Belly Band and Decoration
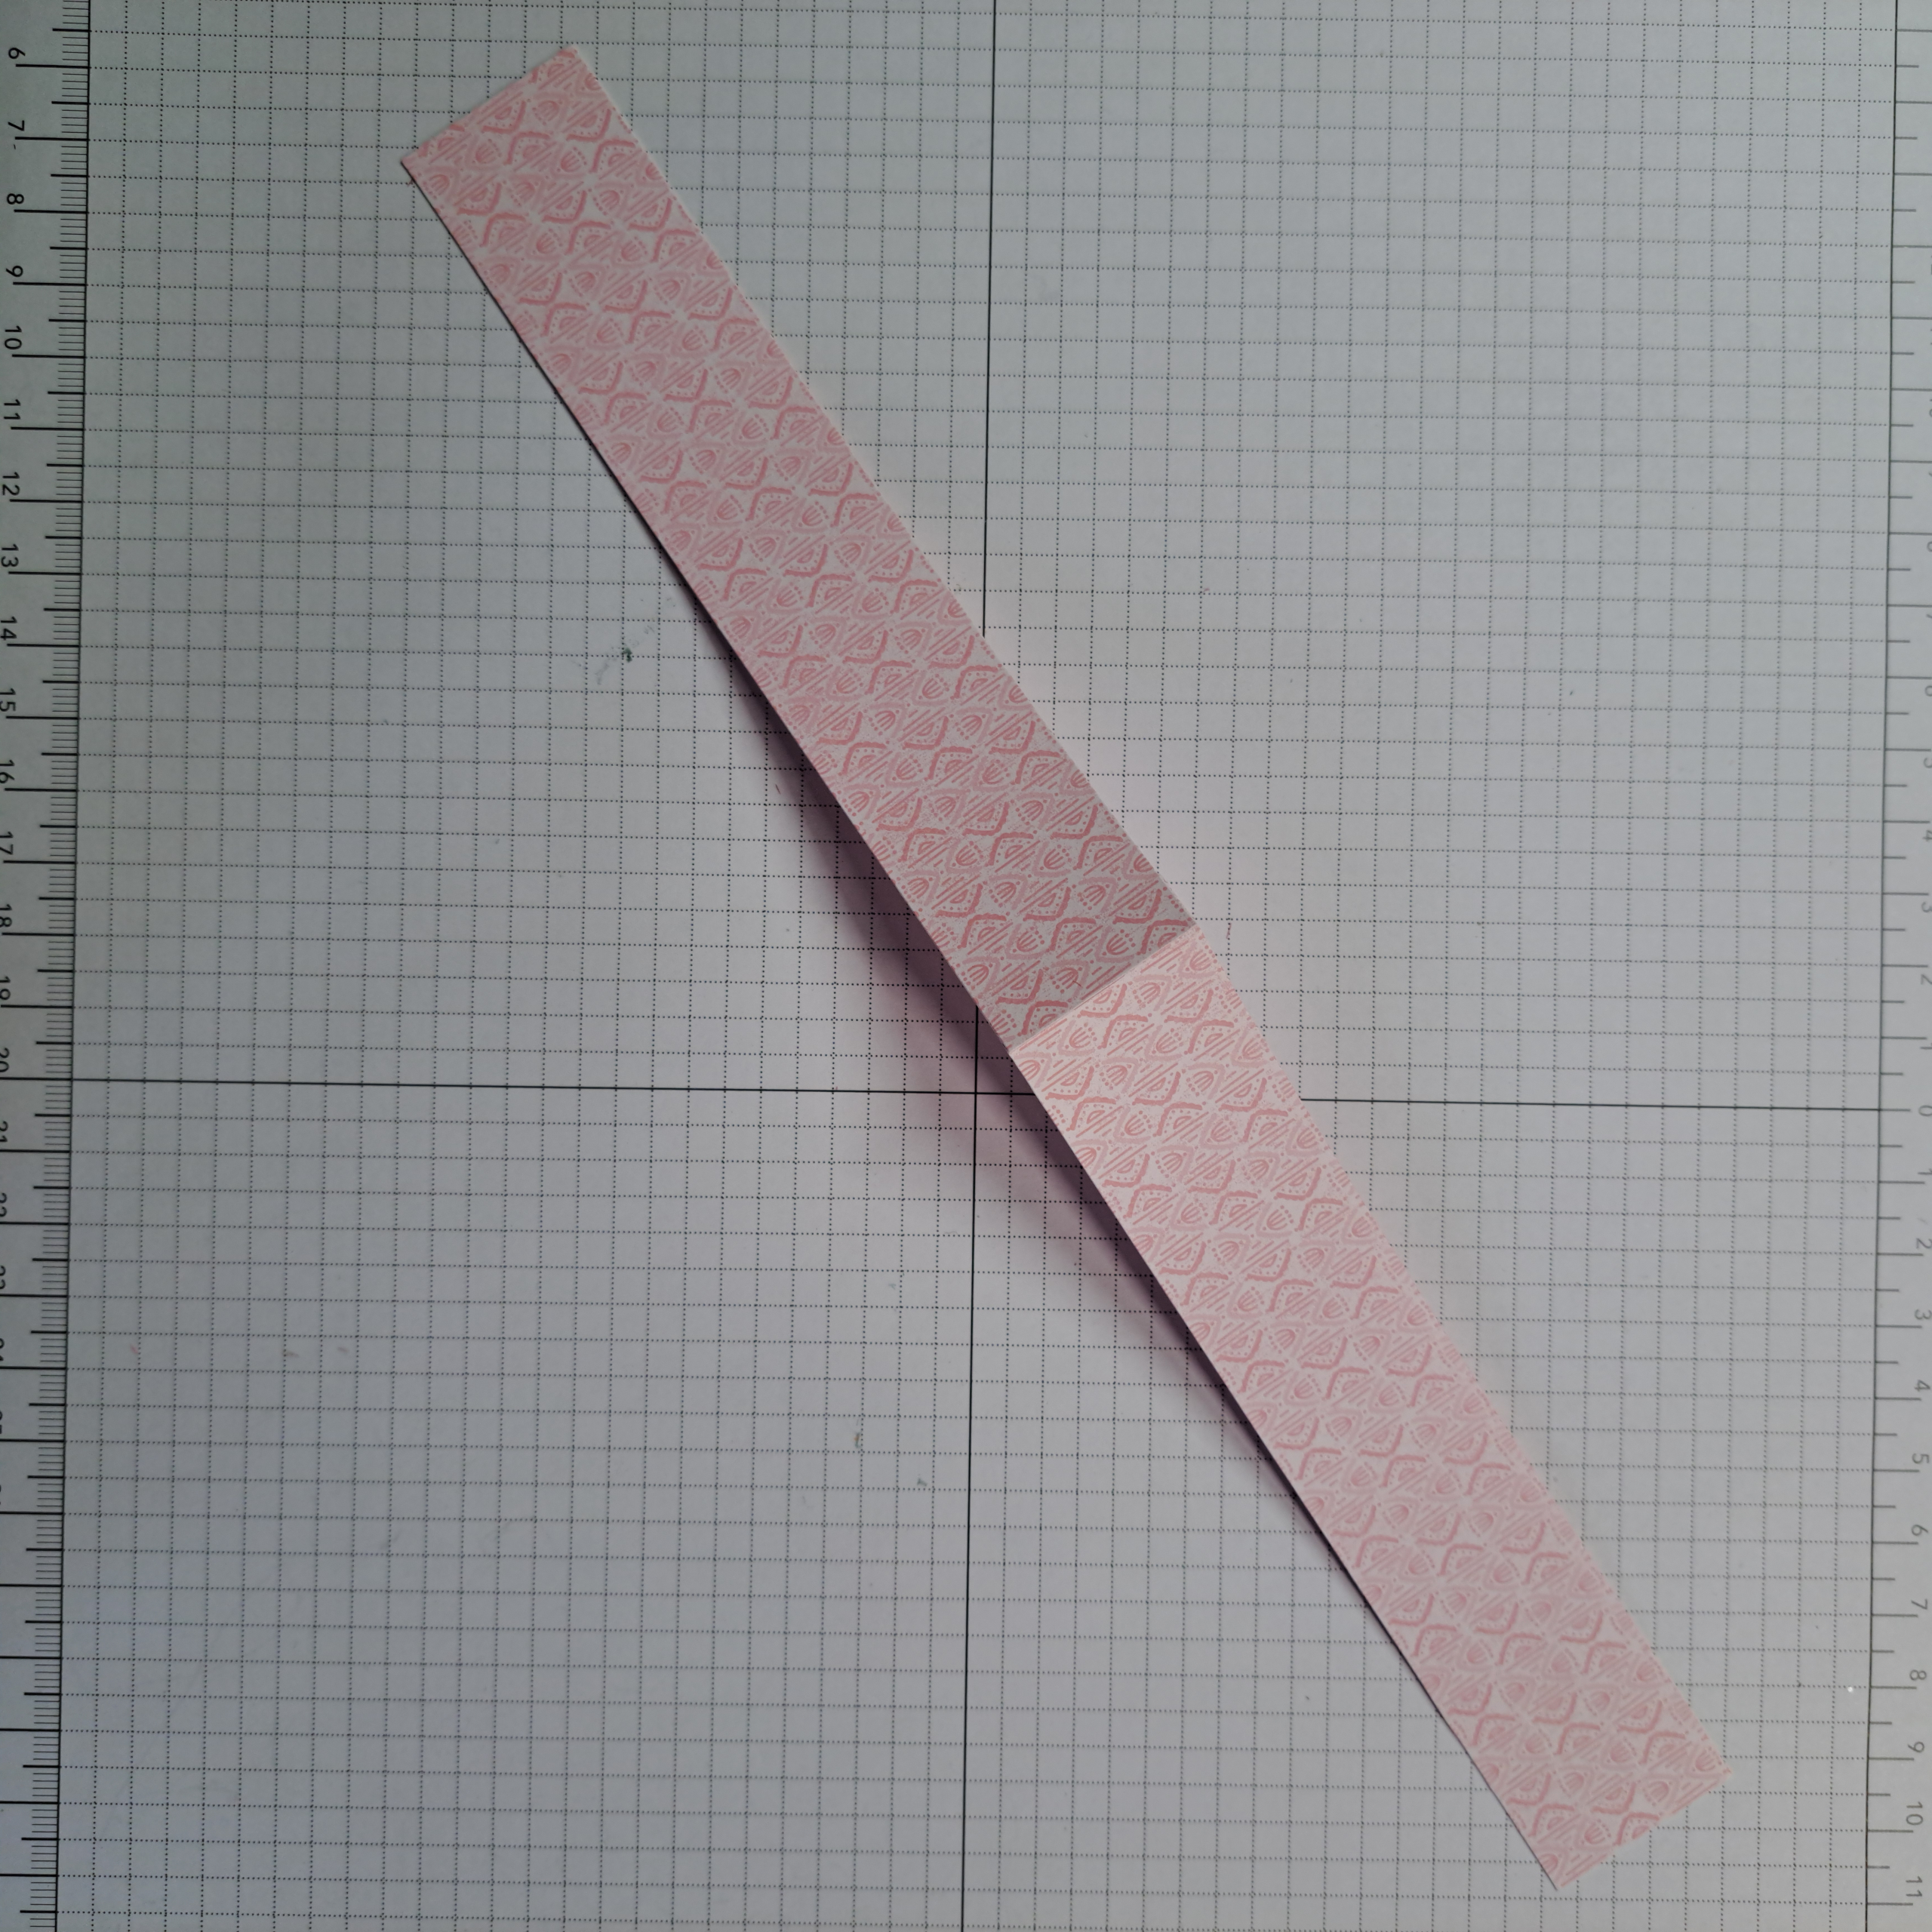
To form the belly band to hold the box closed you will need a strip of card stock or Designer Series Paper. The strip needs to measure at the minimum 2.9cm x 21cm (1-1/8″ x 8-1/2″). For this project I wanted to continue using my Designer Series Paper so I cut two strips 2.9cm x 15.2cm and glued them together.
I stamped my greeting onto white card stock using Pretty in Pink ink and the Easter Greeting from the Reason to Celebrate Photopolymer Stamp Set. I die cut the greeting using the second to smallest banner die from the Stylish Shapes Dies set.
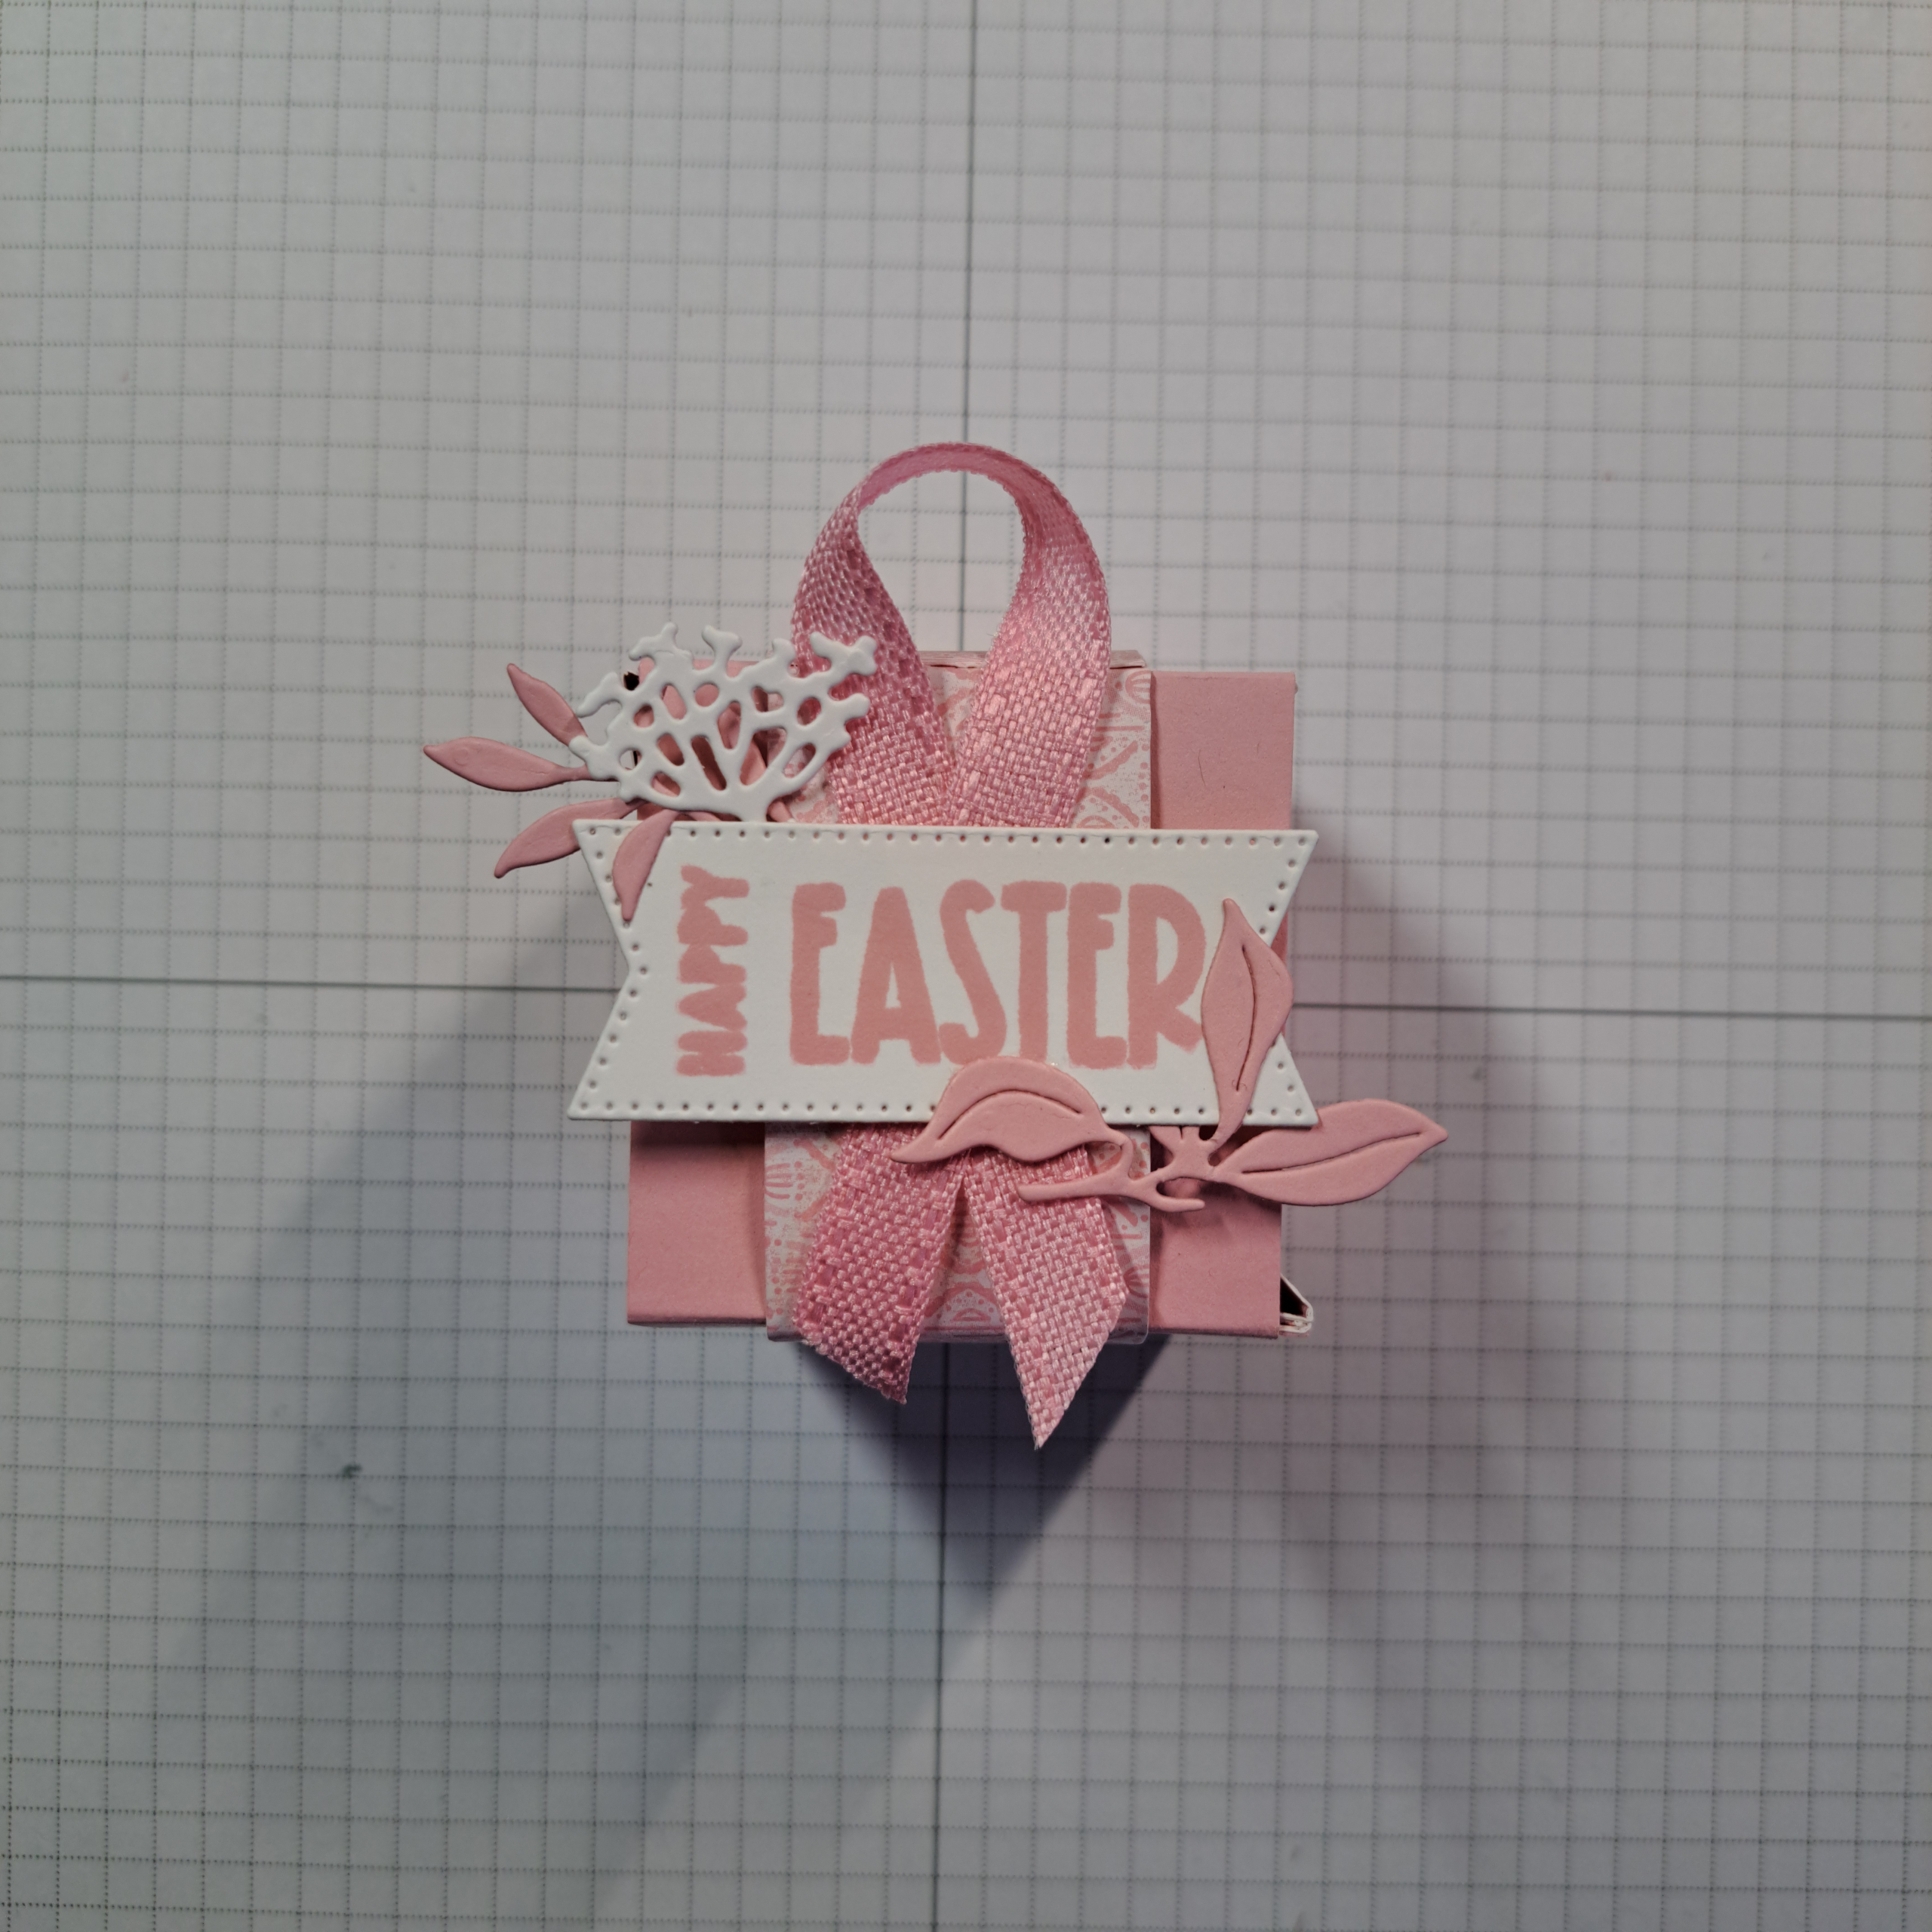
The decorative elements were die cut using scraps of Pretty in Pink and Basic White card stock and the Gallery Blooms Die set. I glued the die cuts to the greeting banner piece.
Before gluing down the greeting I looped a piece of Pretty in Pink 3/8″ Bordered Ribbon onto the center of the belly band. I adhered the greeting over the belly band using Tear and Tape. I did not think the glue would hold well enough through travel and distribution of the boxes.
Thank you for reading today. I hope you enjoyed this blog and I hope you will give this little box a try. If you do please post a picture in the comments or on social media and tag me @LoriOthen.
As I said above, this design is brought to you by Clare Ottaway. You can find her video here: https://www.youtube.com/watch?v=GwBtEnvxFRw If you have the time please give it a watch and a big thumbs up. I believe if you like this project you will love Clare’s work. Also if you want more sizes for this box she has noted where you can get them in the text of the video.
*The 2024-26 In Color 6″ x 6″ Designer Series Paper set has been discontinued. Any Designer Series Paper will work for this project. Only have 12″ x12″ paper? No problem just cut it in half and then in half again to get four 6″ x 6″ papers.
Product List![Reason To Celebrate Photopolymer Stamp Set (English) [ 166905 ]](https://assets1.tamsnetwork.com/images/EC042017NF/166905s.jpg "Reason To Celebrate Photopolymer Stamp Set (English) [ 166905 ]")
![Gallery Blooms Dies [ 165212 ]](https://assets1.tamsnetwork.com/images/EC042017NF/165212s.jpg "Gallery Blooms Dies [ 165212 ]")
![Stylish Shapes Dies [ 159183 ]](https://assets1.tamsnetwork.com/images/EC042017NF/159183s.jpg "Stylish Shapes Dies [ 159183 ]")
![Pretty In Pink A4 Cardstock [ 163794 ]](https://assets1.tamsnetwork.com/images/EC042017NF/163794s.jpg "Pretty In Pink A4 Cardstock [ 163794 ]")
![Basic White A4 Cardstock [ 166781 ]](https://assets1.tamsnetwork.com/images/EC042017NF/166781s.jpg "Basic White A4 Cardstock [ 166781 ]")
![Pretty In Pink Classic Stampin Pad [ 163807 ]](https://assets1.tamsnetwork.com/images/EC042017NF/163807s.jpg "Pretty In Pink Classic Stampin Pad [ 163807 ]")
![Pretty In Pink 3/8" (1 Cm) Bordered Ribbon [ 163784 ]](https://assets1.tamsnetwork.com/images/EC042017NF/163784s.jpg "Pretty In Pink 3/8\" (1 Cm) Bordered Ribbon [ 163784 ]")
![Multipurpose Liquid Glue [ 154974 ]](https://assets1.tamsnetwork.com/images/EC042017NF/154974s.jpg "Multipurpose Liquid Glue [ 154974 ]")
![Tear & Tape Adhesive [ 154031 ]](https://assets1.tamsnetwork.com/images/EC042017NF/154031s.jpg "Tear & Tape Adhesive [ 154031 ]")
![Paper Trimmer [ 152392 ]](https://assets1.tamsnetwork.com/images/EC042017NF/152392s.jpg "Paper Trimmer [ 152392 ]")
![Stampin' Cut & Emboss Machine [ 149653 ]](https://assets1.tamsnetwork.com/images/EC042017NF/149653s.jpg "Stampin' Cut & Emboss Machine [ 149653 ]")