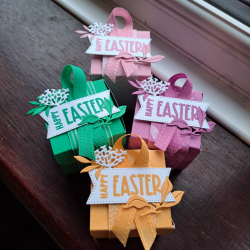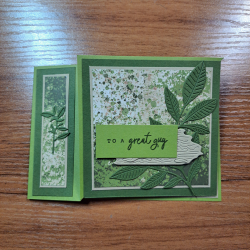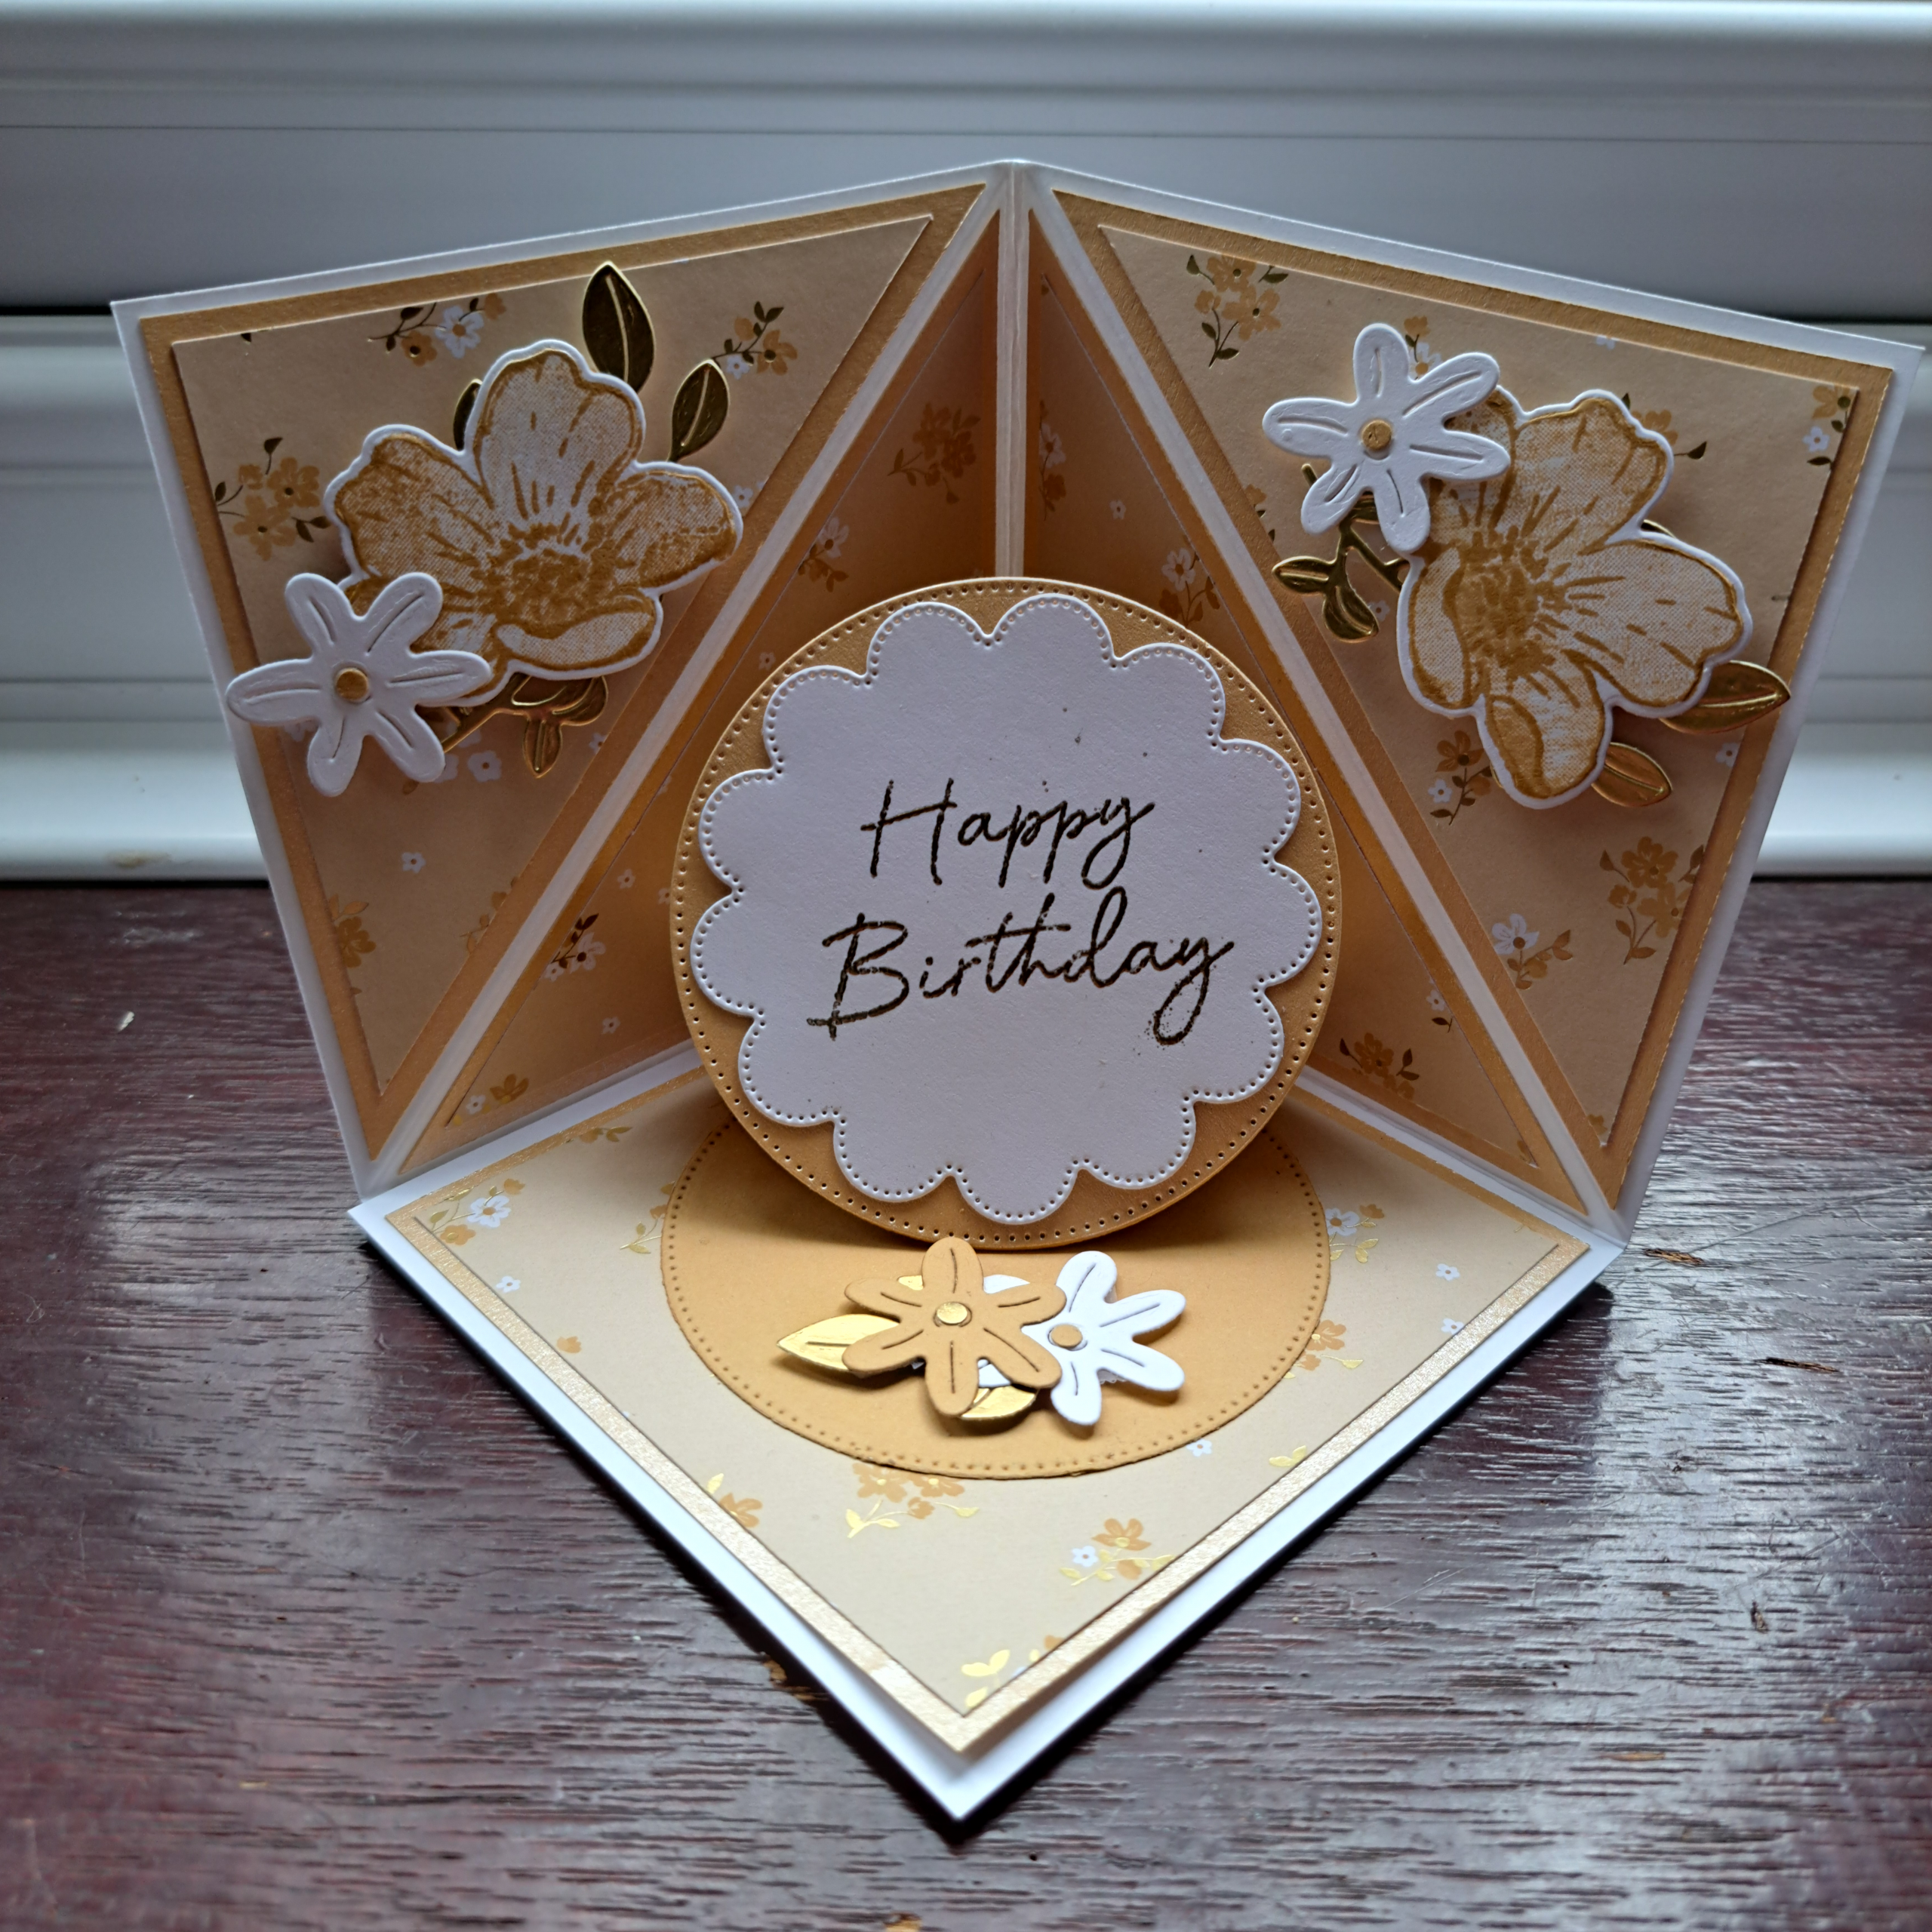
Is it a fun fold? Is it a pop-up? Is it a paper sculpture? YES! Combine all of your favorite card tricks into one beautiful statement. This is not your ordinary card. Although it looks complicated the design is really quite simple. I realize this is my second post using the Bloom Boutique Suite, but honestly I can’t get enough of these amazing stamps and papers. The clean backgrounds and gentle colors in this suite are perfect creating more complicated interactive cards.
Supplies
Boutique Blossoms Photopolymer Stamp Set
Boutique Blossoms Dies
Scalloped Blooms Photopolymer Stamp Set
Scalloped Blooms Dies
Stylish Shapes Dies
Hole Punch Assortment-optional
Bloom Boutique Designer Series Paper
2026-28 In Color Pearlized Specialty Paper
Gold Foil Sheets
Basic White Card Stock
Golden Glow Card Stock
Golden Glow Stampin’ Pad
VersaMark Pad
Metallics WoW Embossing Powder
Mini Magnets
Glue Dots
Multipurpose Liquid Glue
Stampin’ Dimensionals
Heat Tool
Embossing Additions Tool Kit-optional
Stampin’ Positioner-optional
Paper Trimmer
Cut and Emboss Machine
Directions
Card Base
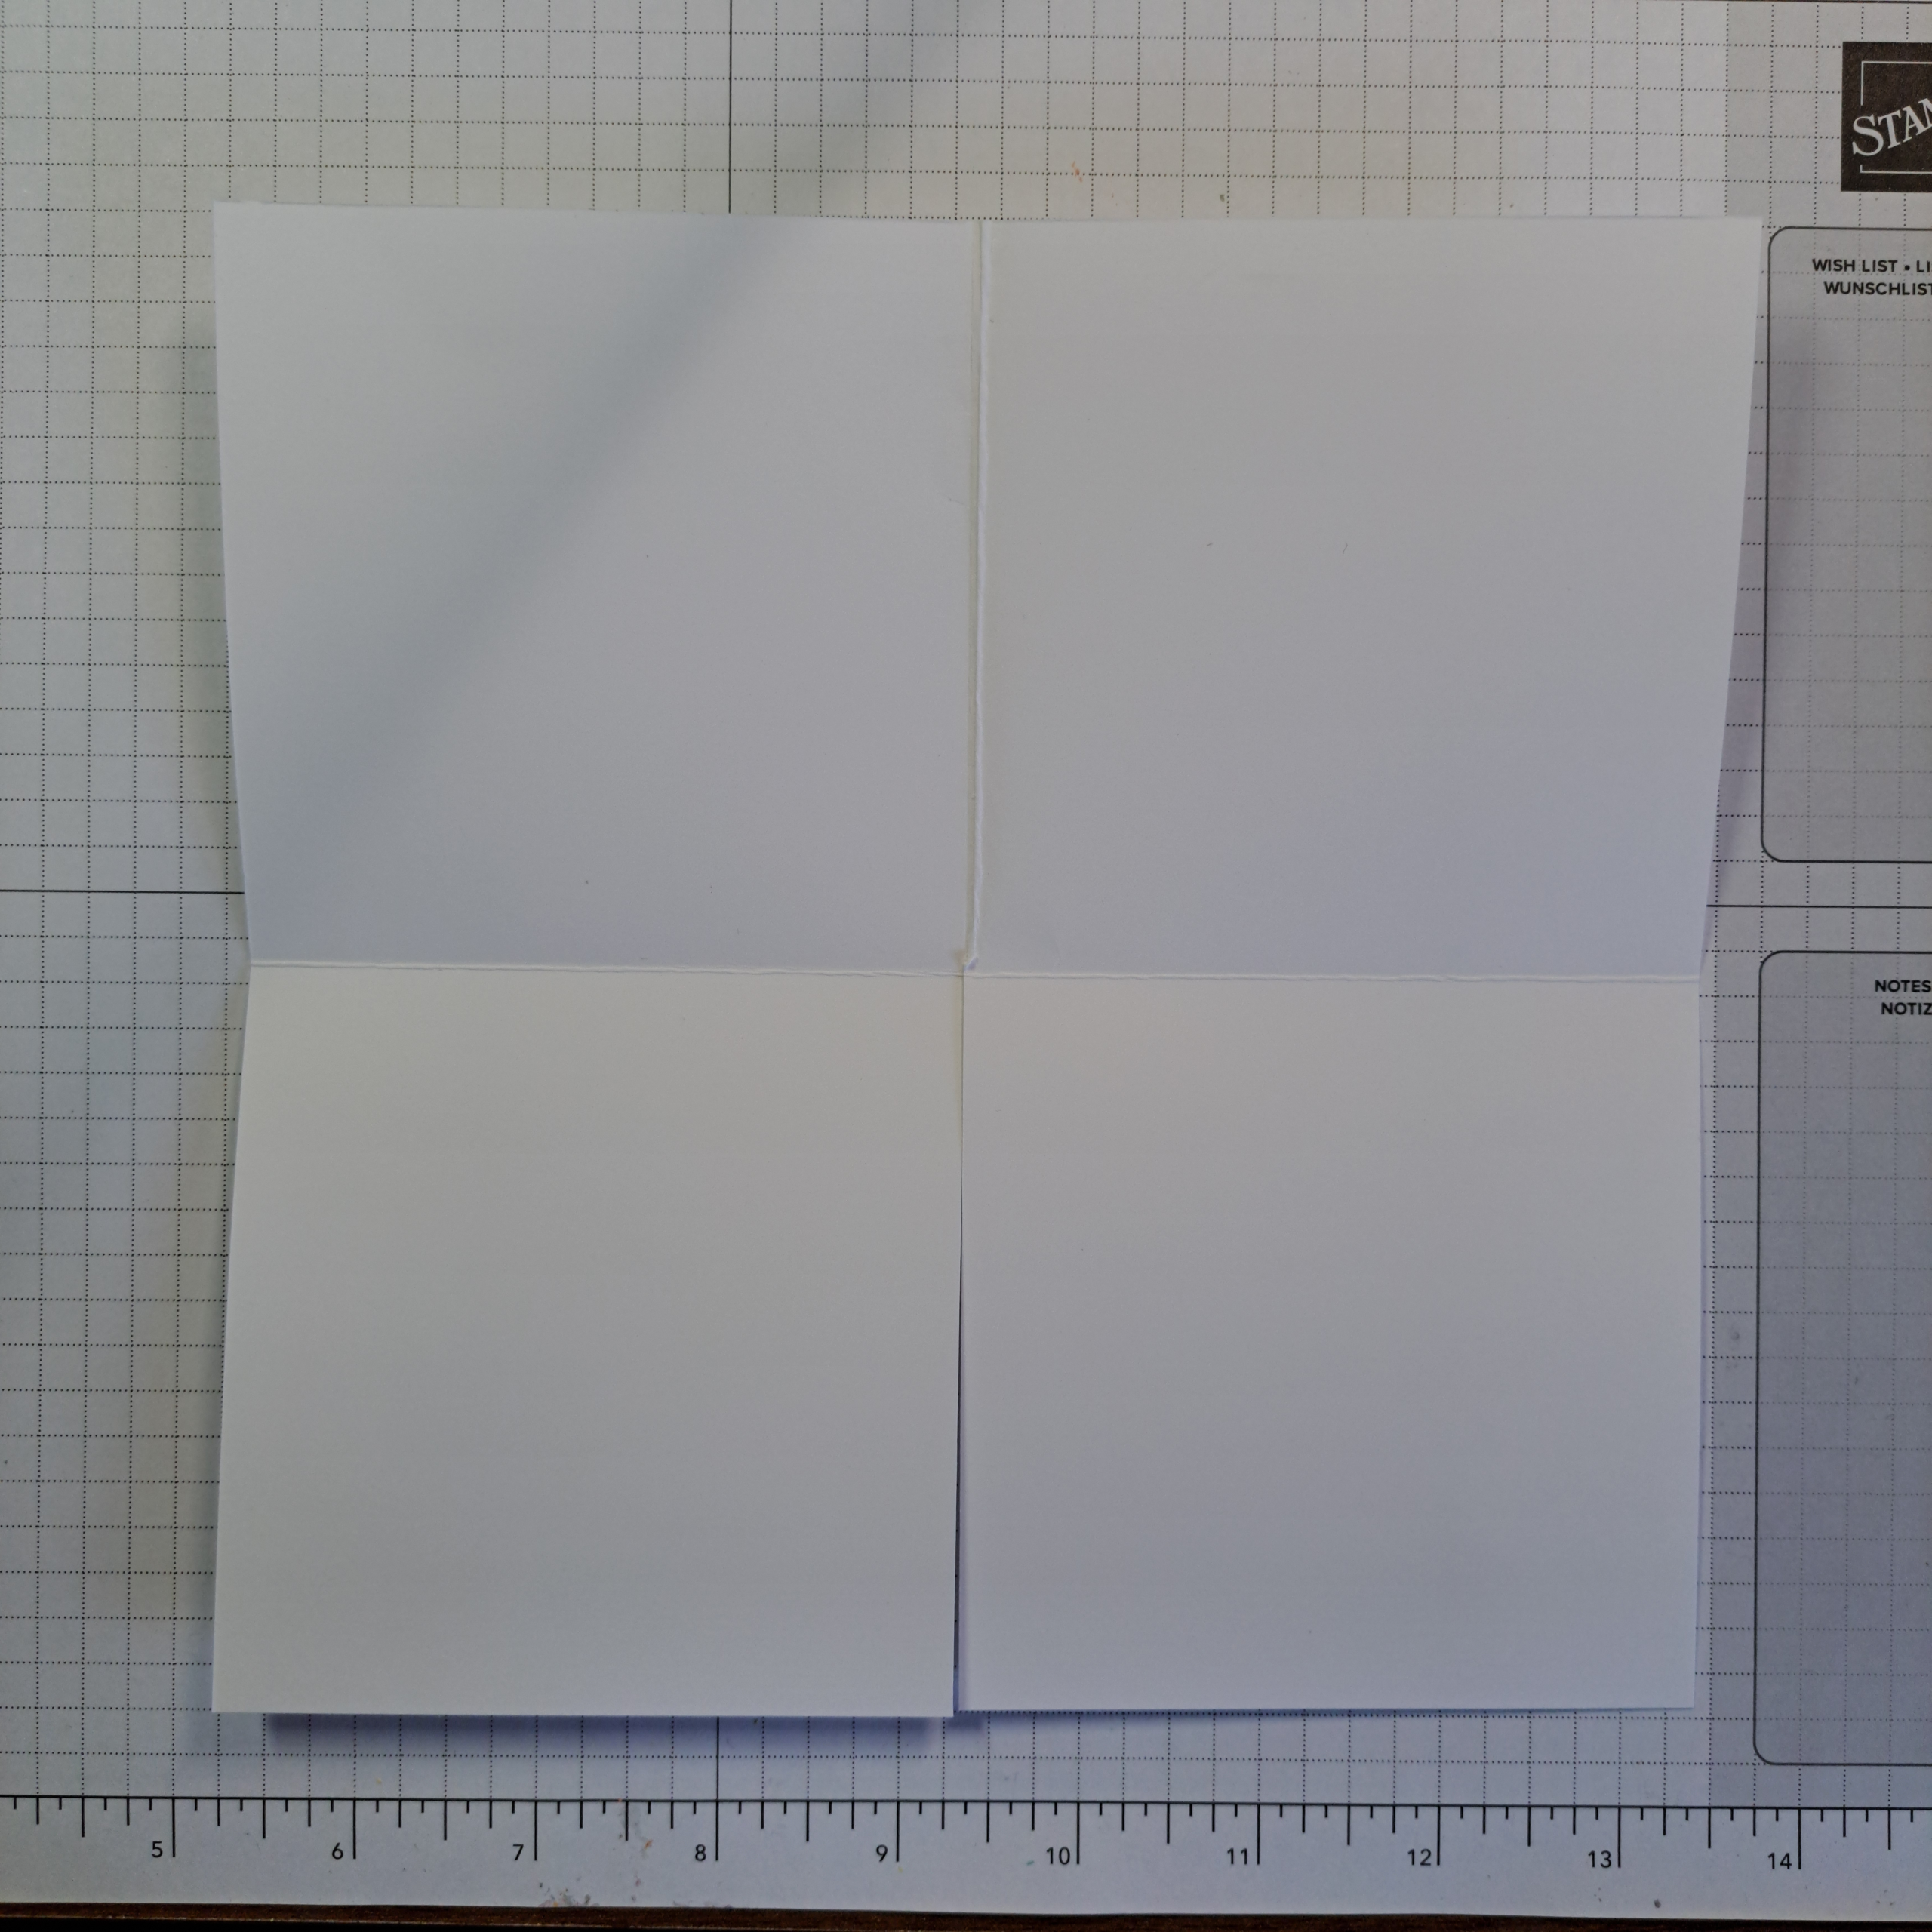
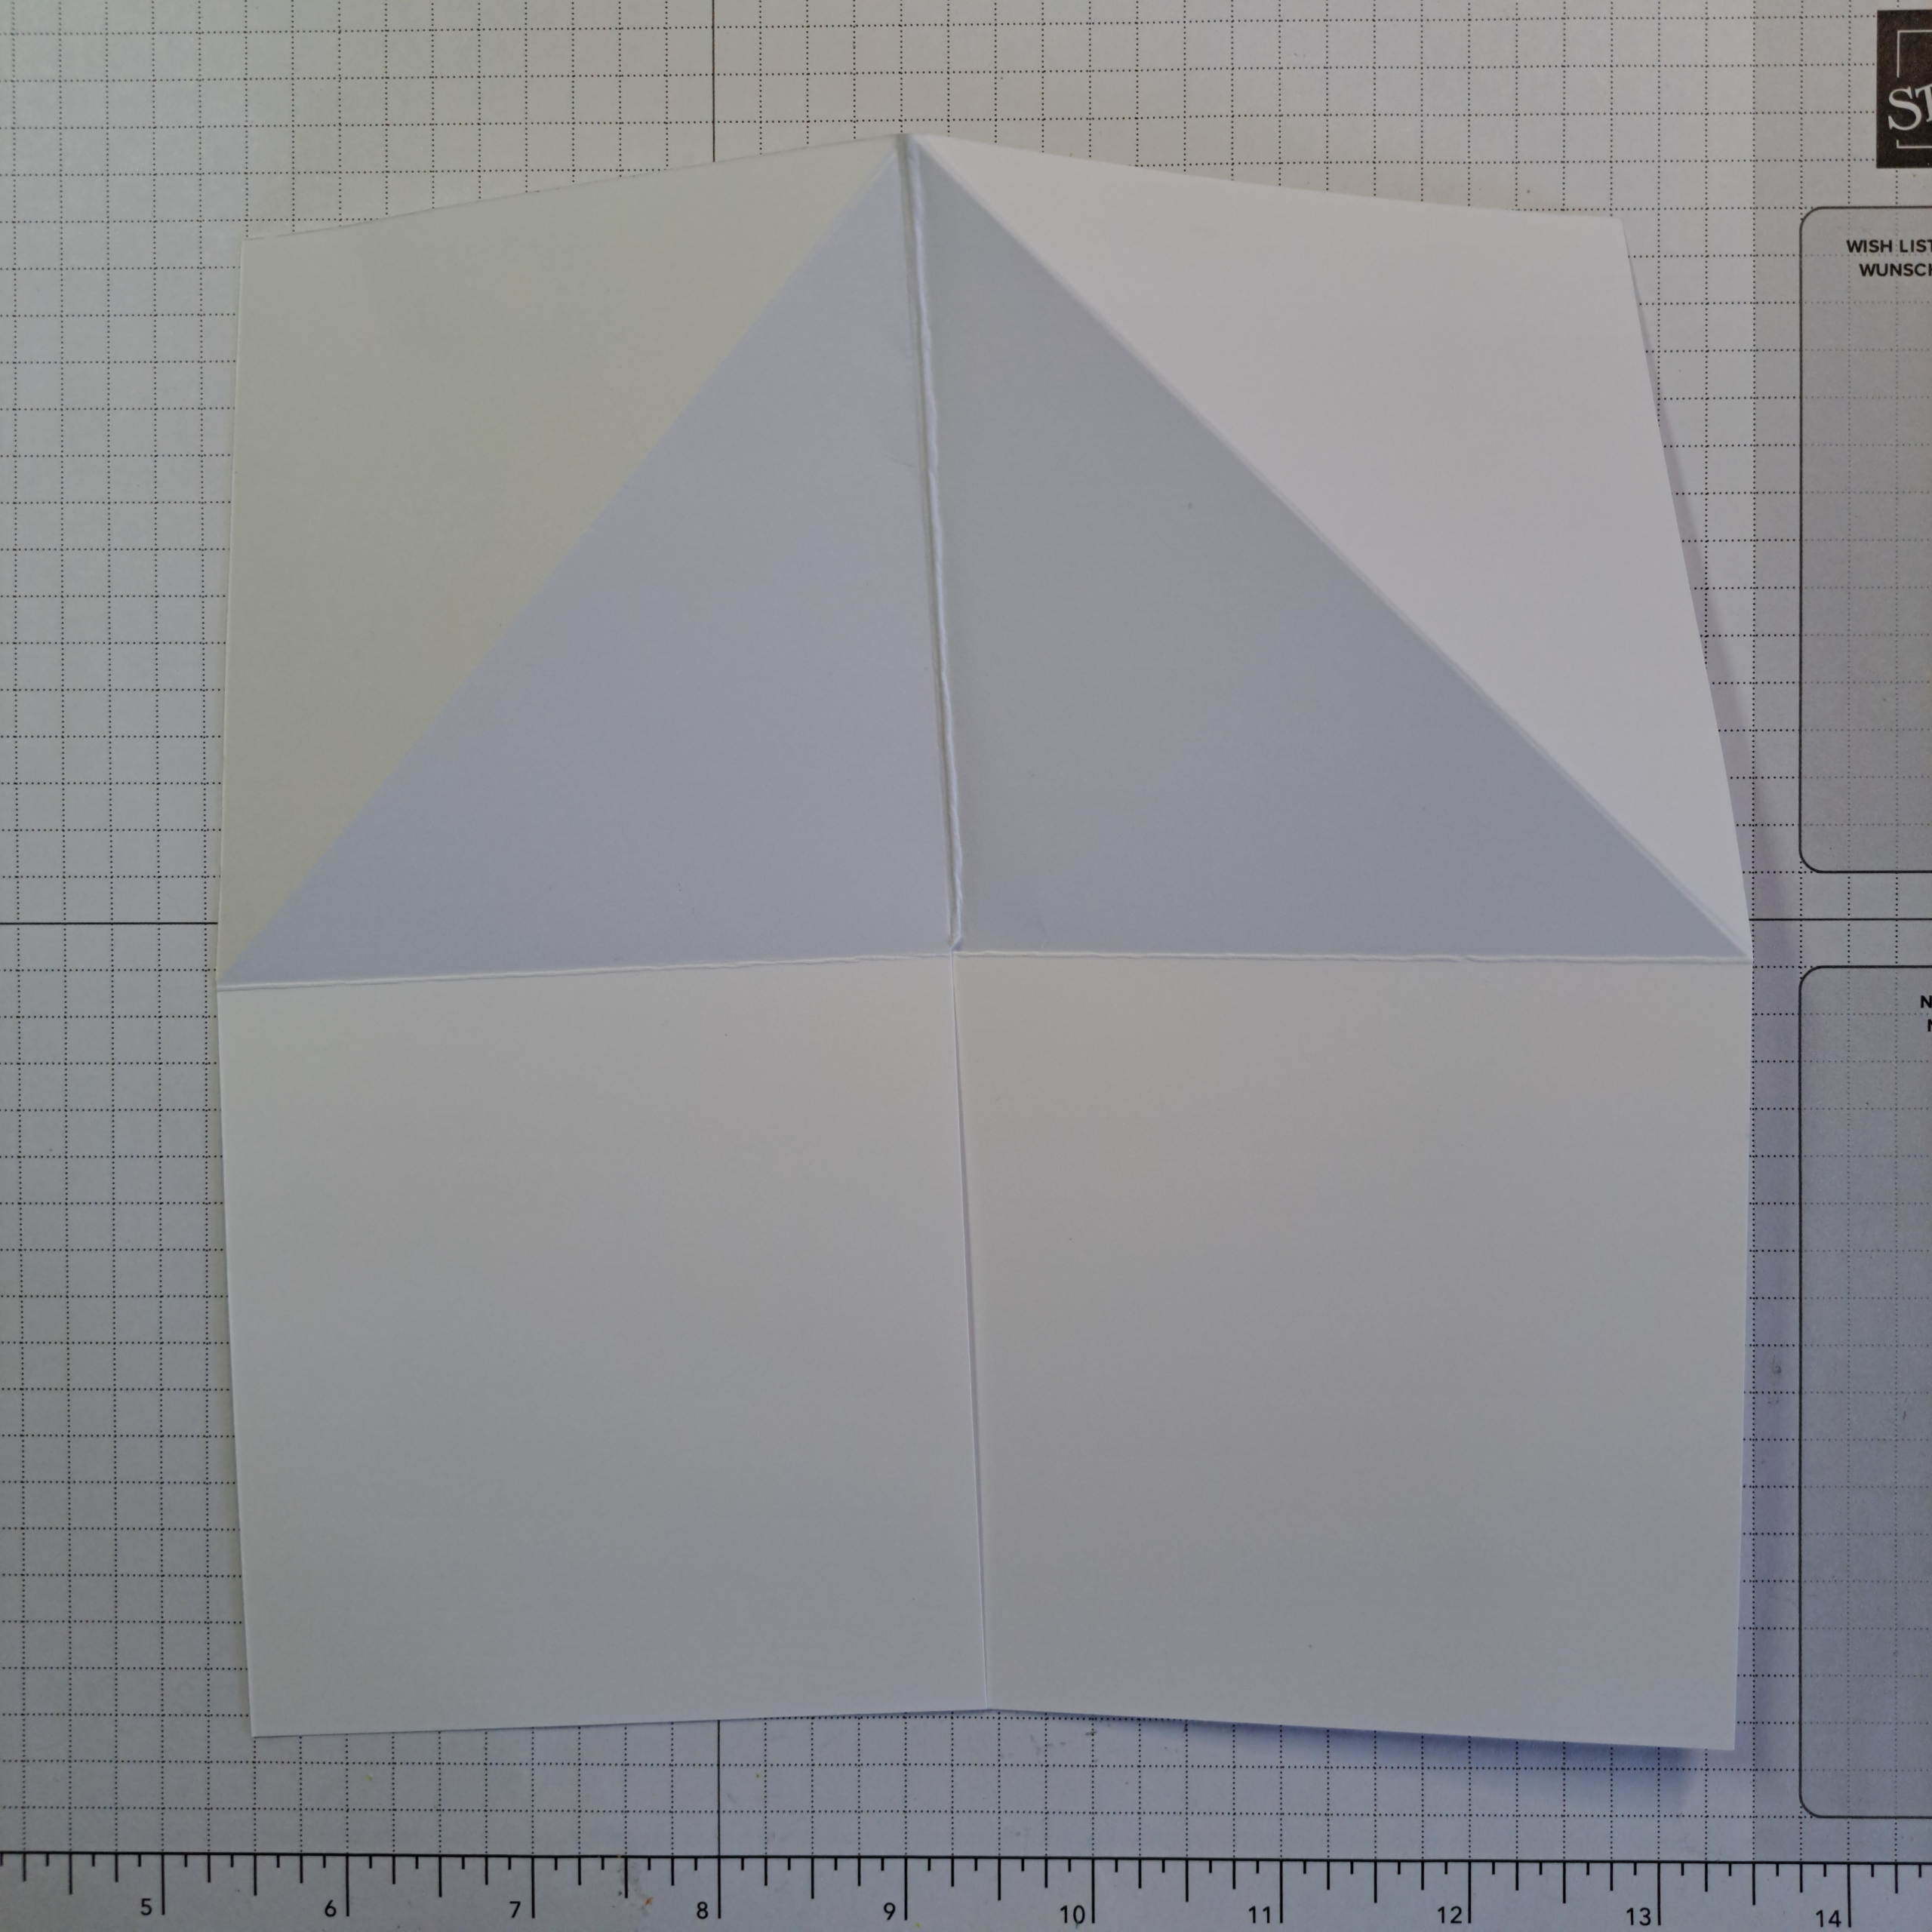
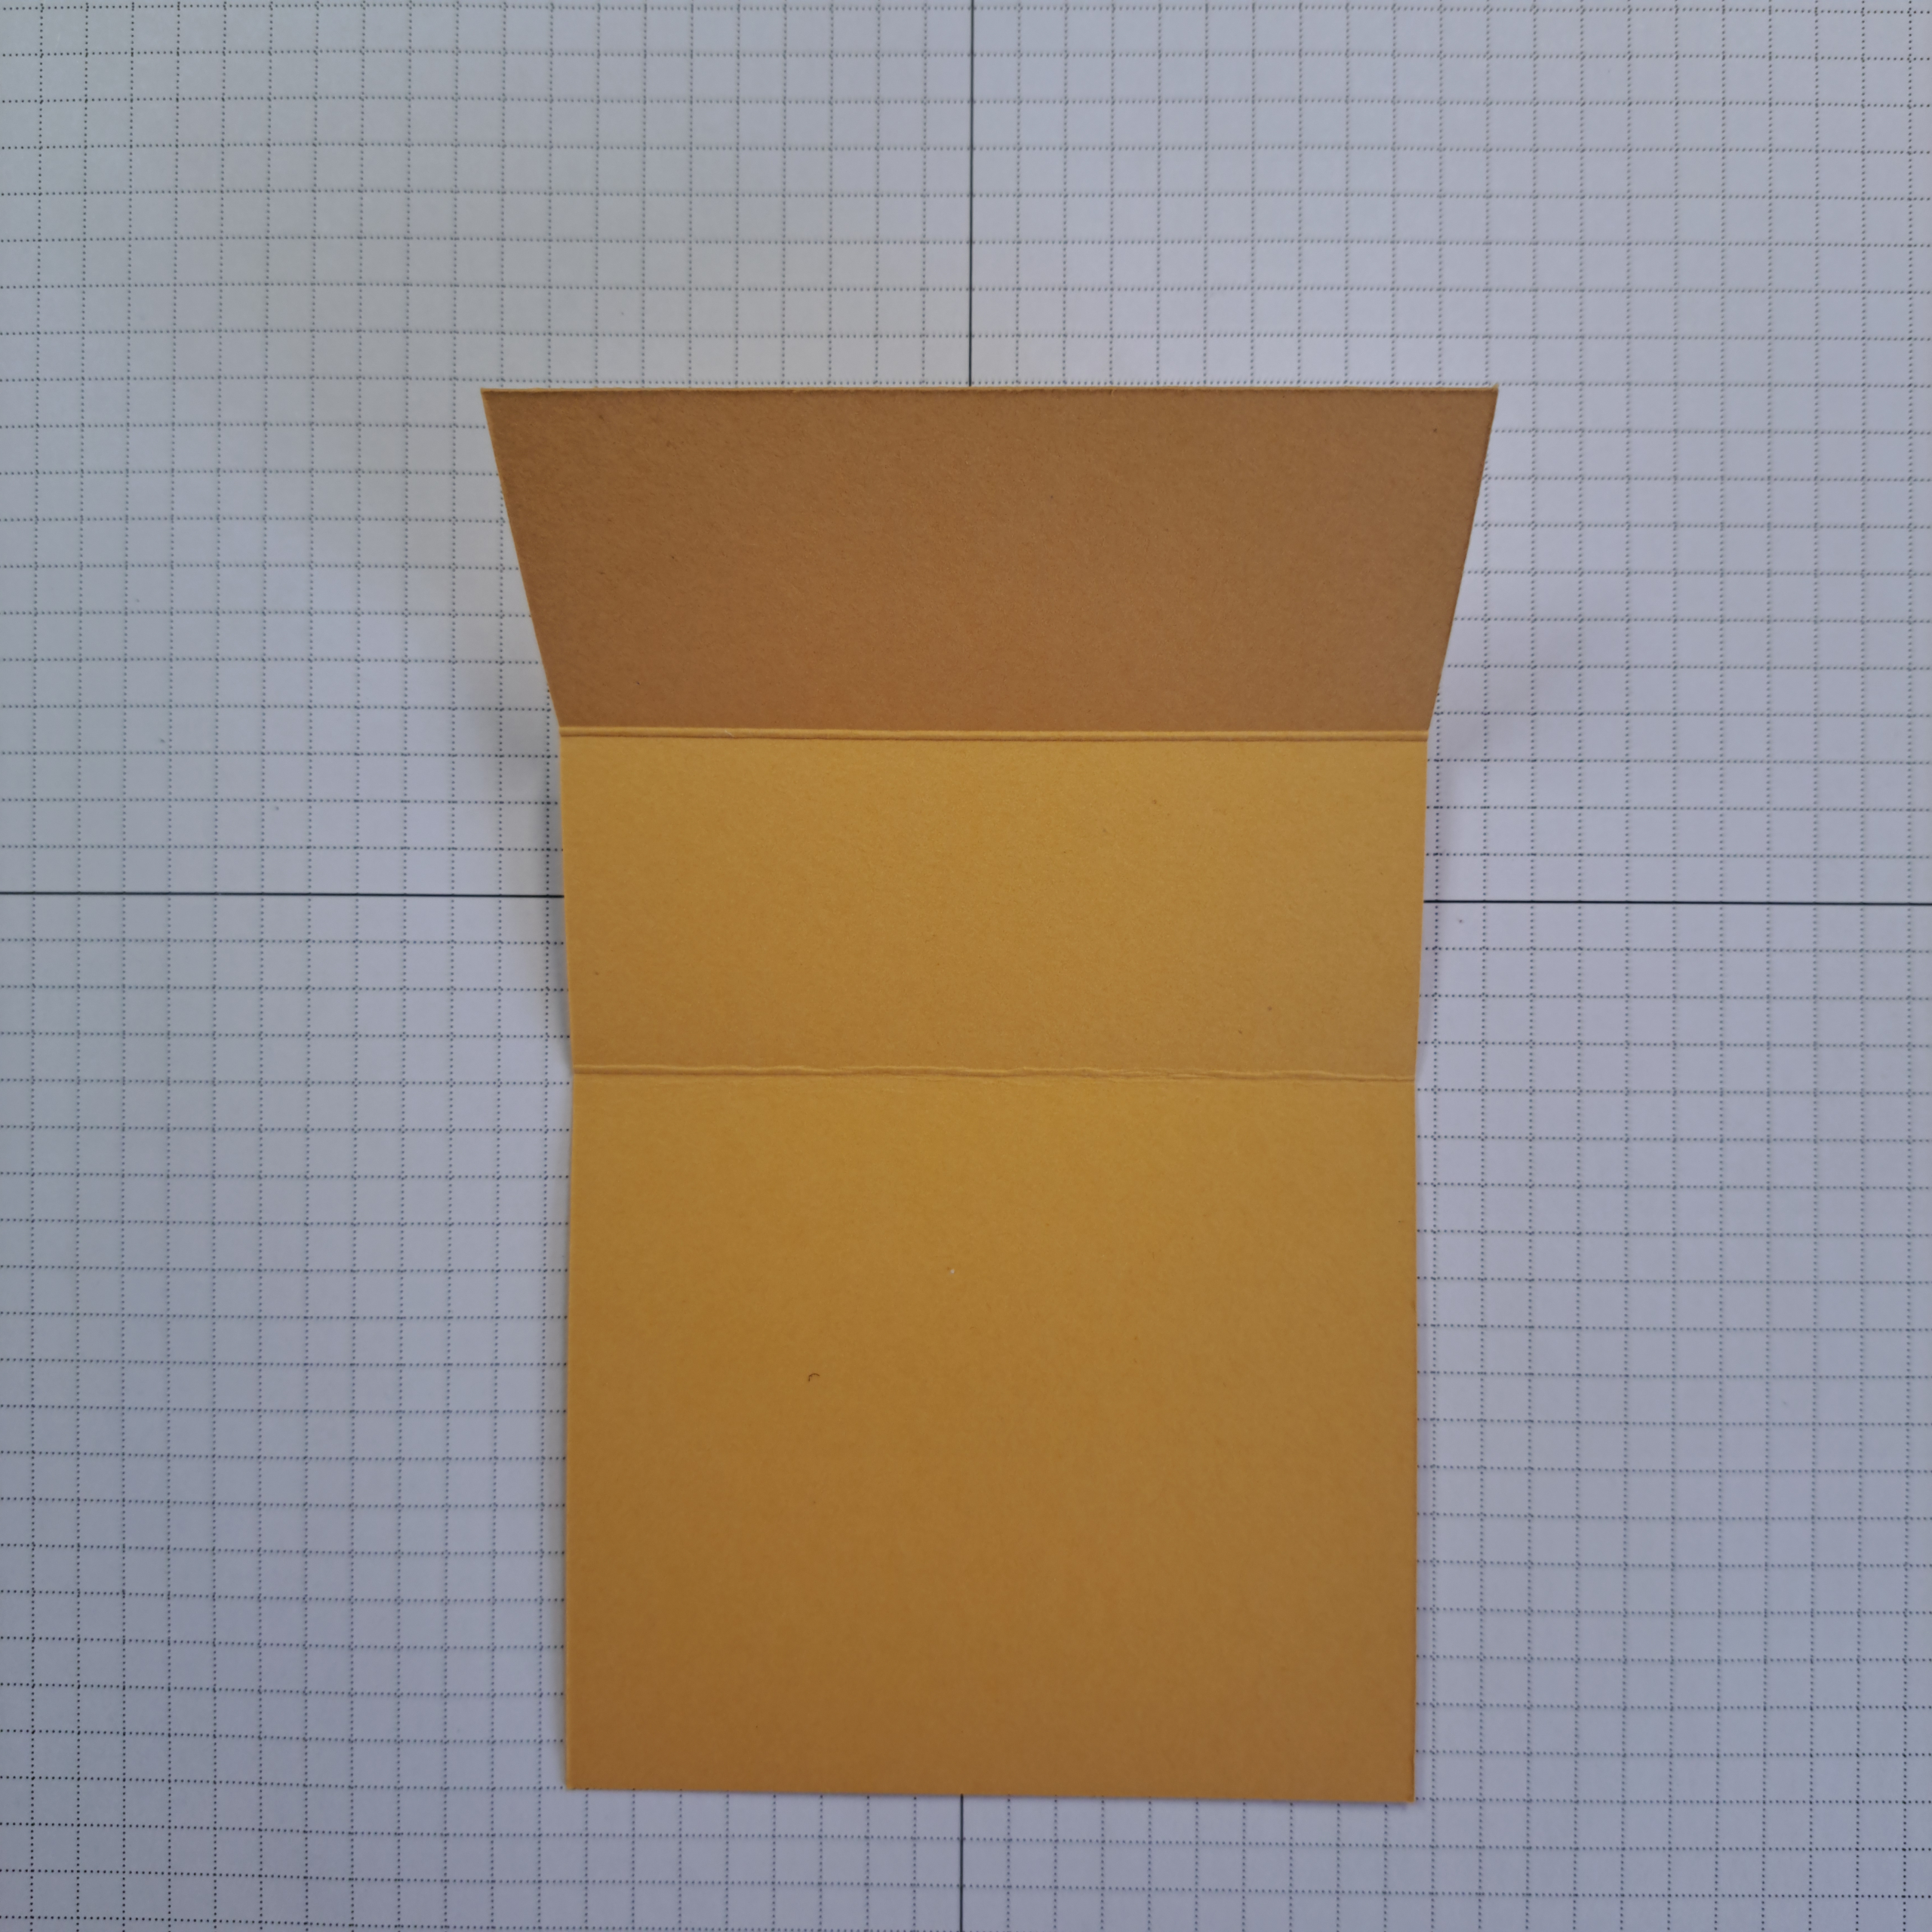
Cut a large square 20.4cm x 20.4cm (8″ x 8″) out of white card stock. Score this piece halfway across at 10.2cm (4″). Turn the card stock 90 degrees and score half way down to the previous score mark. Instead of continuing the score line to the bottom of the card stock, you will now switch to your cutting blade and cut the rest of the way down. (See photo.) Fold the lower flaps up and burnish well. Fold the card in half, with the flaps hanging at the bottom and burnish this fold.
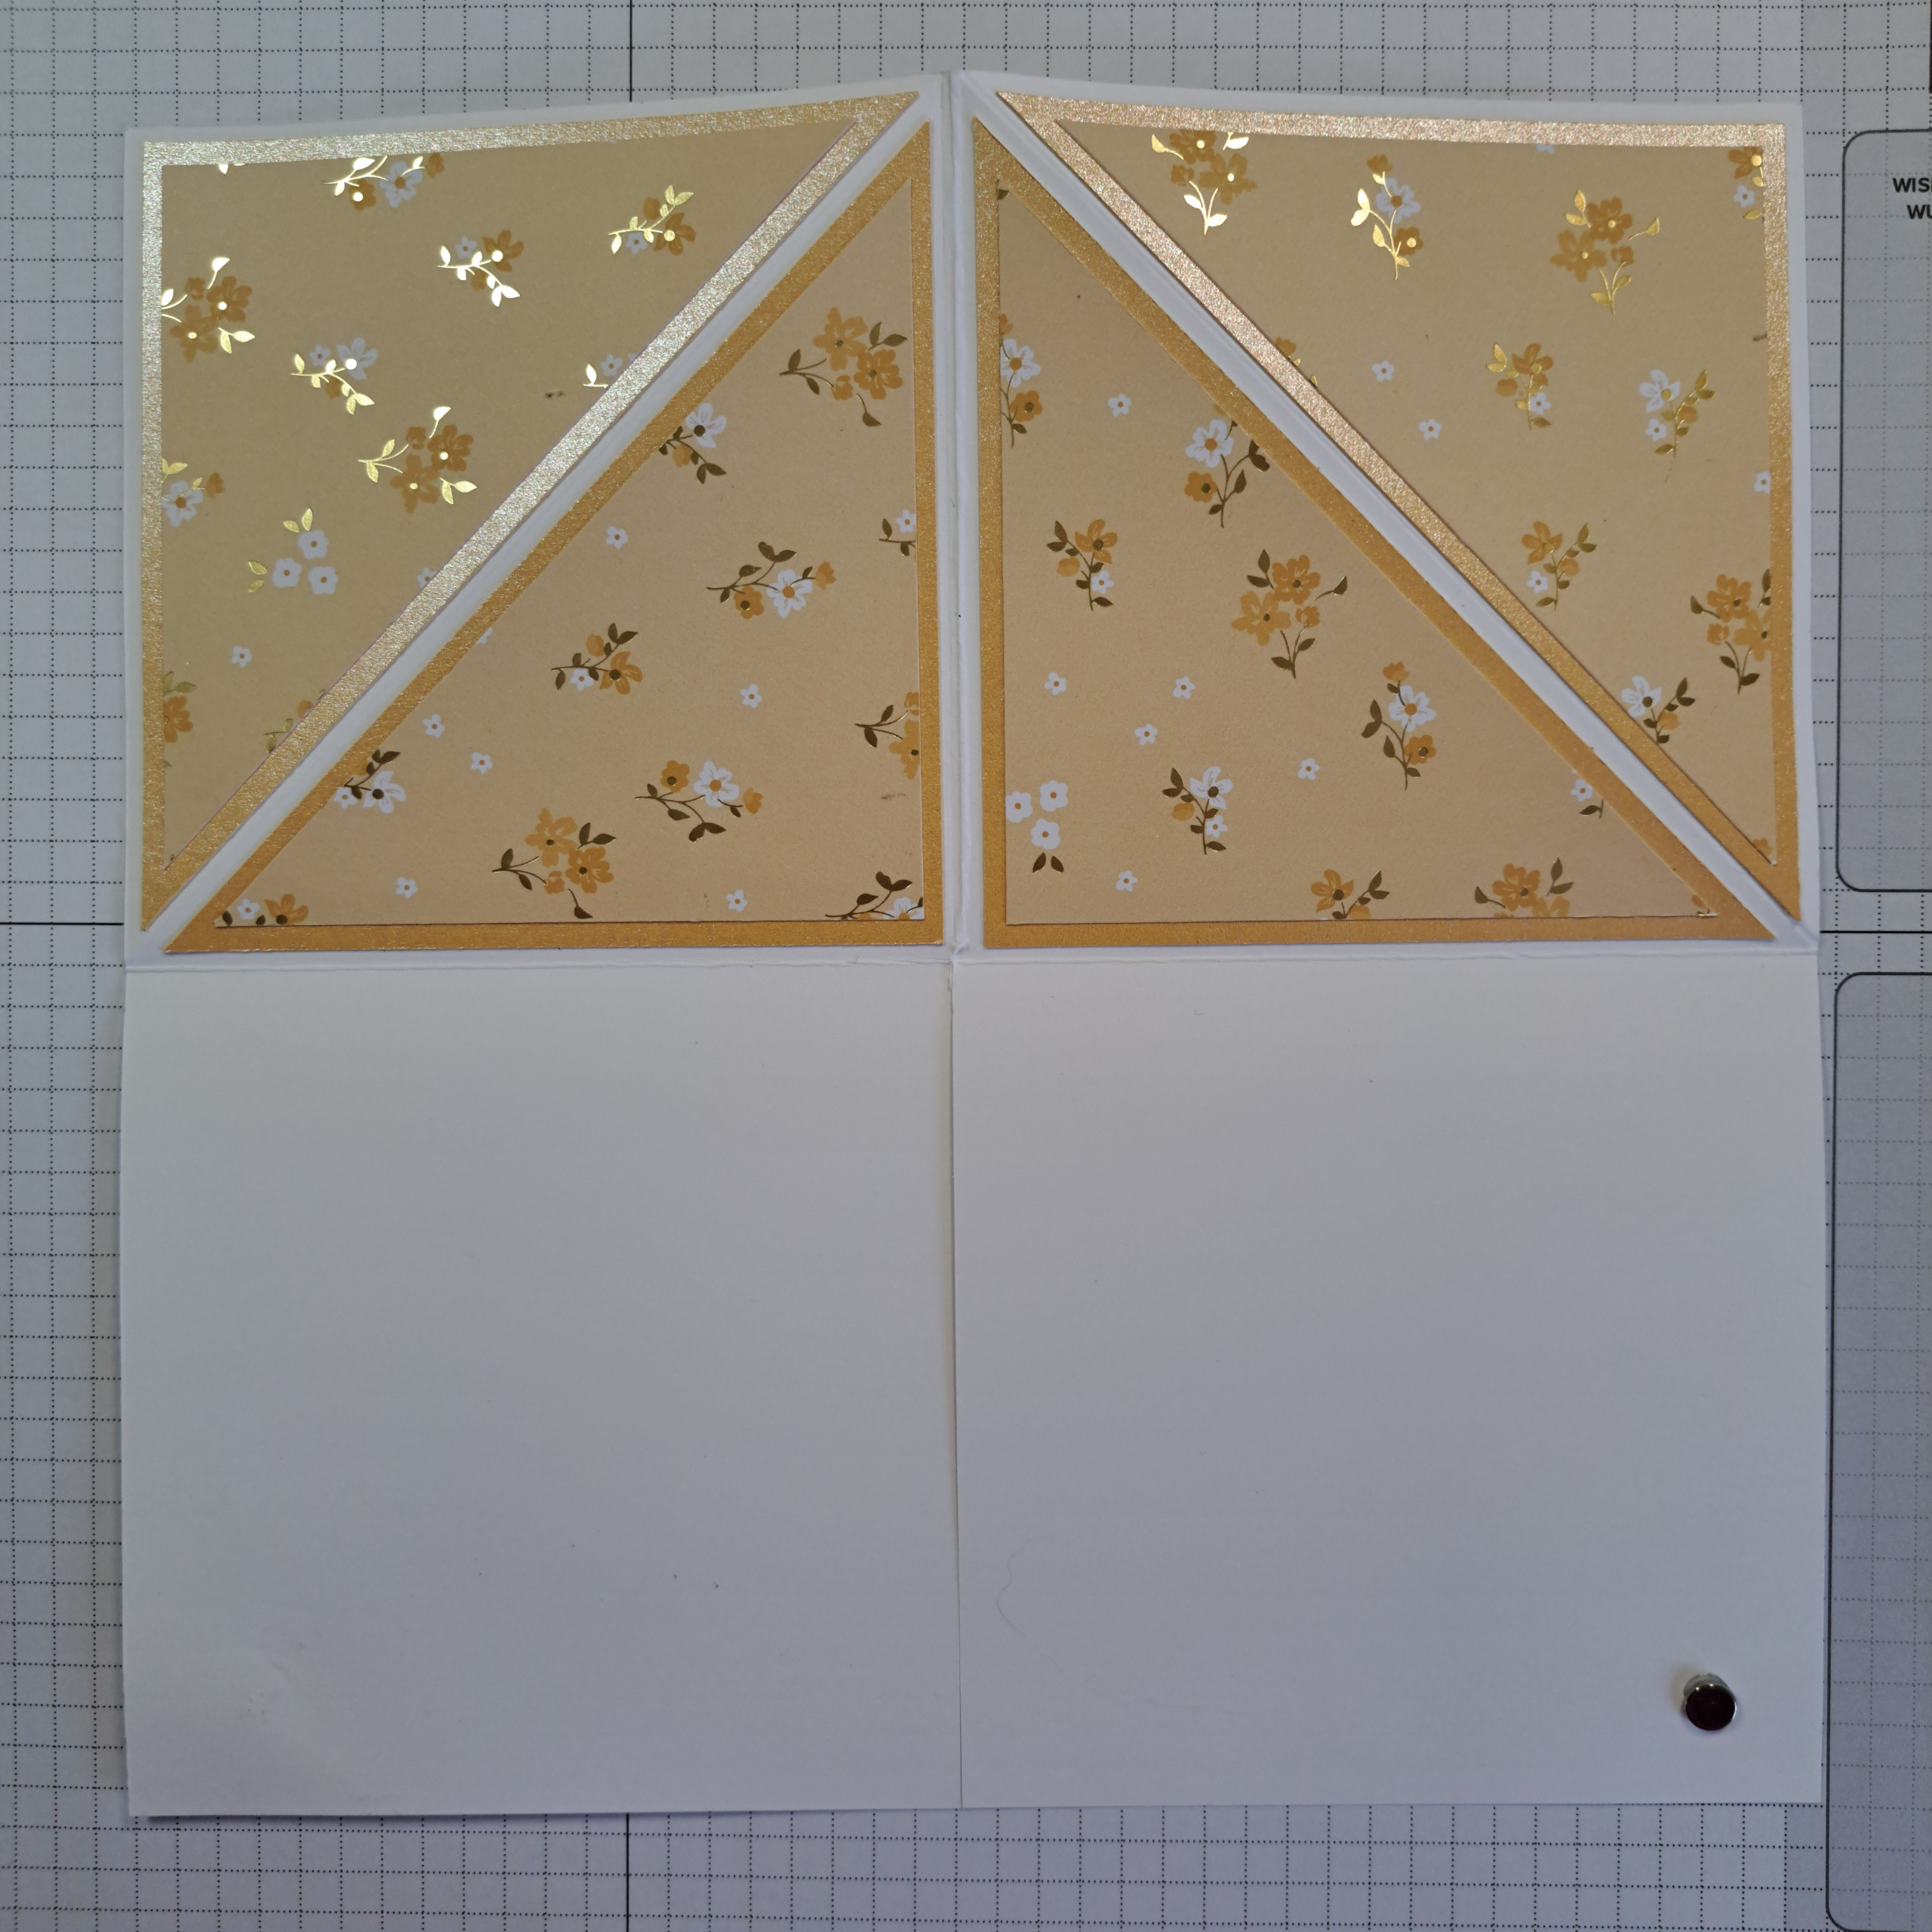
Unfold the card. On each of the upper two quadrants, score a diagonal line from the top of the center score line down to the outside of the card stock, ending at the horizontal score line. (See photo below left.)
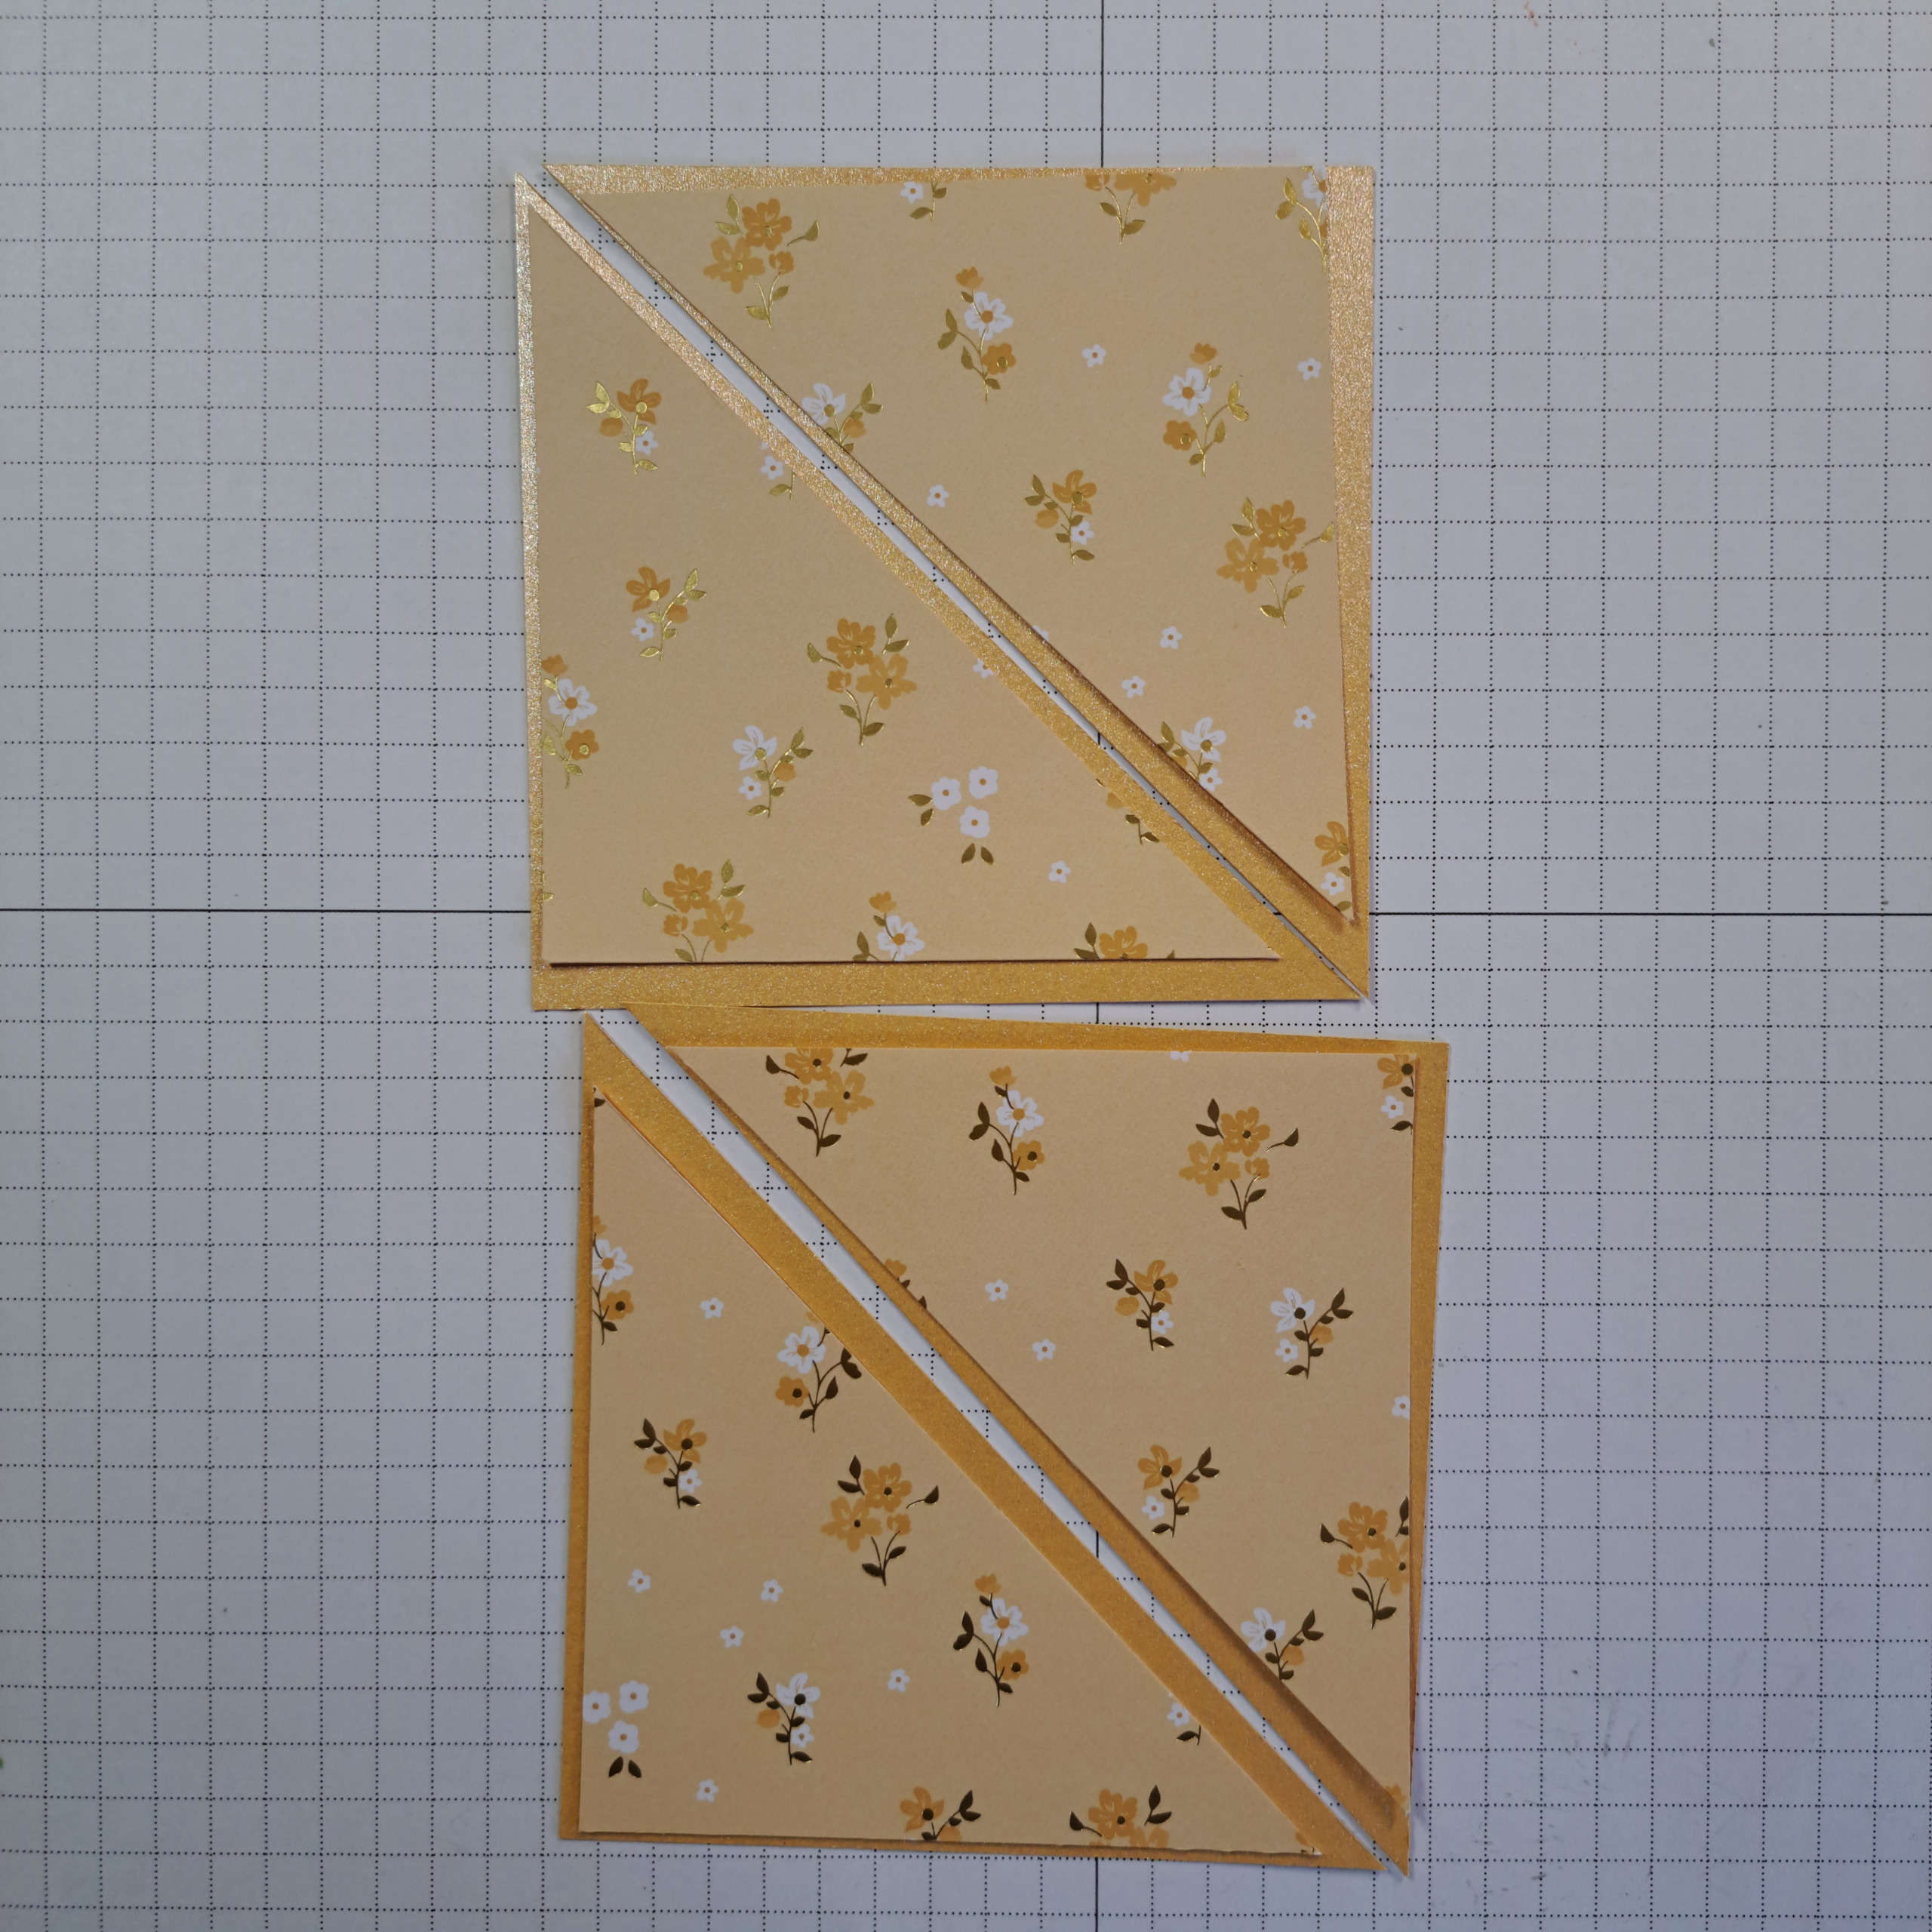
Cut two squares from the Pearlized Specialty Paper, 9.5 cm x 9.5cm (3-3/4″ x 3-3/4″). Cut each of these squares in half diagonally.
Using a matching Designer Series Paper cut two squares 8.5cm x 8.5cm (3-1/2″ x 3-1/2″). Cut each of these squares in half diagonally.
Adhere the Designer Series Paper triangles over the Specialty Paper triangles leaving as narrow border of the Specialty Paper showing on all sides.
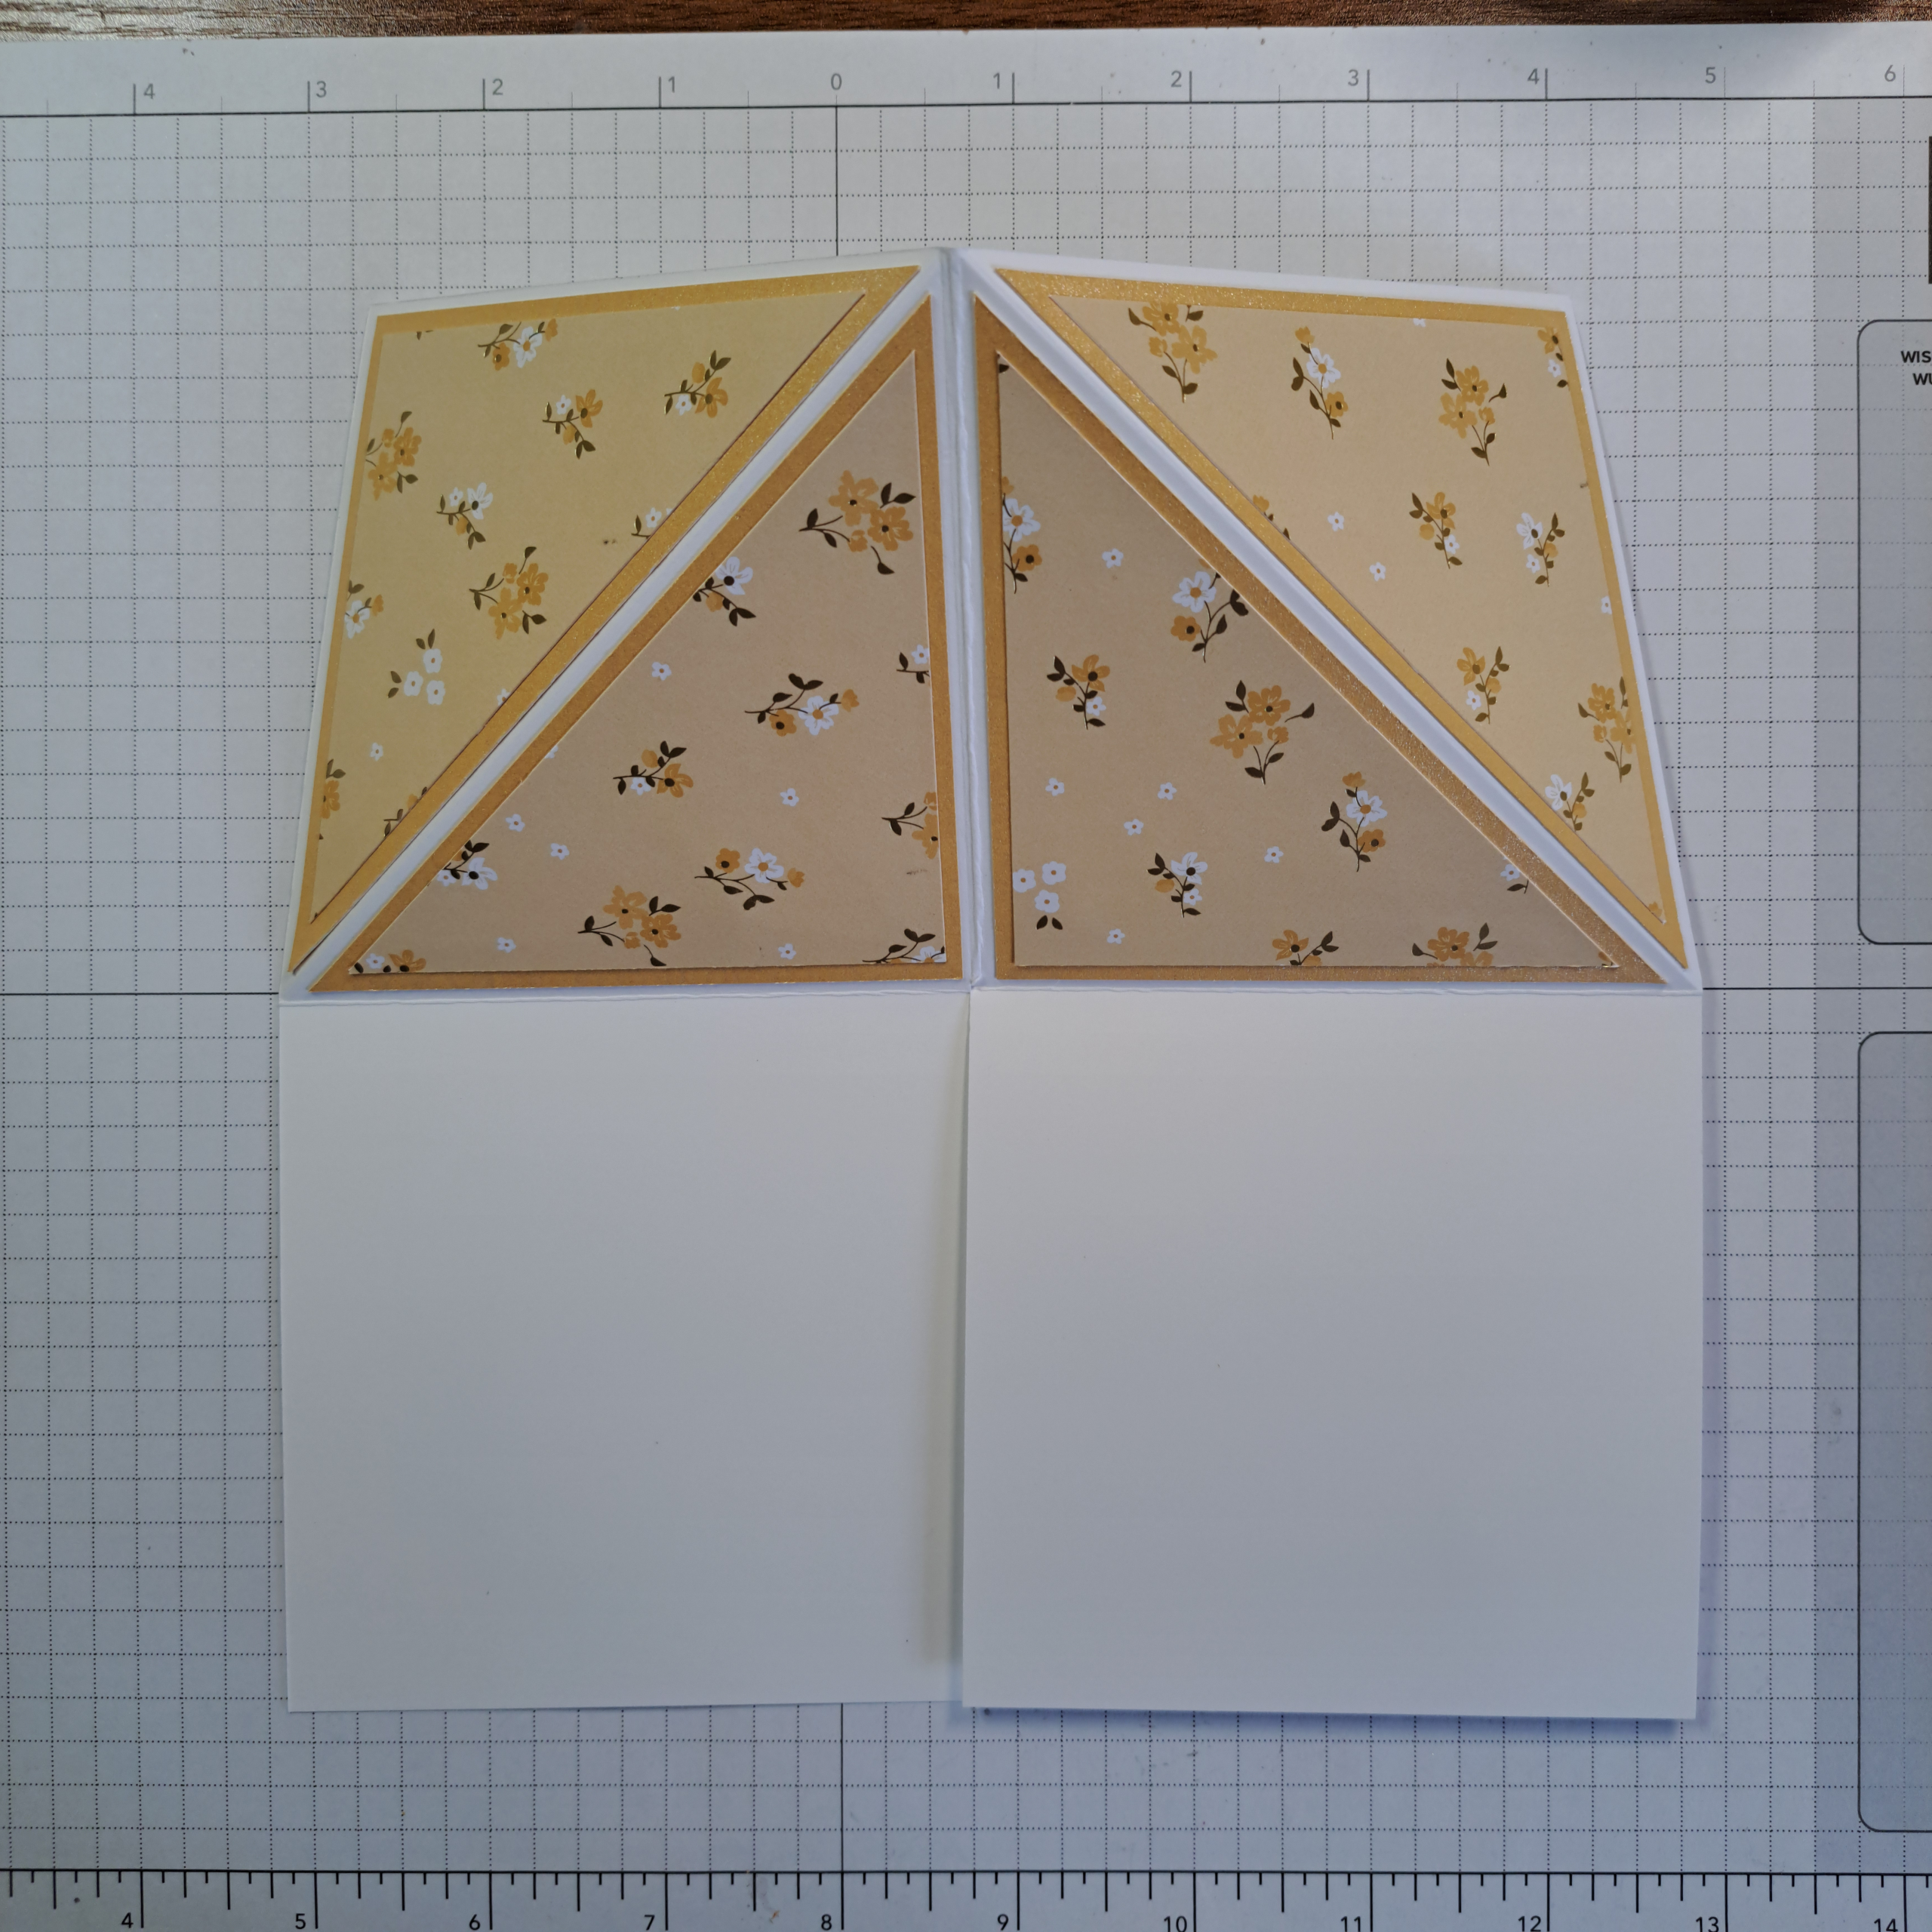
Glue these triangles to the upper two quadrants of the card base as shown in the photo below right.
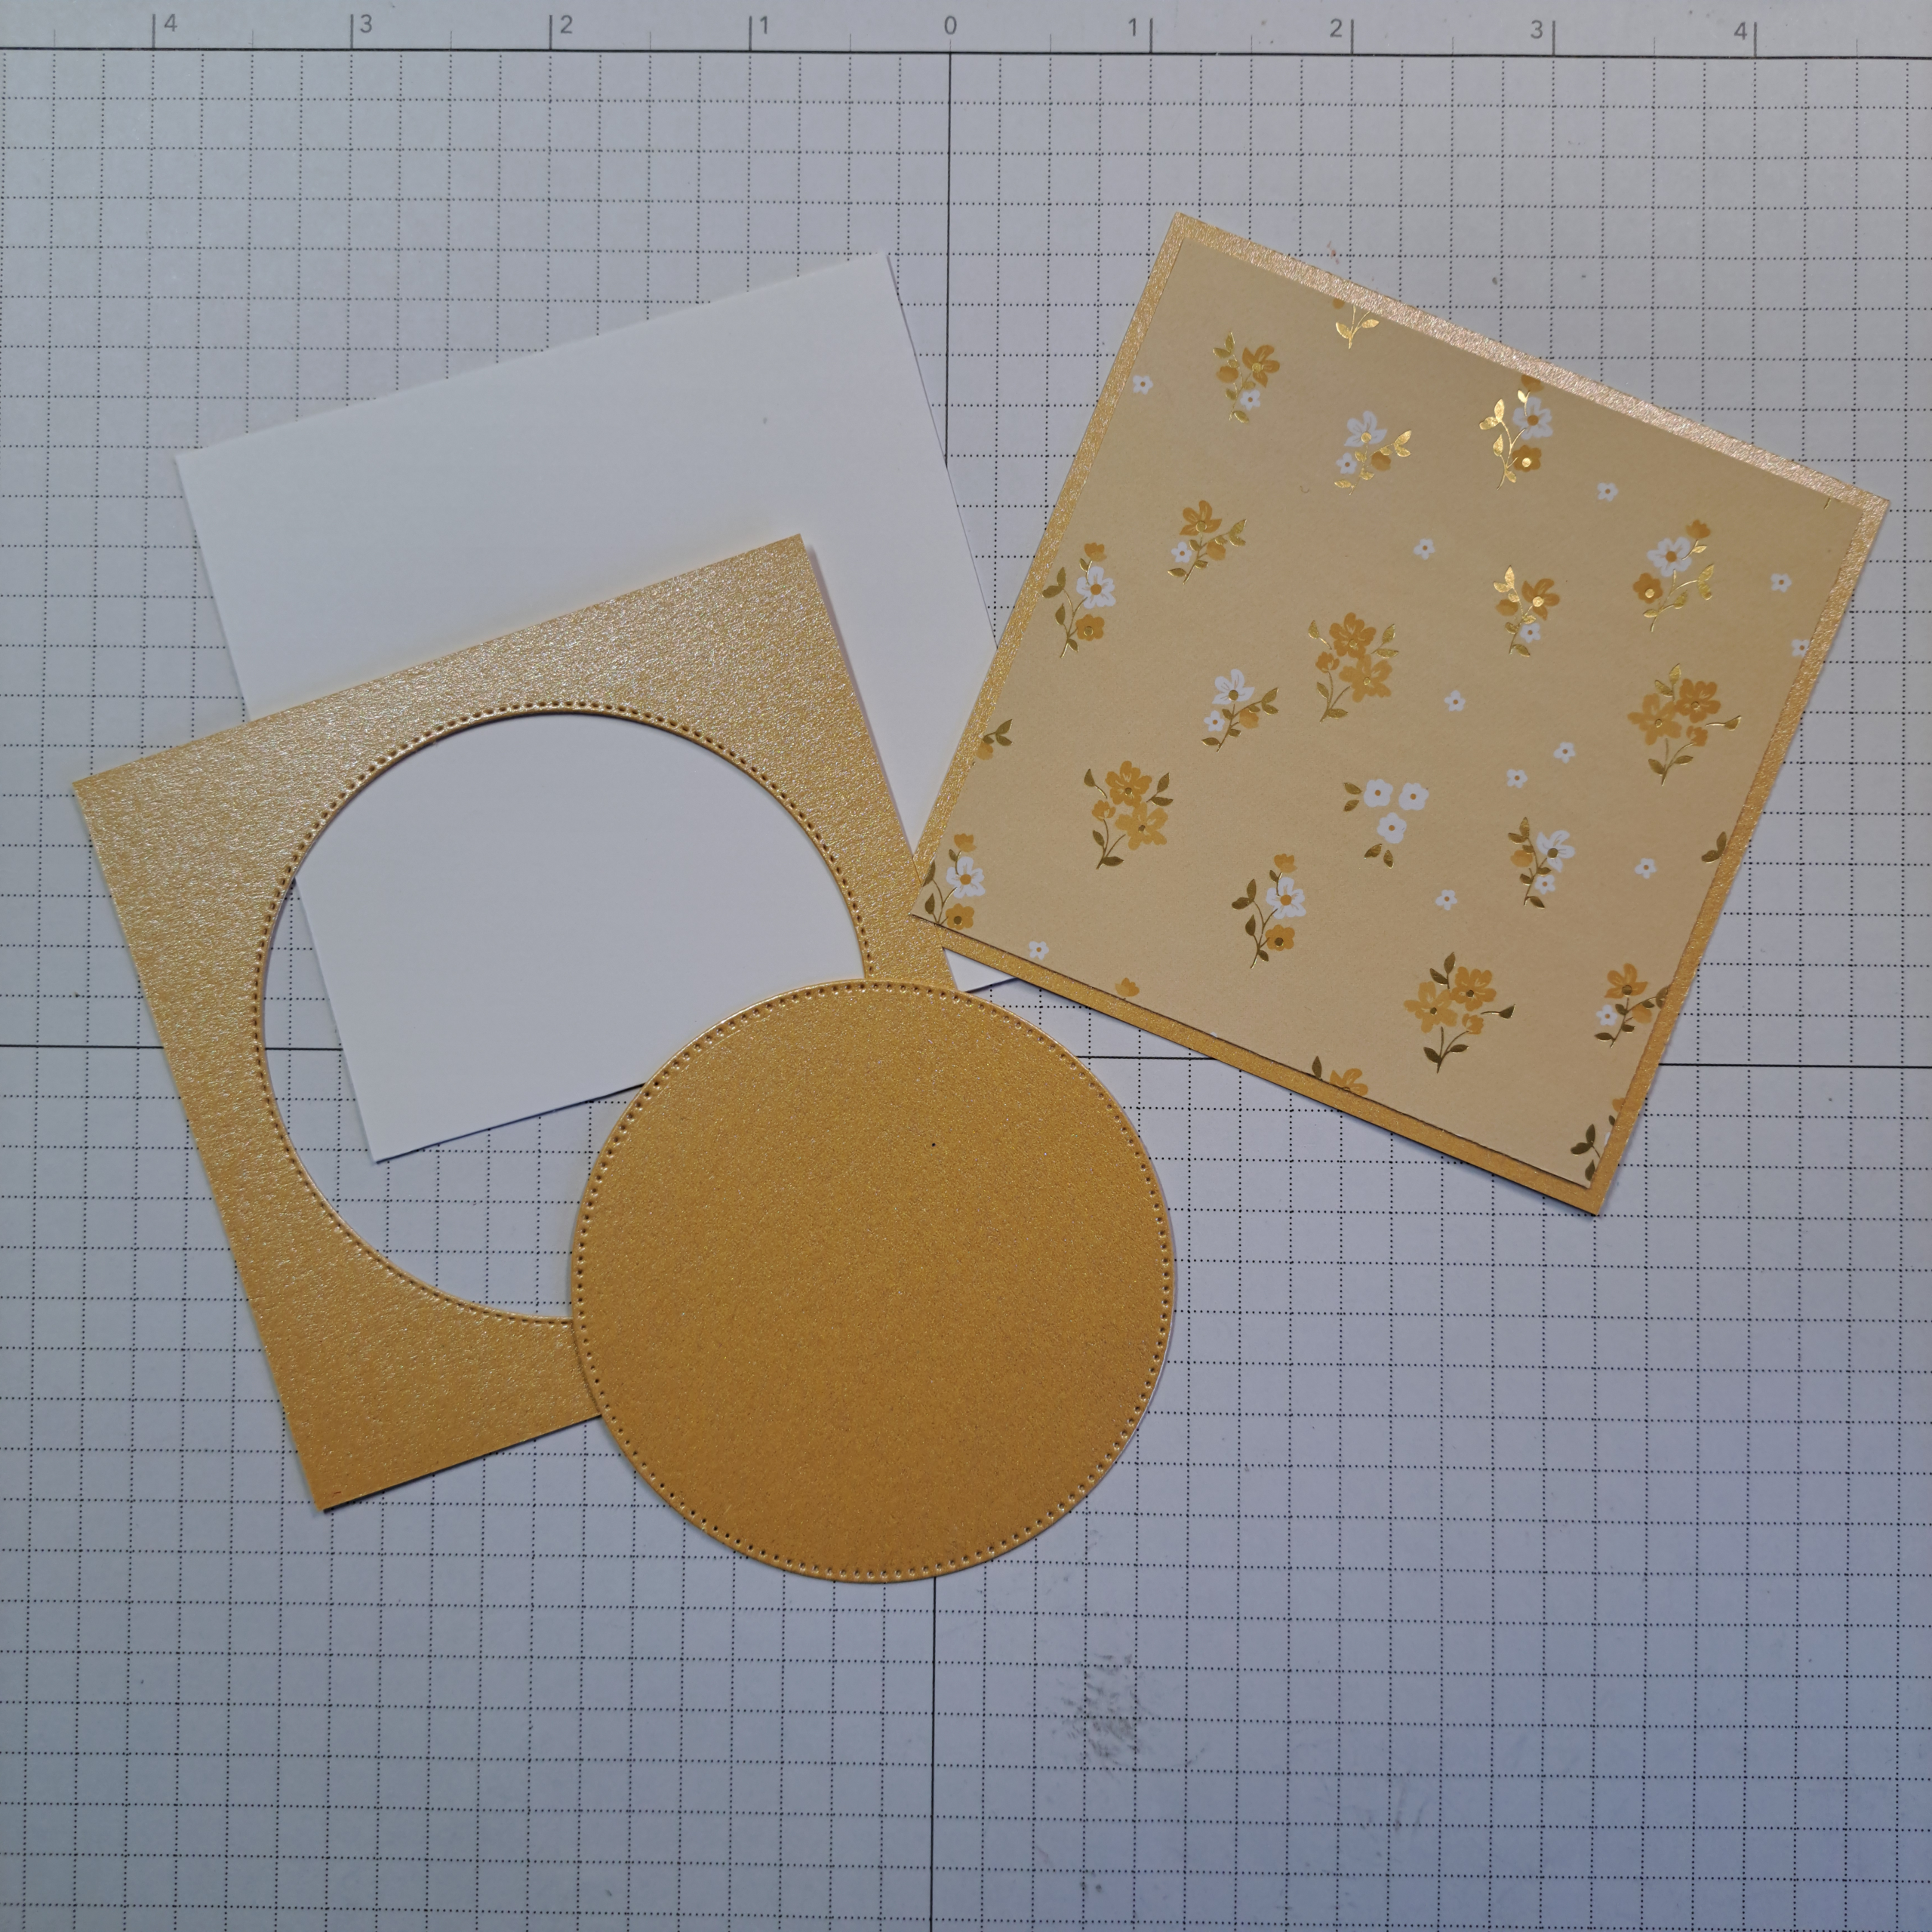
For the bottom half of the card cut two squares, 9.7cm x 9.7cm (3-3/4″ x 3-3/4″) from the Pearlized Specialty Paper. From the center of one of the squares die cut the largest circle from the Stylish Shapes (the circle diameter is 7.6cm or 3″). Set this circle aside to be used in the next stage. (You can die cut this circle from a separate piece of card stock but since the specialty papers are a bit more expensive I followed Dawn’s original direction to make use of the blank space behind a layer.)
To create a space for a secondary greeting or to write a message, cut a piece of white card stock to 9.2cm x 9.2cm (3-1/2″ x 3-1/2″). Layer this piece over the Specialty Paper piece you die cut. The cut out space will not show. Just be sure that there is a nice even narrow border of the Specialty Paper showing on all sides of the square.
For the remaining rectangle (to be used in the bottom right quadrant) cut a layering piece of the Designer Series Paper to 9.2cm x 9.2cm (3-1/2″ x 3-1/2″). Adhere this piece over the Pearlized Specialty paper rectangle. And as usual leave an even border of the Pearlized Specialty paper showing.
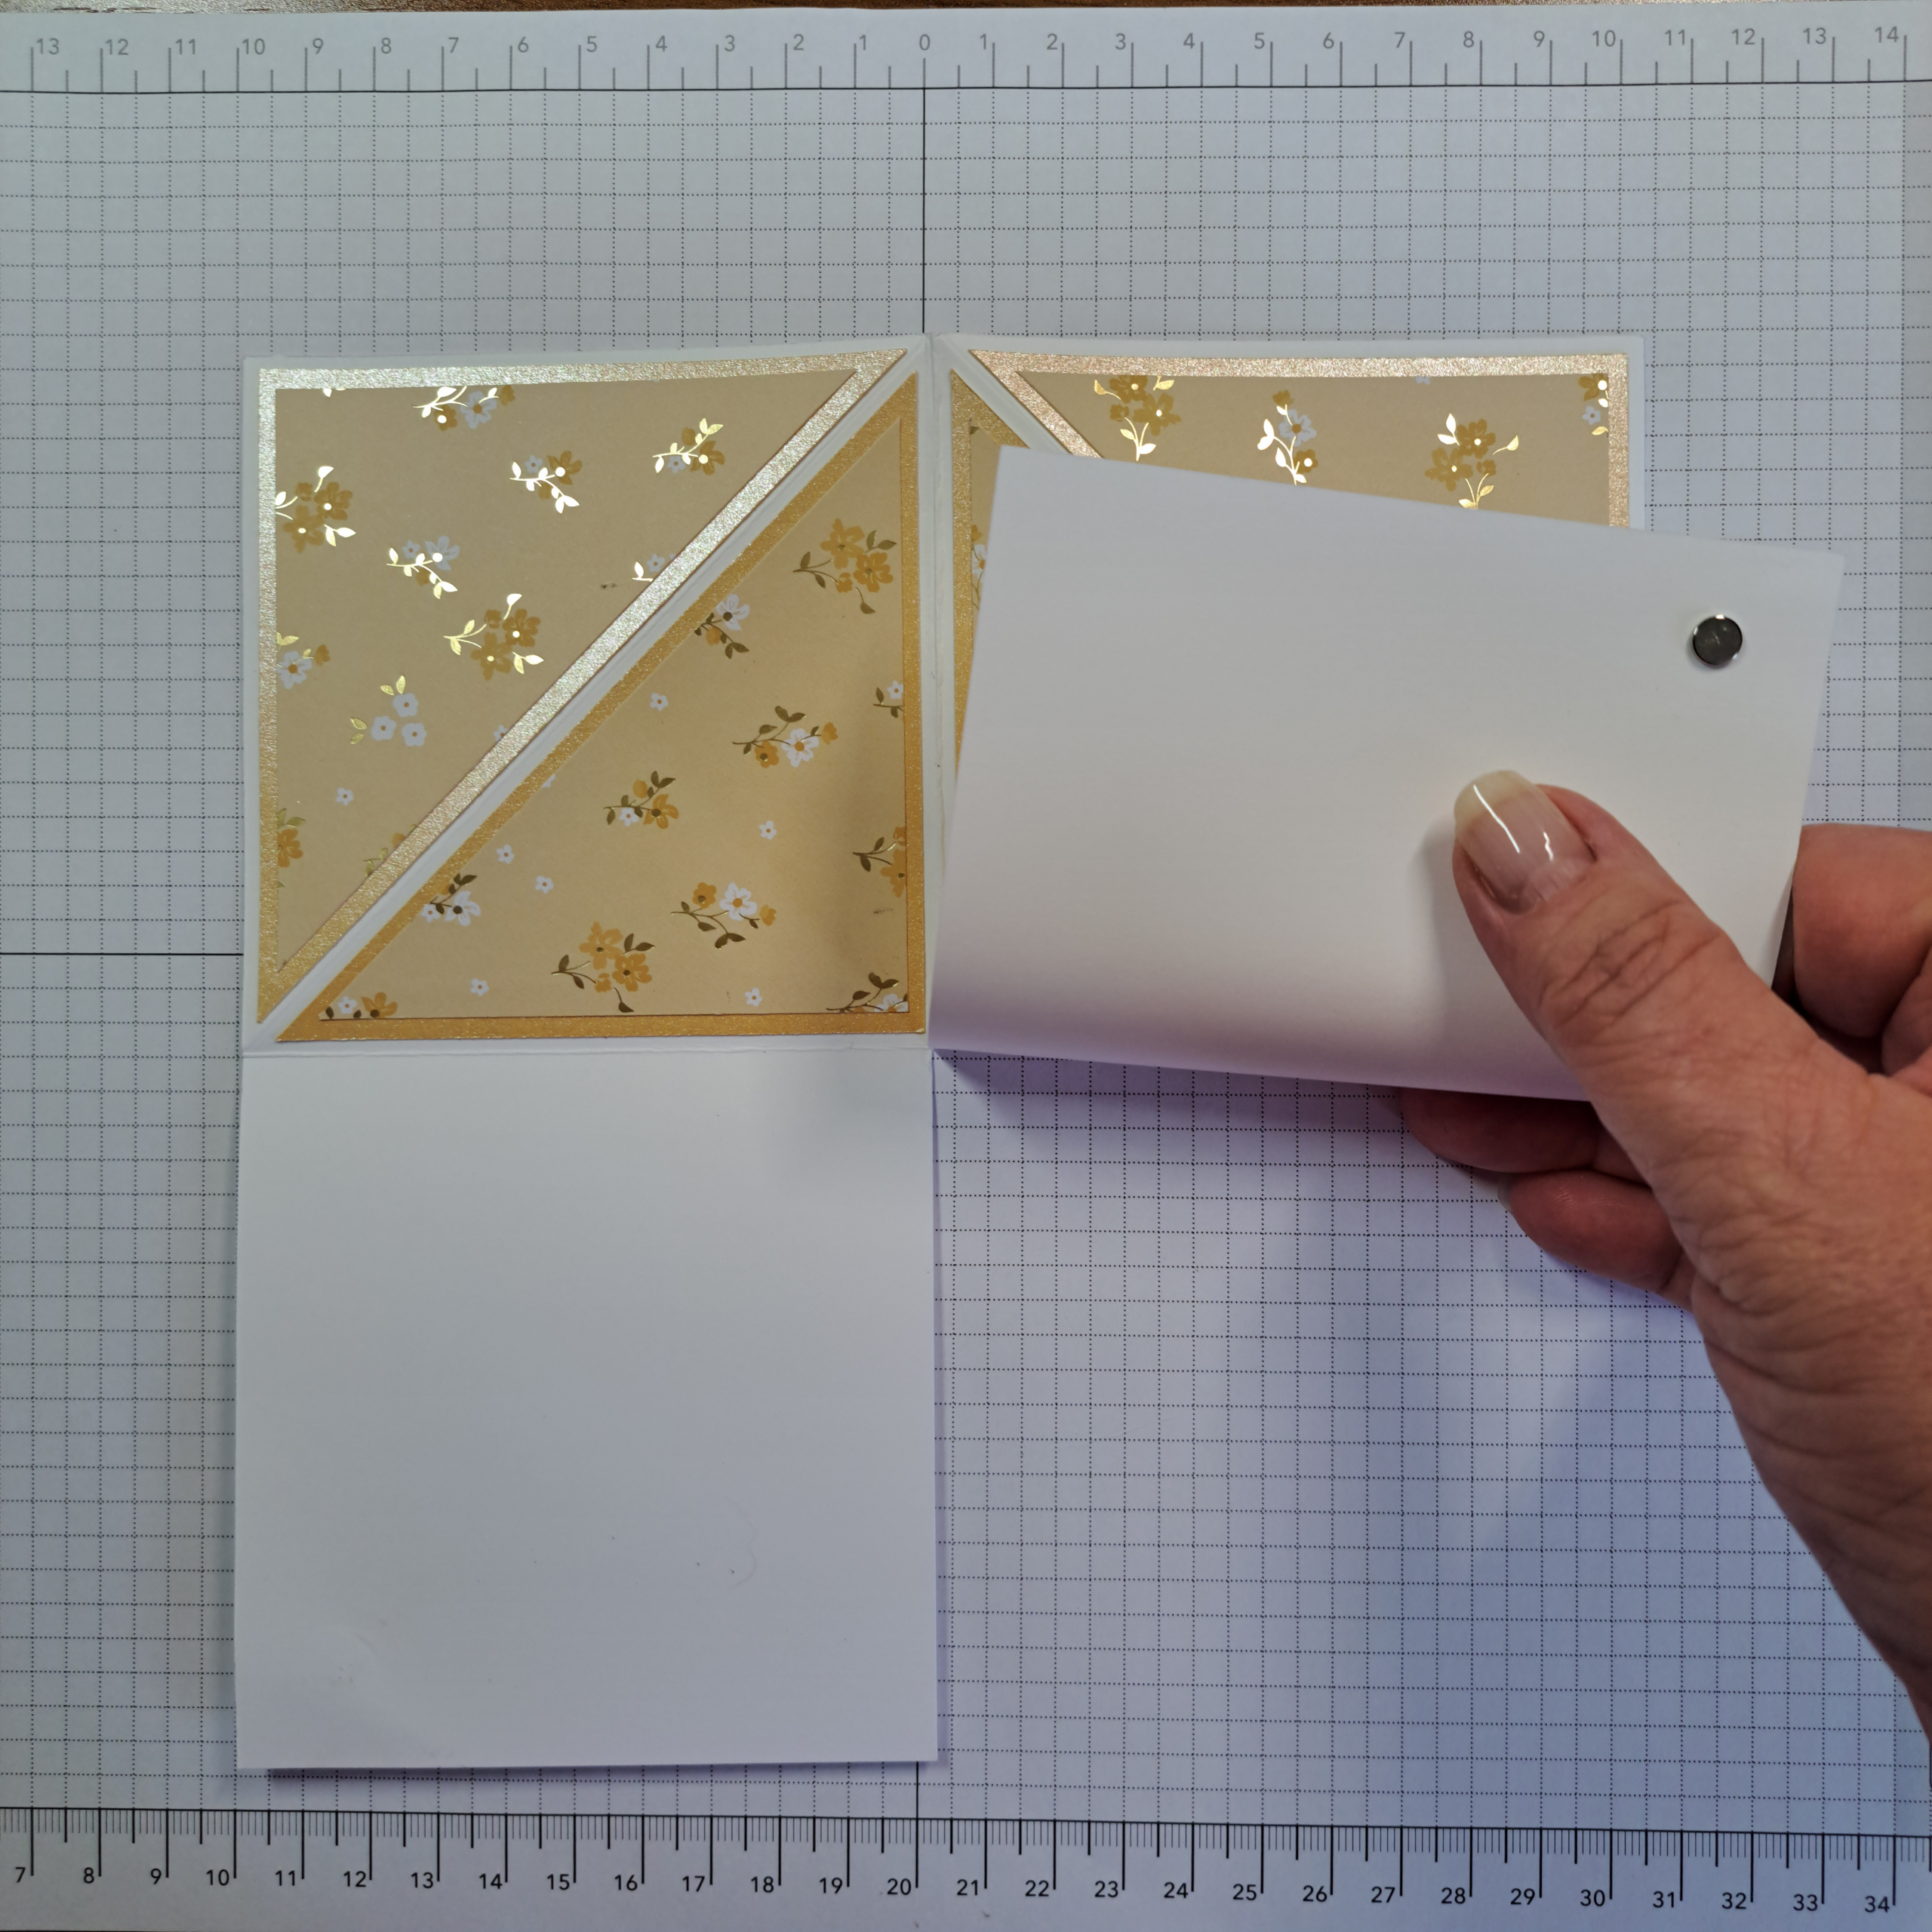
To finish off the base attach the magnets using the following method:
- Start with the magnets attached to each other.
- Place a glue dot or other strong adhesive on the back of the magnet stack and affix to the bottom right corner of the opened out card (See below photograph on the left.).
- Remove the top magnet and attach it to the back side of the card so that it lines up with the magnet that was stuck to the front (photo in the center).
- Place a glue dot on the magnet stuck to the back of the card.
- Hold the card face up and stand it up by moving the bottom right quadrant over the top of the bottom left quadrant. Aline the quadrants up and then press down to adhere the magnet to this left side. (See photograph on the right.)
- If you have used liquid glue instead of a glue dot, give it a moment to try before pulling apart the card quadrants.

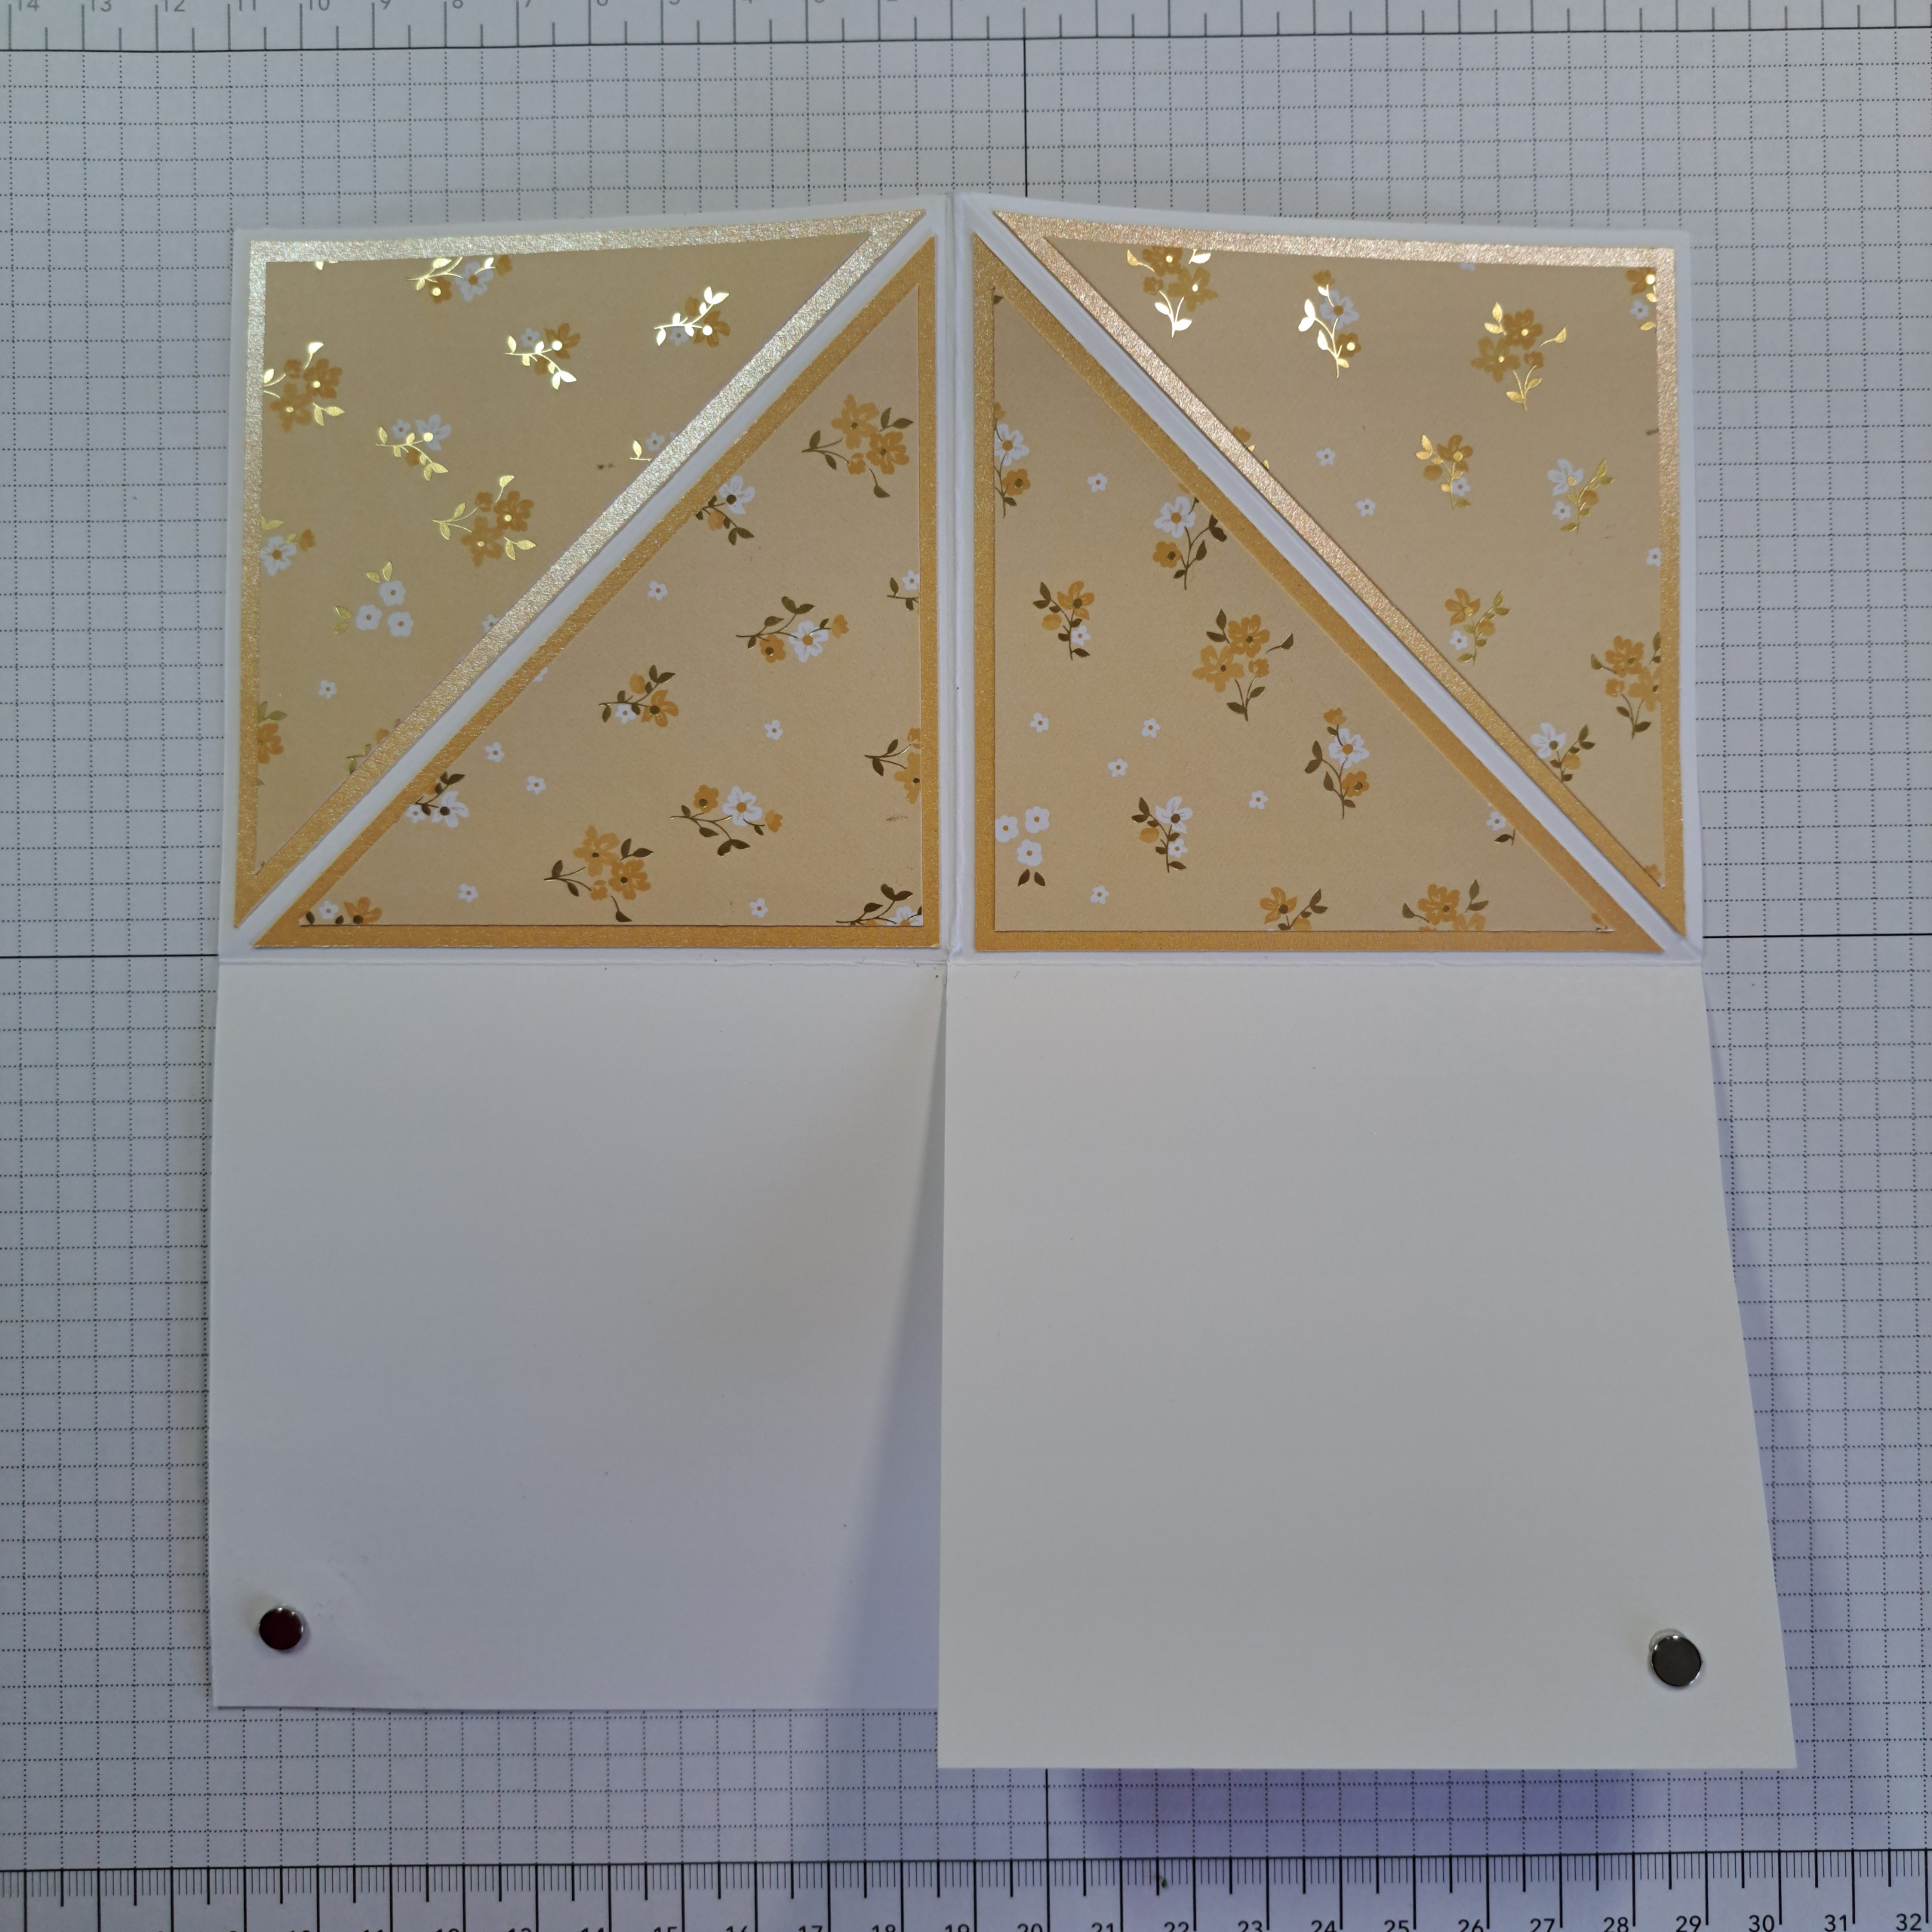
Adhere the prepared squares over the magnets on the base. The white and pearl paper piece will go on the left and the DSP and pearl paper will go on the right. I used a glue dot on the magnets in addition to liquid glue to adhere the squares.
Create the Easel Pop-Up Element
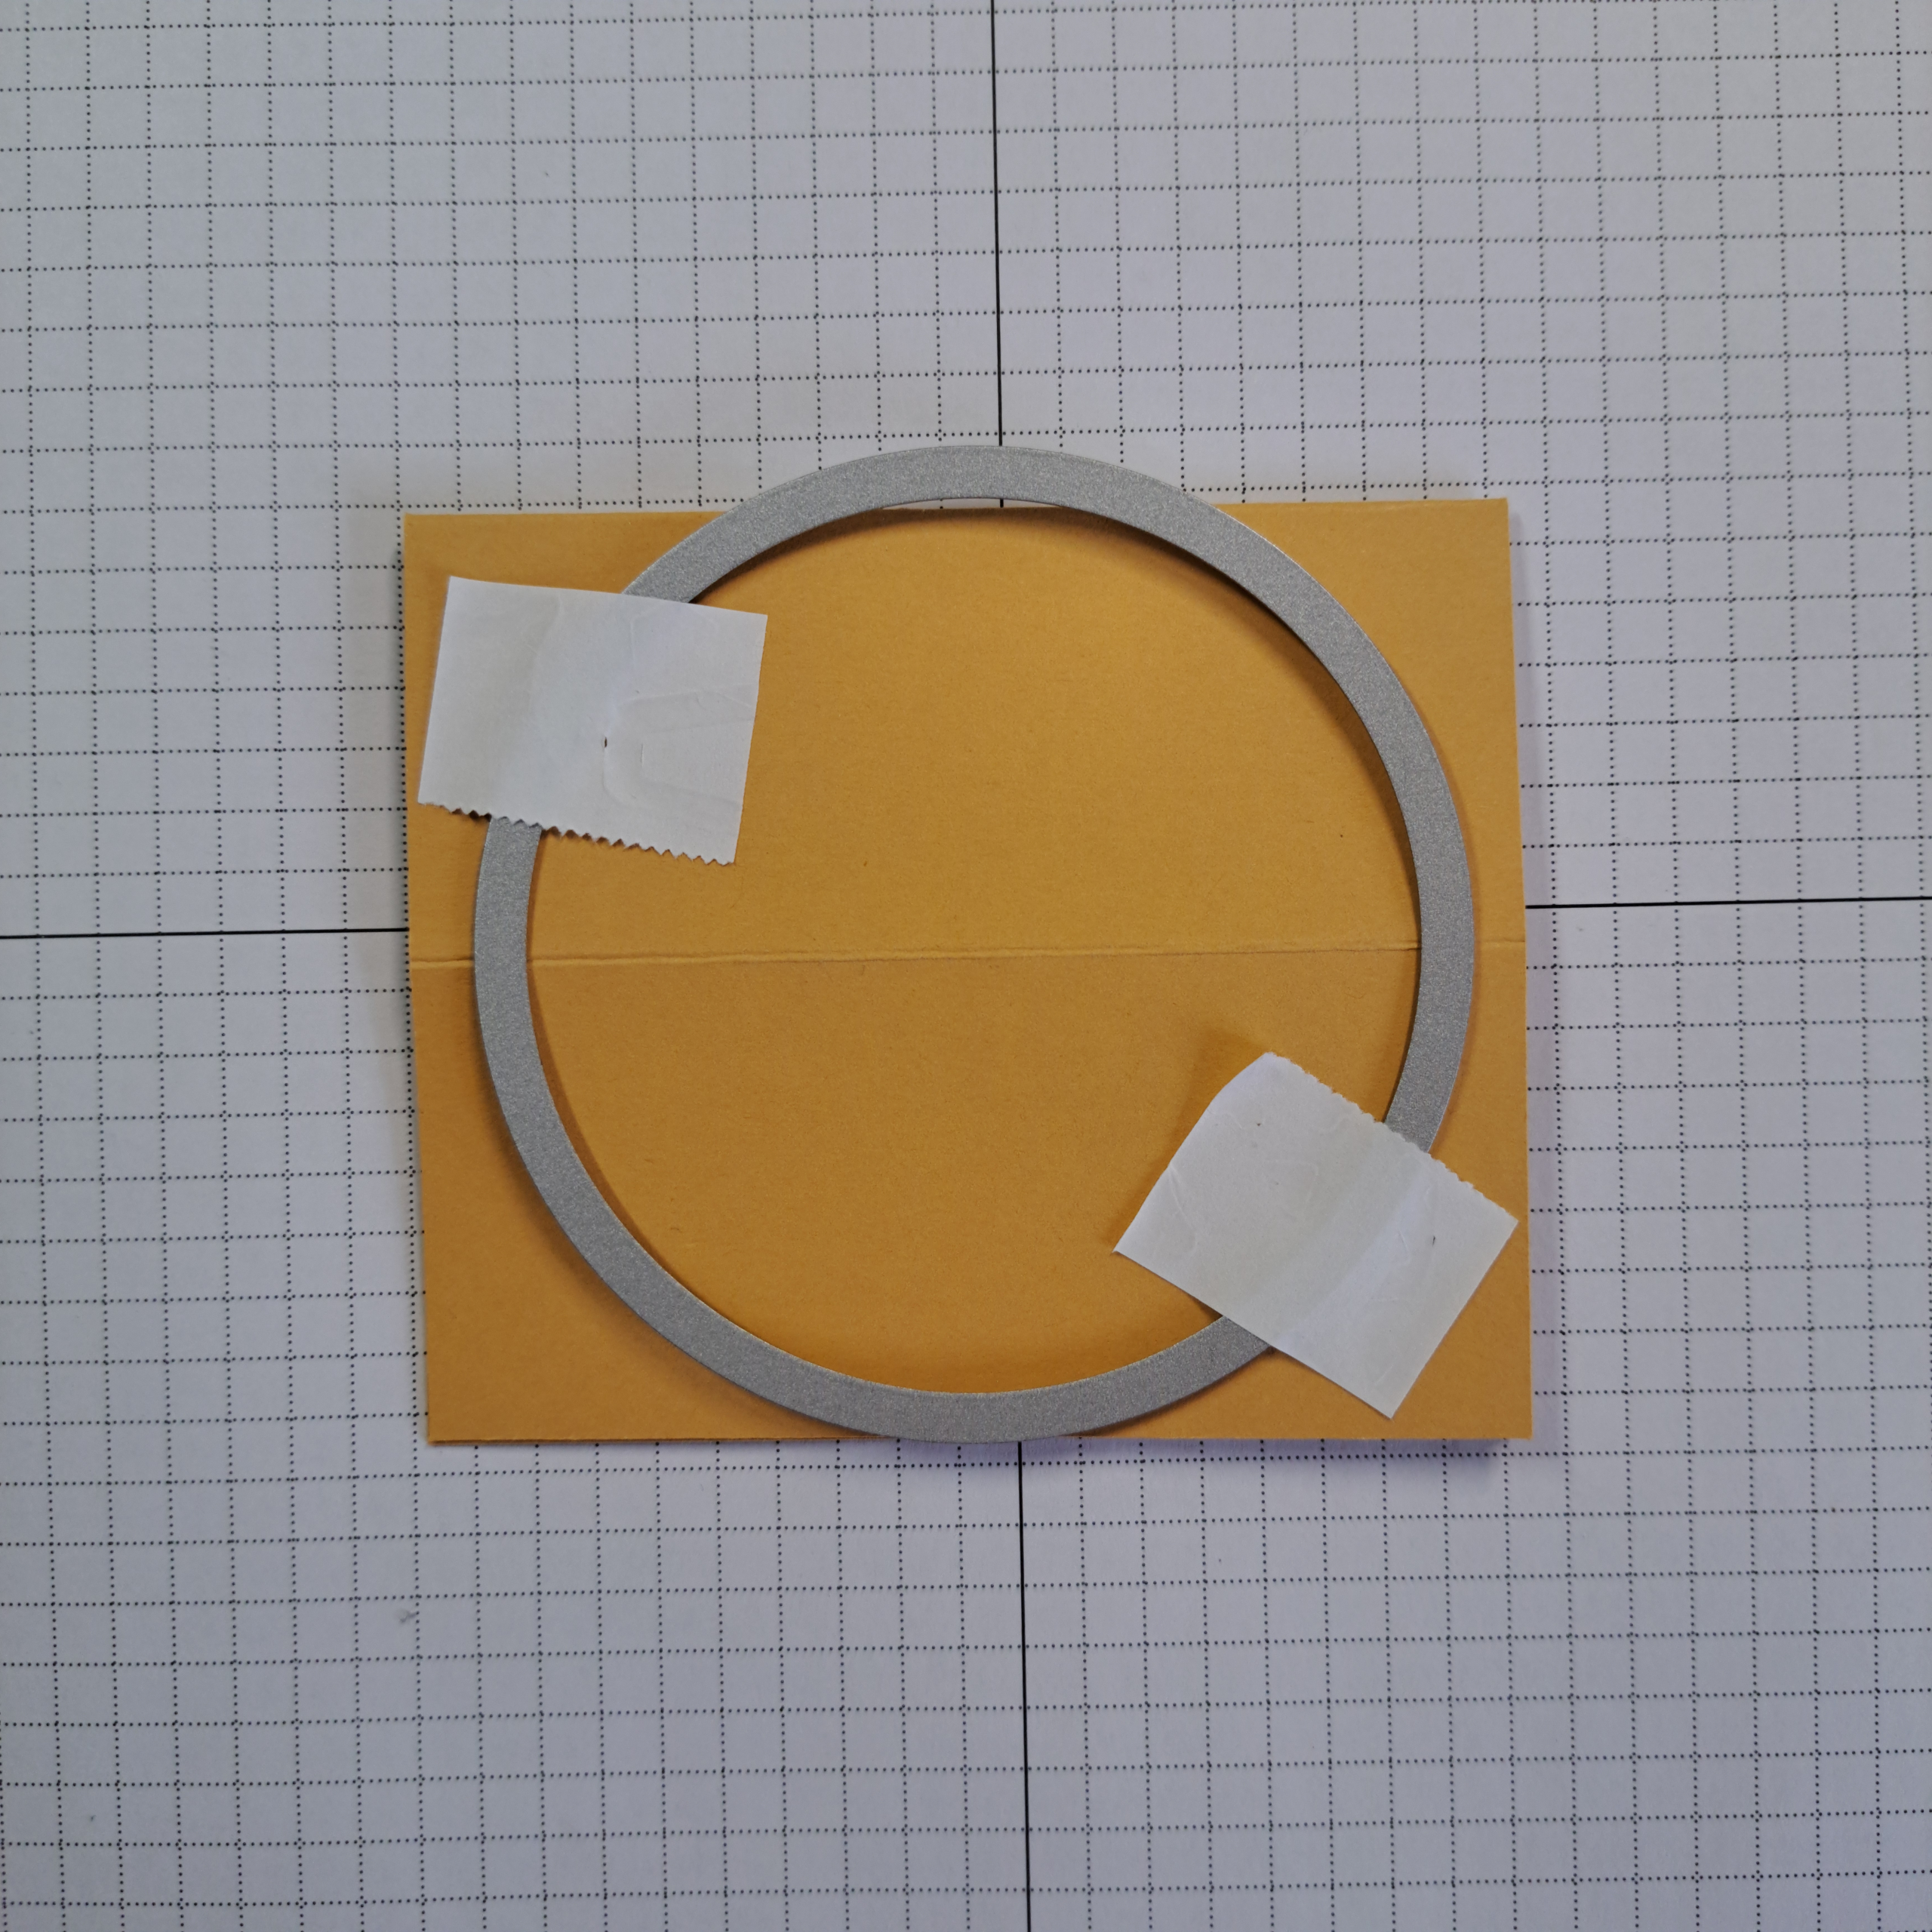
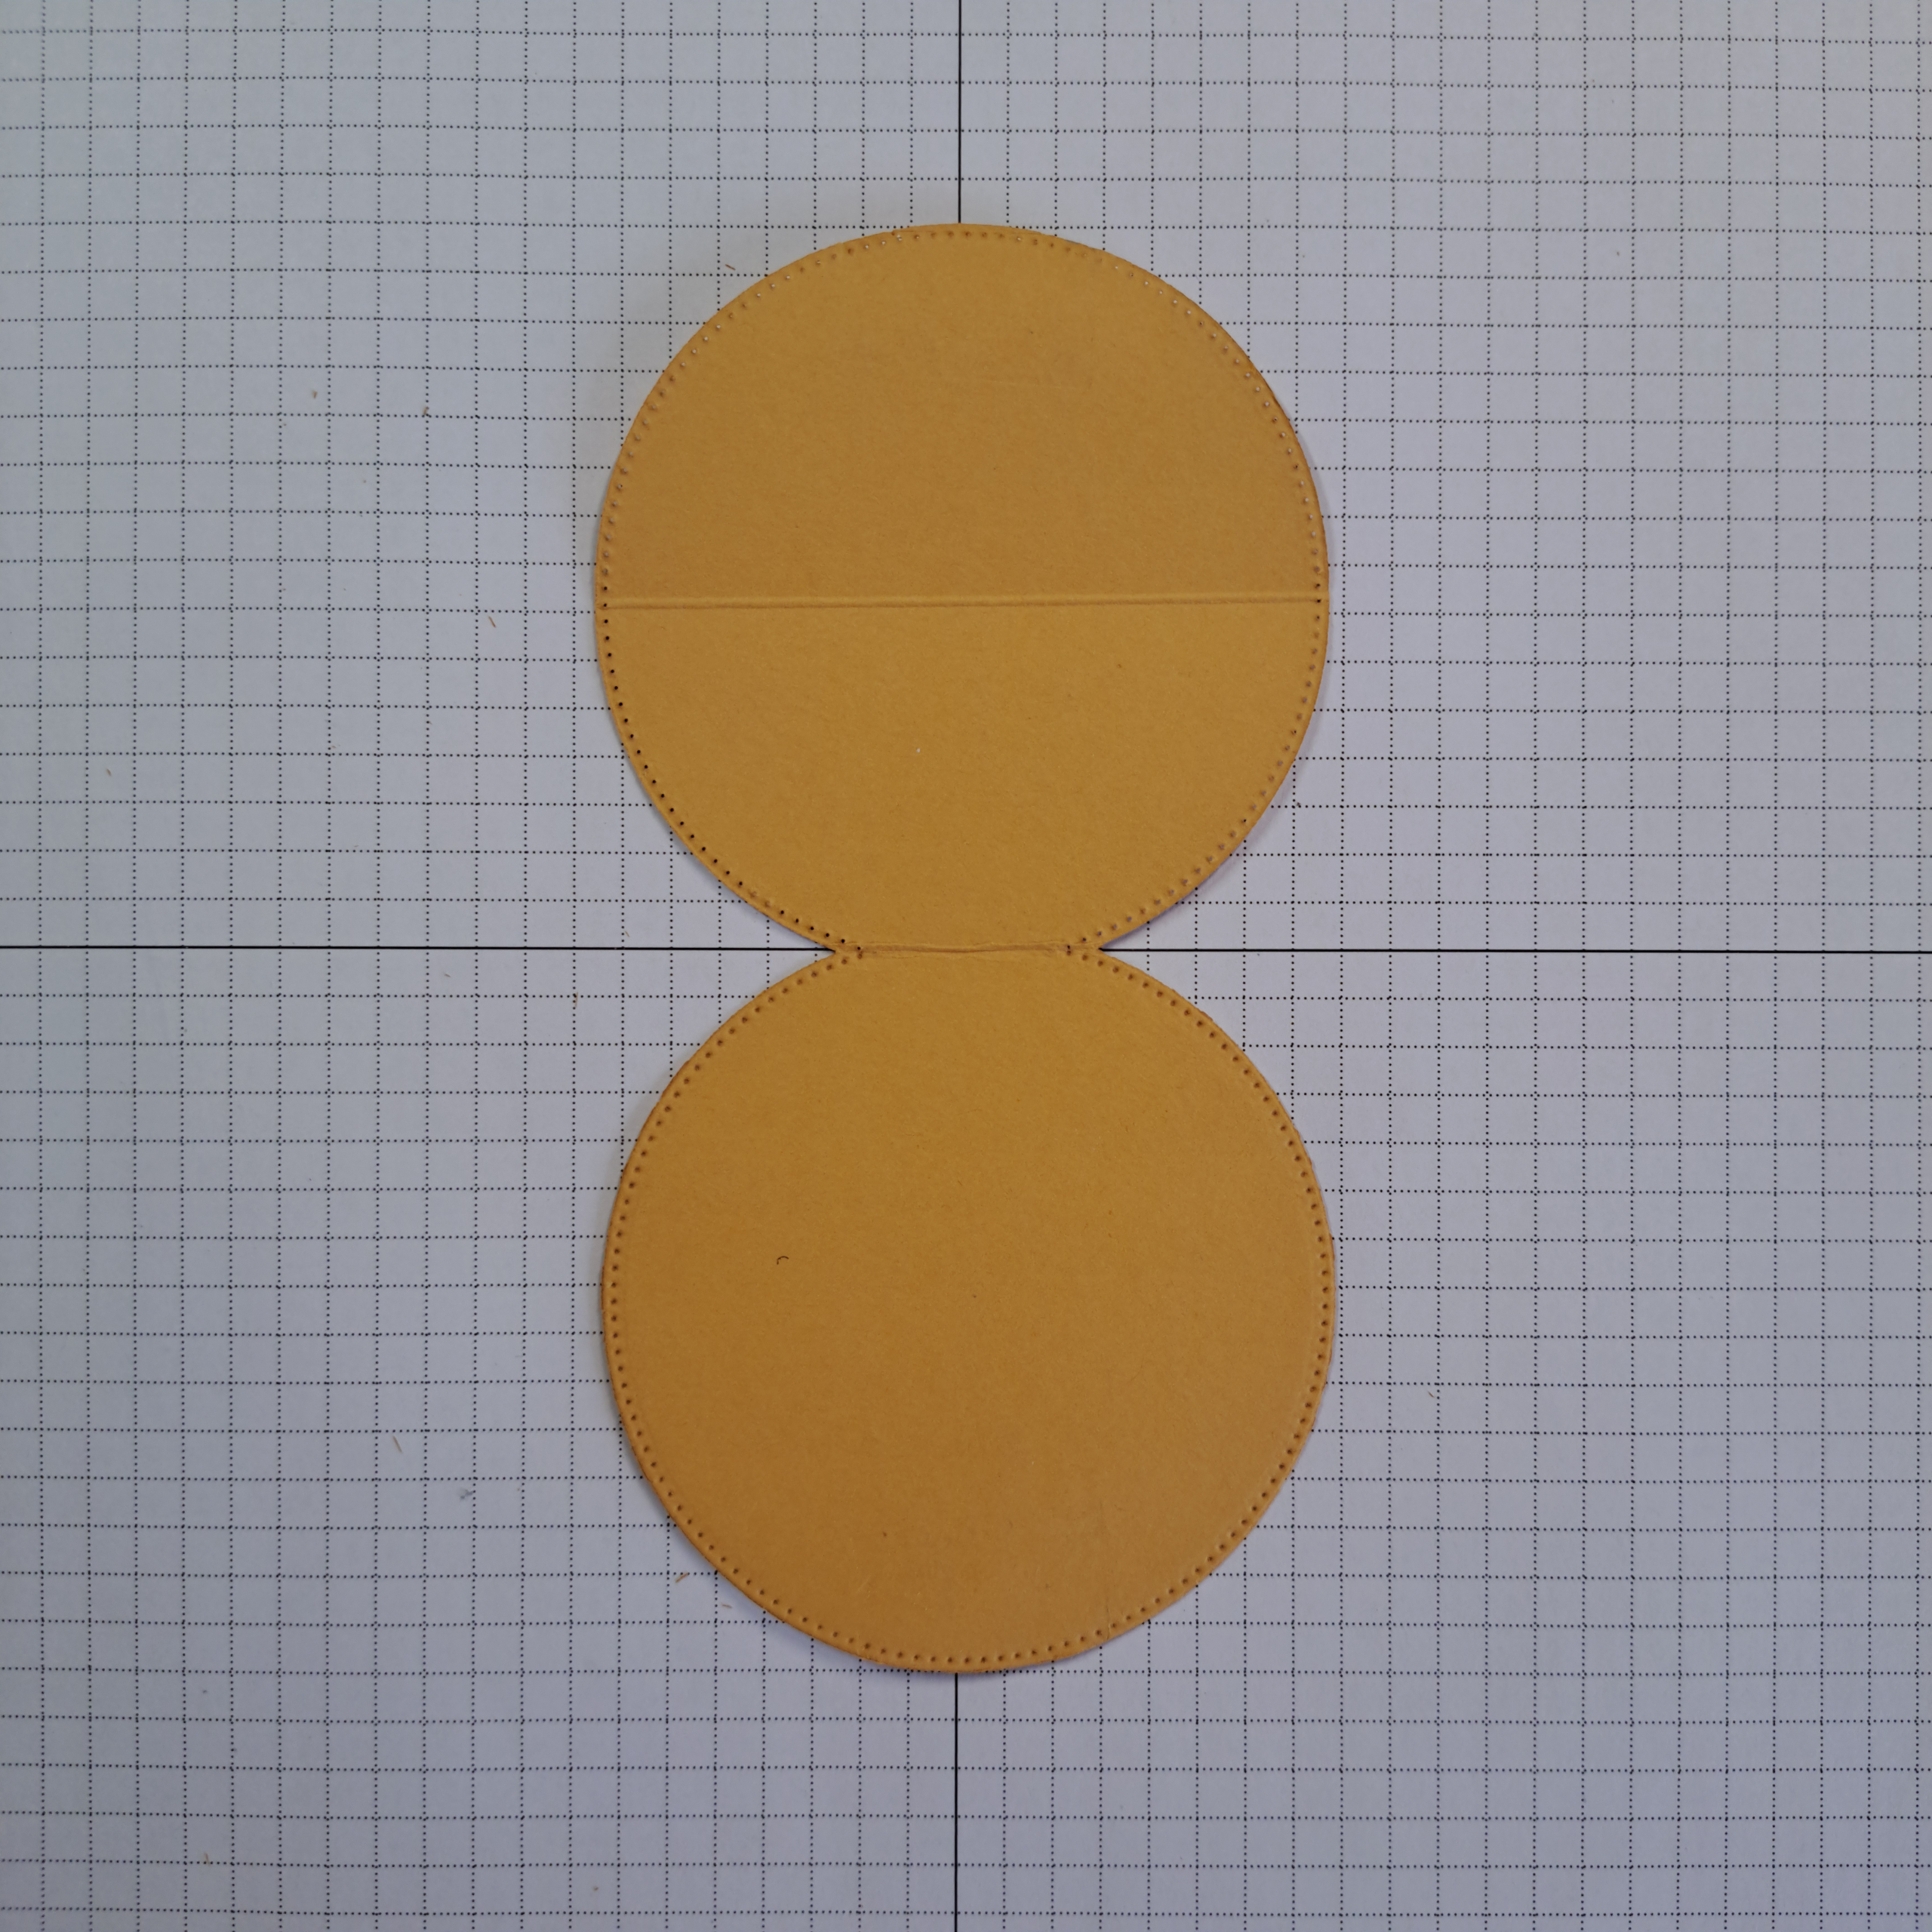
Cut a piece of Golden Glow card stock to 15.2cm x 8.9cm (3-1/2″ x 6″). With the long side at the top of your score board or paper trimmer score at 7.6cm and 11.2cm (3″ and 4-3/8″). Fold along score lines and burnish well.
Fold this piece in half on 7.6cm (3″) score and place the large circle die from the Stylish Shapes in the center of the card stock. If you line up the center score line, 11.2cm (4-3/8″) with the circle die, the top of the die should be hanging off. This will create a ‘hinge’ to the circle when you are done die cutting. (See photograph below.)
Adhere the solid side of the pop up element onto the card base, angled to best show off the the easel-pop up.
Decorating the Card
Stamp the flower outline image first on white card stock with the Golden Glow ink. Then stamp the fill-in image over the outline using the same ink. You can also do it the other way around. I just prefer to do the outline first. Repeat the process so you now have two flowers. Die cut out the images using the matching die set.
Die cut three of the small flowers from white card stock and one from a scrap of golden glow card stock. Optionally, punch out centers for the die cut flowers, you can use the 1/8″ round hole punch from the Hole Punch Assortment set or any tiny hole punch you may have. For the three white flowers I used Golden Glow card stock and for the one Golden Glow flower I used a gold foil punched dot.
Die cut two of the larger leaf clusters and one of the smaller leaf clusters from a scrap of a Gold Foil sheet.
Create two flower clusters to go on the upper triangles of the card. For each cluster, group together a large gold leaf, a large stamped flower and a small white die cut flower. Attach to the triangles using Stampin’ Dimensionals.
Next create a small cluster consisting of one white die cut flower, Golden Glow flower and the small leaf shape. This cluster will be used as a ‘prop’ to old the easel in place. Attach mini dimensionals to the back of this unit. This piece will be adhered to the card in the last step.
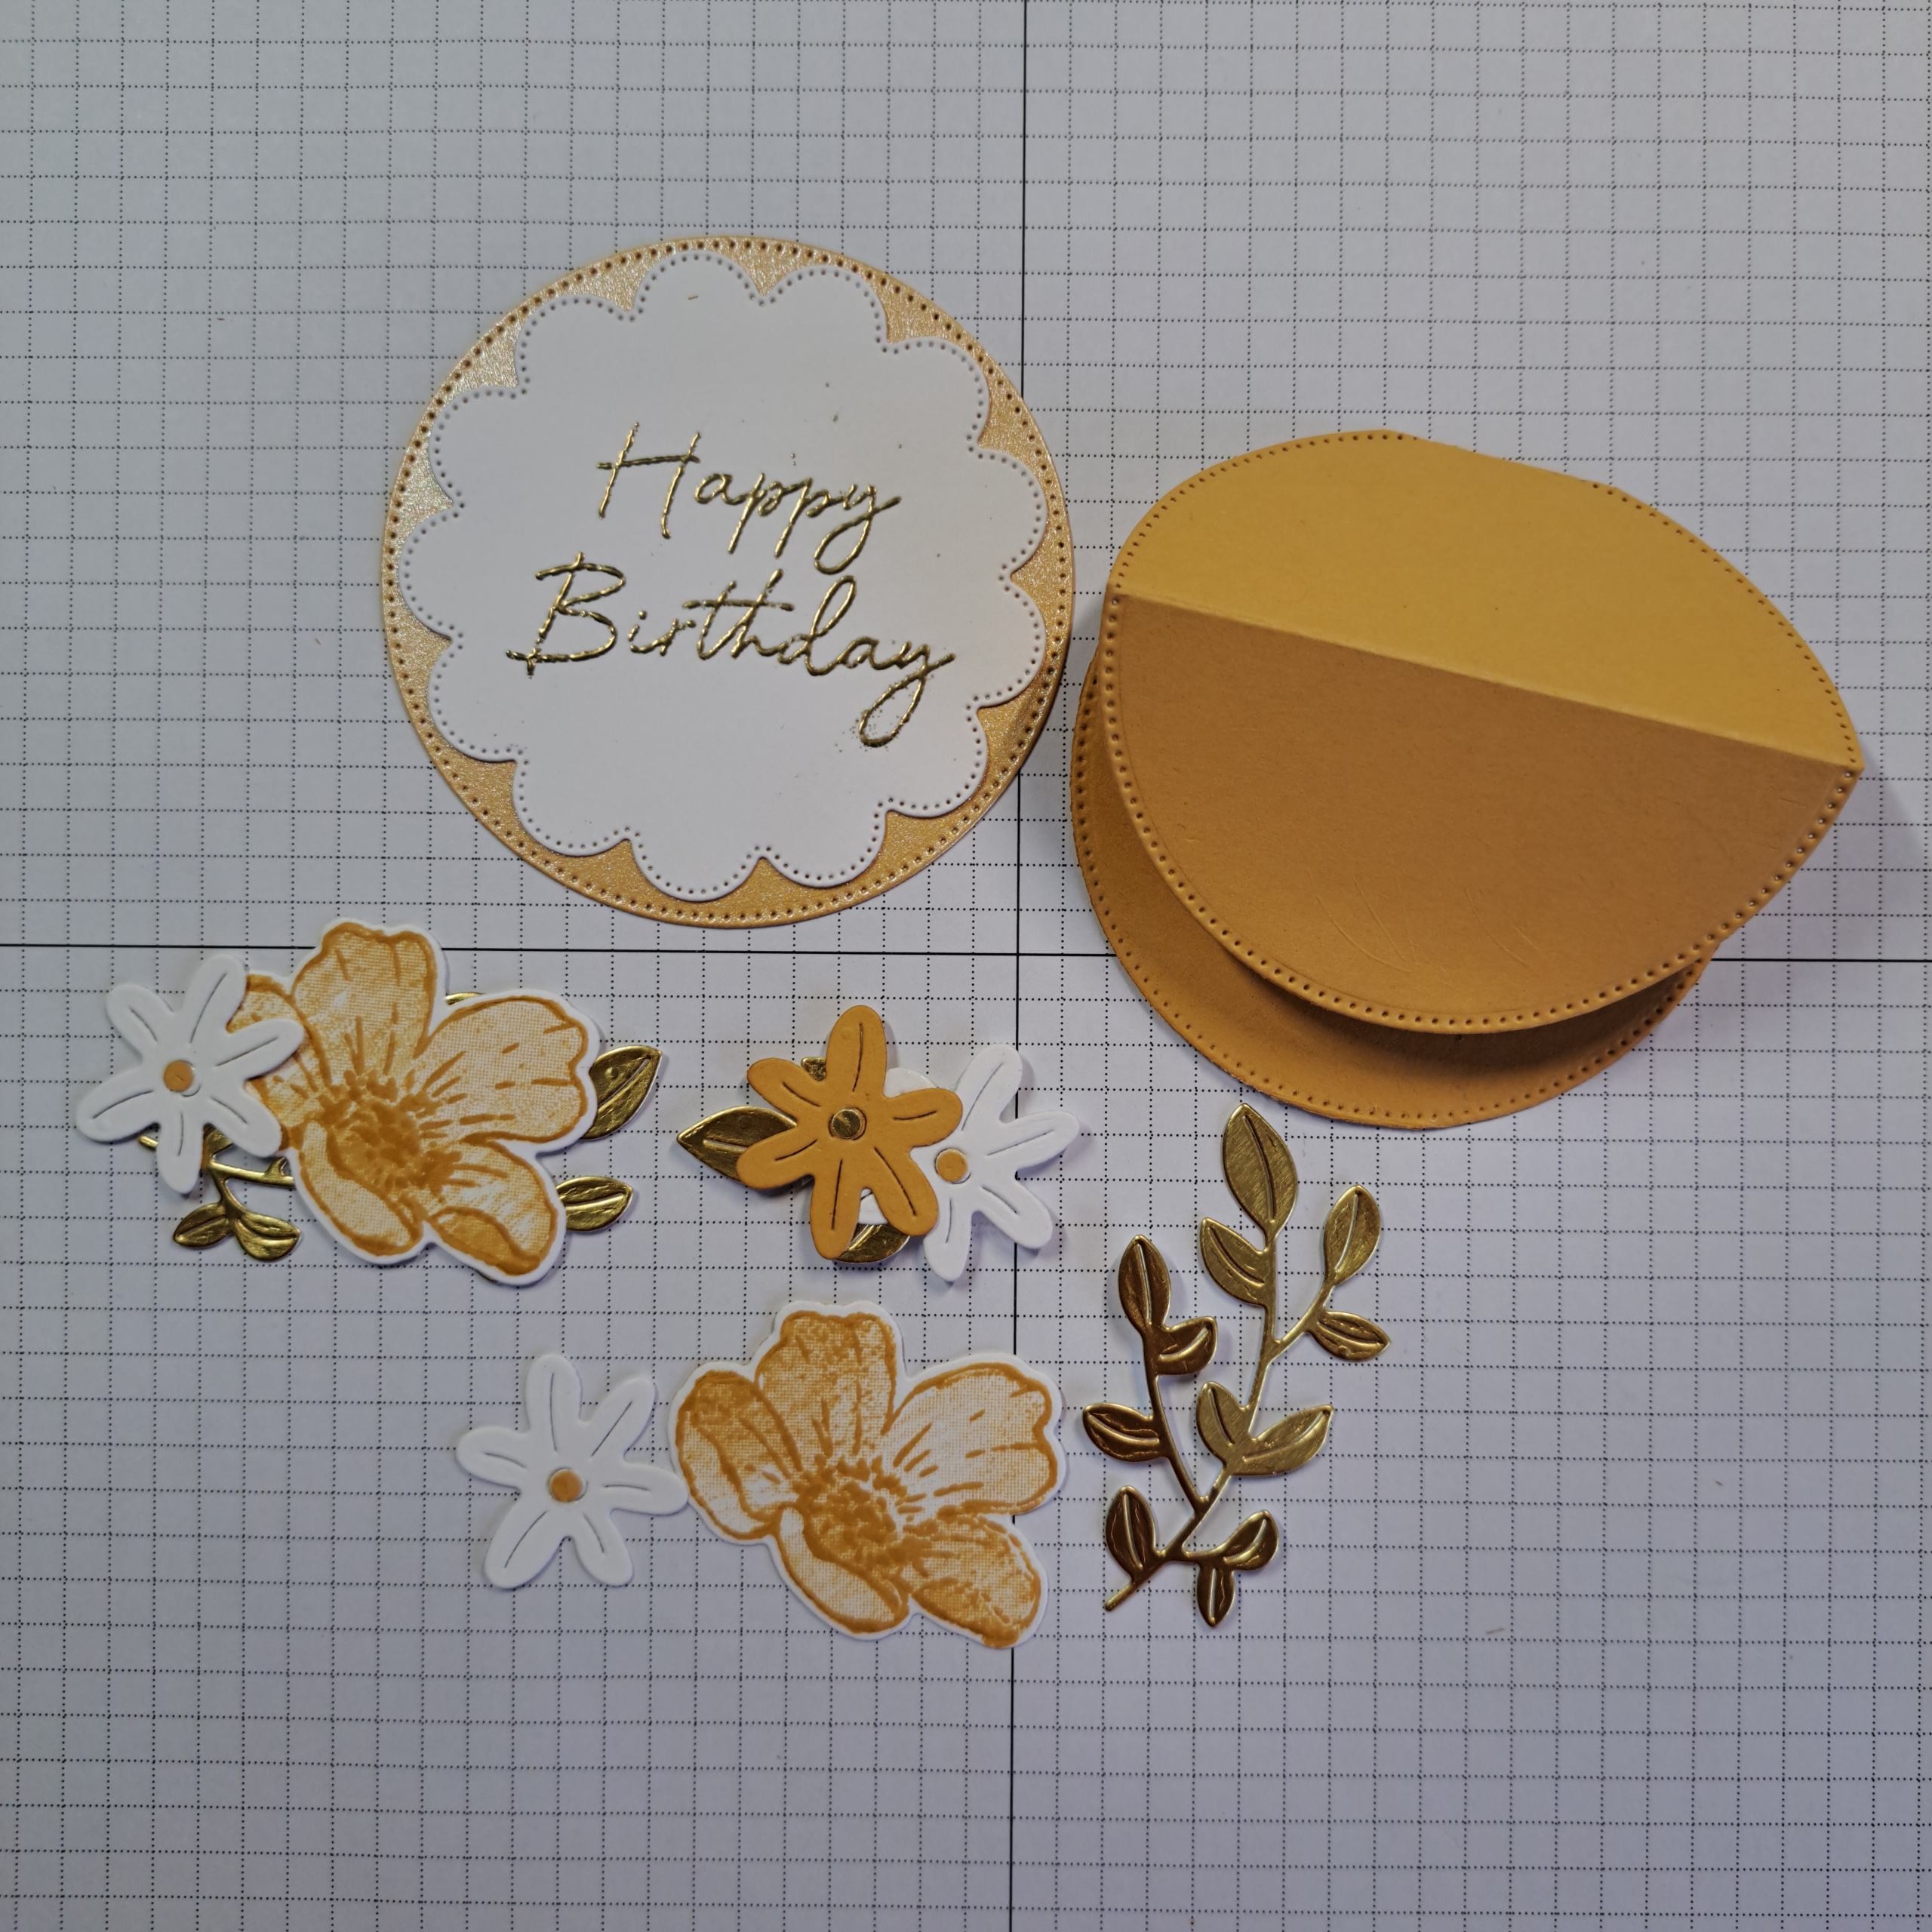
Die cut the 7cm (2-3/4″) scallop from white card stock. Stamp the greeting onto this piece using VersaMark ink. Sprinkle over the gold embossing powder, tap off excess and heat set. Adhere this scalloped piece to the center of the 7.6cm or 3″ circle you cut earlier from the pearlized paper.
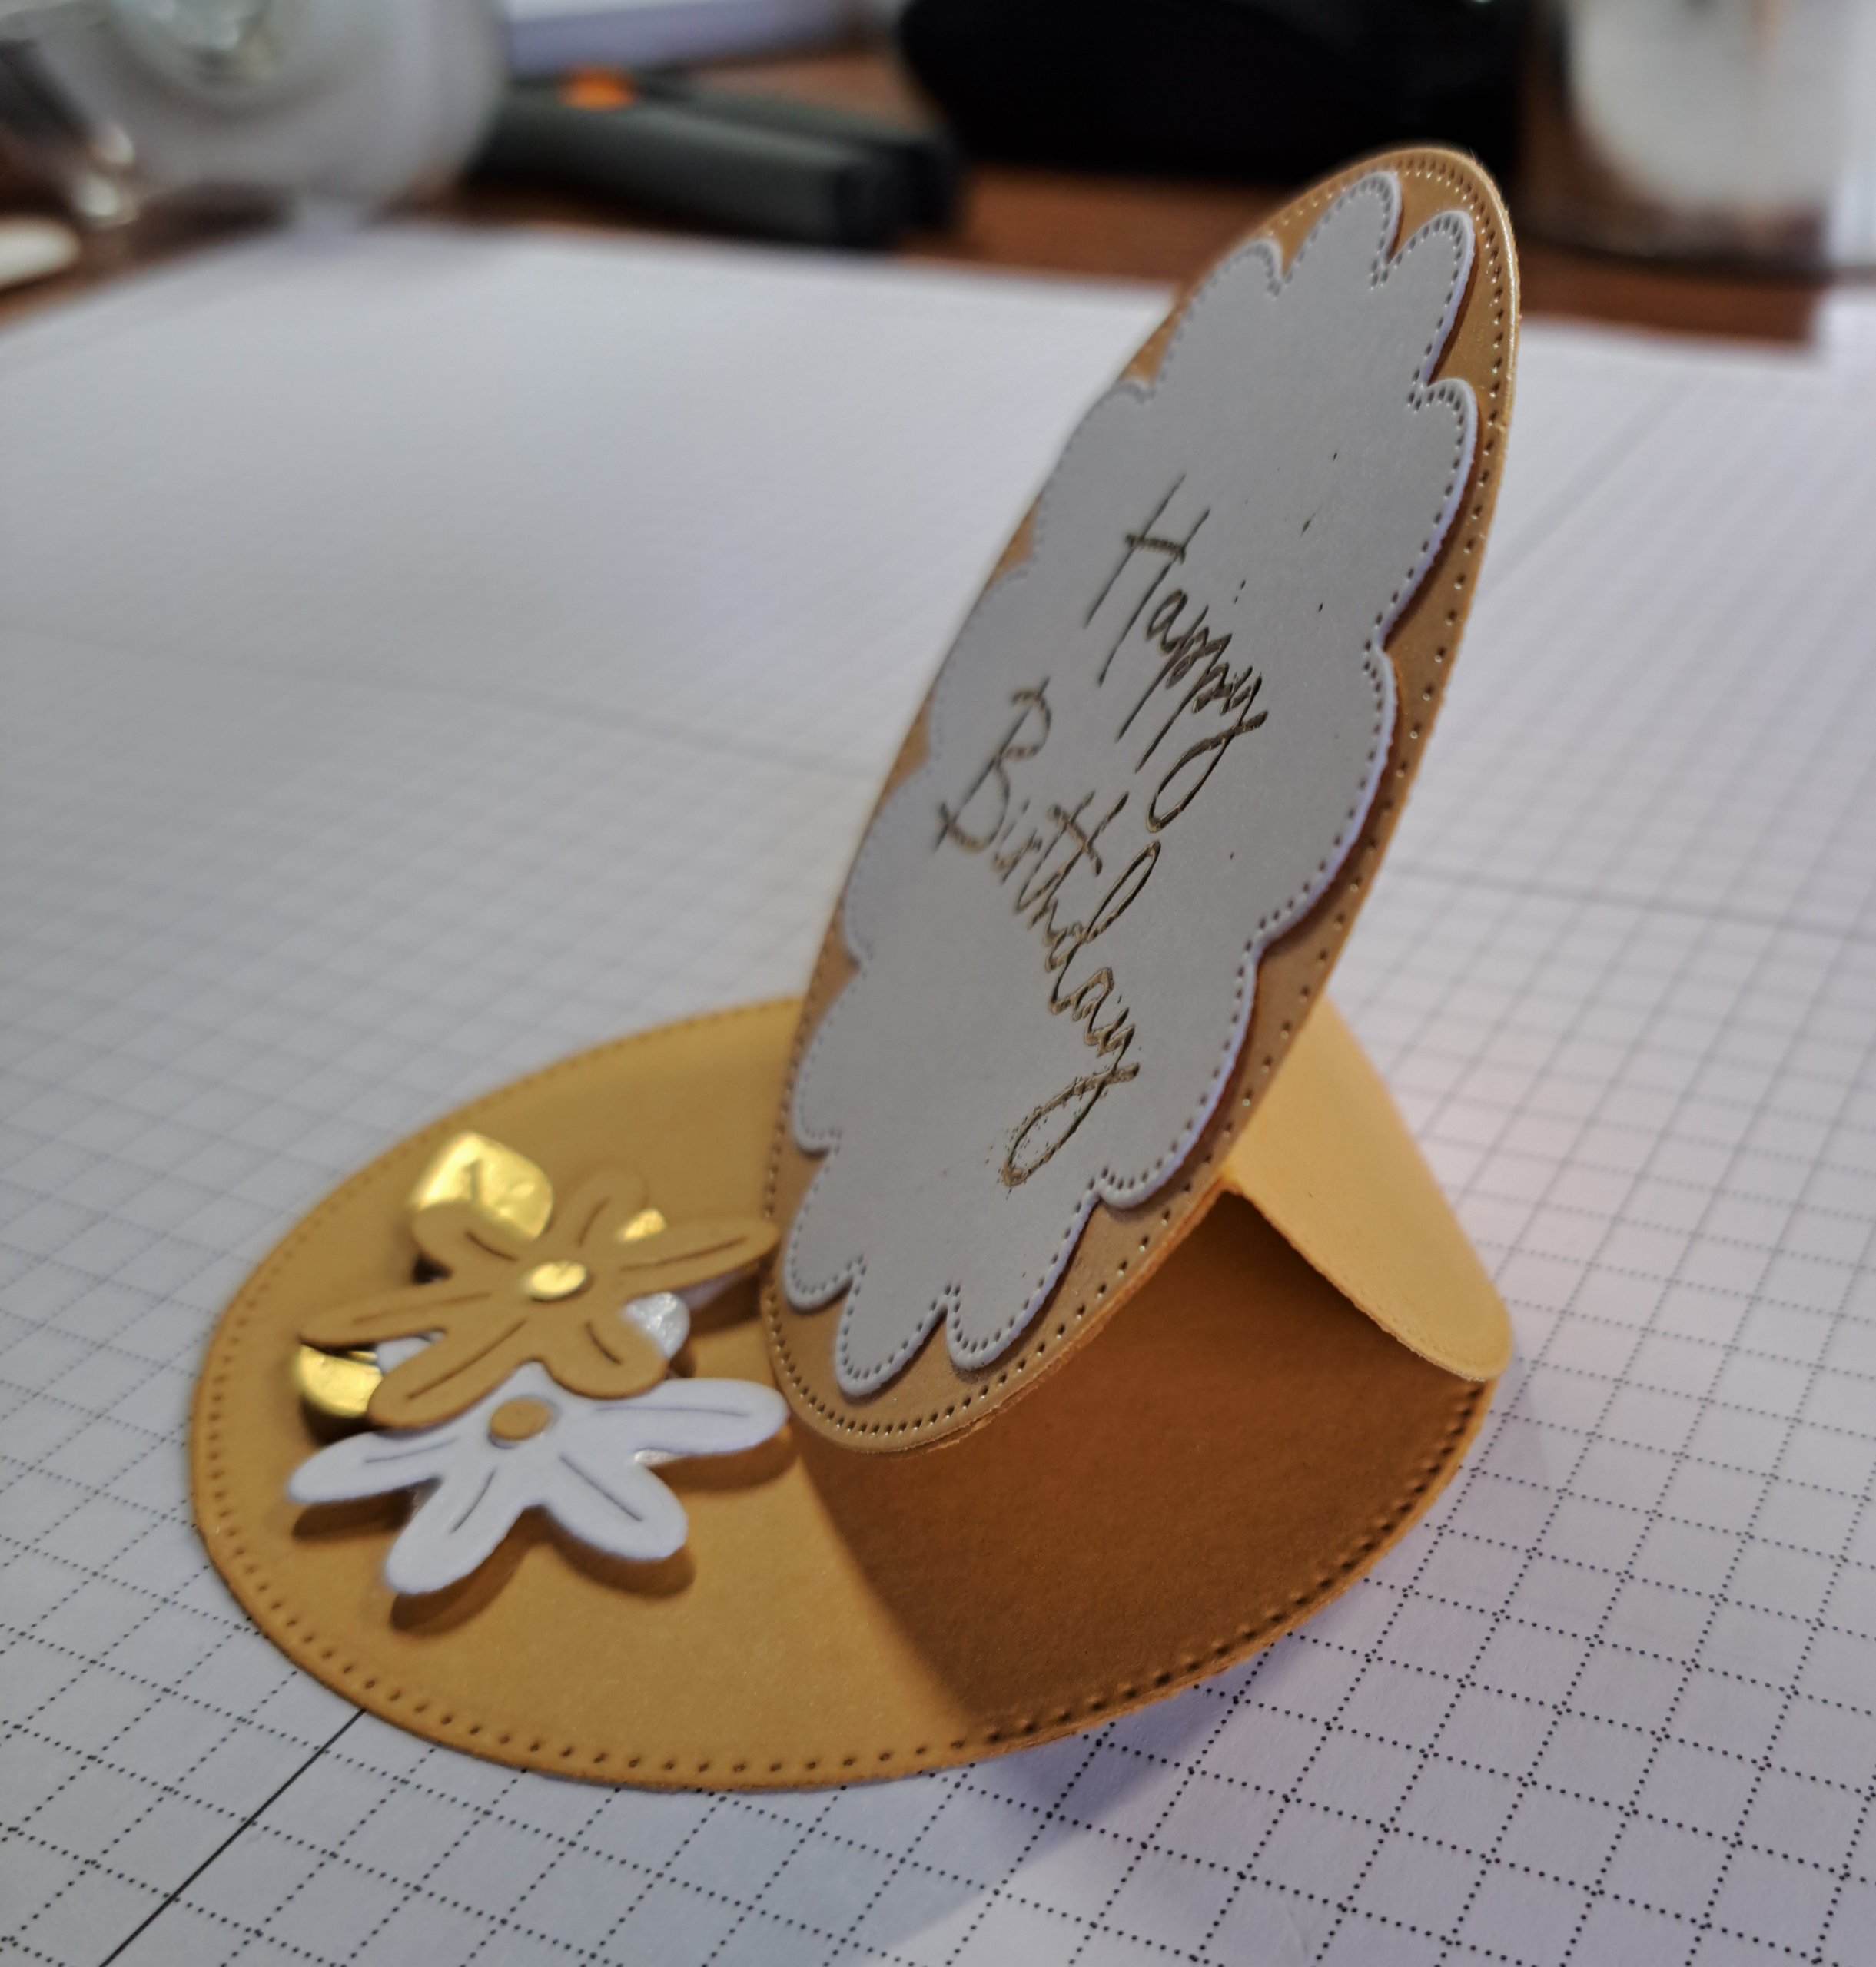
Spread adhesive on the bottom half of the easel pop-up, below the fold/score line. Adhere the greeting unit to the easel unit, matching up the circles so that the easel piece is not visible around the greeting piece. (The photograph shows the easel unattached to the card so that you can see better how it operates.)
The final step is to remove the paper backing from the dimensionals on the small flower cluster. Position the easel piece so it is standing up and adhere the flowers down to the easel base so that the greeting will stand up by bracing against the flower cluster.
Thank you so much for taking the time to read today. I hope you give this card a try, it might seem complicated but once you get started you will discover how much fun this design is. If you do give this a go please post a picture in the comments or on social media and tag me @LoriOthen.
Special thank you to Dawn Griffith at Dawn’s Stamping Thoughts for this awesome design. I have used her measurements for the imperial sized card and my own improvised measurements for the metric. The card base is the same size in either version and will easily fit into the standard A4 envelope. Here is the link for Dawn’s video, I hope you will jump on over there and give her a big thumbs up! https://www.youtube.com/watch?v=A9ZihyGEoMc
Product List![Boutique Blossoms Photopolymer Stamp Set [ 167652 ]](https://assets1.tamsnetwork.com/images/EC042017NF/167652s.jpg "Boutique Blossoms Photopolymer Stamp Set [ 167652 ]")
![Boutique Blossoms Dies [ 167653 ]](https://assets1.tamsnetwork.com/images/EC042017NF/167653s.jpg "Boutique Blossoms Dies [ 167653 ]")
![Scalloped Blooms Photopolymer Stamp Set (English) [ 167639 ]](https://assets1.tamsnetwork.com/images/EC042017NF/167639s.jpg "Scalloped Blooms Photopolymer Stamp Set (English) [ 167639 ]")
![Scalloped Blooms Dies [ 167646 ]](https://assets1.tamsnetwork.com/images/EC042017NF/167646s.jpg "Scalloped Blooms Dies [ 167646 ]")
![Stylish Shapes Dies [ 159183 ]](https://assets1.tamsnetwork.com/images/EC042017NF/159183s.jpg "Stylish Shapes Dies [ 159183 ]")
![Hole Punch Assortment [ 165409 ]](https://assets1.tamsnetwork.com/images/EC042017NF/165409s.jpg "Hole Punch Assortment [ 165409 ]")
![Bloom Boutique 12" X 12" (30.5 X 30.5 Cm) Specialty Designer Series Paper [ 167637 ]](https://assets1.tamsnetwork.com/images/EC042017NF/167637s.jpg "Bloom Boutique 12\" X 12\" (30.5 X 30.5 Cm) Specialty Designer Series Paper [ 167637 ]")
![2026–2028 In Color™ 12" X 12" (30.5 X 30.5 Cm) Pearlized Specialty Paper [ 167766 ]](https://assets1.tamsnetwork.com/images/EC042017NF/167766s.jpg "2026–2028 In Color™ 12\" X 12\" (30.5 X 30.5 Cm) Pearlized Specialty Paper [ 167766 ]")
![Gold Foil Sheets [ 132622 ]](https://assets1.tamsnetwork.com/images/EC042017NF/132622s.jpg "Gold Foil Sheets [ 132622 ]")
![Golden Glow A4 Cardstock [ 167686 ]](https://assets1.tamsnetwork.com/images/EC042017NF/167686s.jpg "Golden Glow A4 Cardstock [ 167686 ]")
![Basic White A4 Cardstock [ 166781 ]](https://assets1.tamsnetwork.com/images/EC042017NF/166781s.jpg "Basic White A4 Cardstock [ 166781 ]")
![Golden Glow Classic Stampin' Pad [ 167676 ]](https://assets1.tamsnetwork.com/images/EC042017NF/167676s.jpg "Golden Glow Classic Stampin' Pad [ 167676 ]")
![Versamark Pad [ 102283 ]](https://assets1.tamsnetwork.com/images/EC042017NF/102283s.jpg "Versamark Pad [ 102283 ]")
![Metallics Wow! Embossing Powder [ 165678 ]](https://assets1.tamsnetwork.com/images/EC042017NF/165678s.jpg "Metallics Wow! Embossing Powder [ 165678 ]")
![Mini Glue Dots [ 103683 ]](https://assets1.tamsnetwork.com/images/EC042017NF/103683s.jpg "Mini Glue Dots [ 103683 ]")
![Multipurpose Liquid Glue [ 154974 ]](https://assets1.tamsnetwork.com/images/EC042017NF/154974s.jpg "Multipurpose Liquid Glue [ 154974 ]")
![Stampin' Dimensionals [ 104430 ]](https://assets1.tamsnetwork.com/images/EC042017NF/104430s.jpg "Stampin' Dimensionals [ 104430 ]")
![Embossing Additions Tool Kit [ 159971 ]](https://assets1.tamsnetwork.com/images/EC042017NF/159971s.jpg "Embossing Additions Tool Kit [ 159971 ]")
![Heat Tool - Uk Plug [ 129054 ]](https://assets1.tamsnetwork.com/images/EC042017NF/129054s.jpg "Heat Tool - Uk Plug [ 129054 ]")
![Stampin' Positioner [ 167768 ]](https://assets1.tamsnetwork.com/images/EC042017NF/167768s.jpg "Stampin' Positioner [ 167768 ]")
![Paper Trimmer [ 152392 ]](https://assets1.tamsnetwork.com/images/EC042017NF/152392s.jpg "Paper Trimmer [ 152392 ]")
![Stampin' Cut & Emboss Machine [ 149653 ]](https://assets1.tamsnetwork.com/images/EC042017NF/149653s.jpg "Stampin' Cut & Emboss Machine [ 149653 ]")