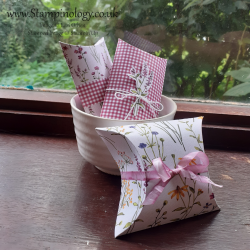
Continuing on with the gift packaging series, we will explore the pillow box today. (Remember Holidays are Coming).
These neat little boxes are great for Halloween Treats. Make these out of dark blue card stock and decorate with white or gold ribbons to hold your Hanukkah gelt. Use Christmas themed paper, fill the boxes with chocolate and hang these from ribbons on your Christmas Tree. And let’s not forget weddings, can you imagine white embossed card stock wrapped up with ribbons to hold the rice (or bird seed or flower petals) for your guests to throw at the bride and groom? Oh yeah! and party favor boxes! And for New Years confetti and Easter chocolate….I think I had better stop now and actually show you how simple it is to make these awesomely useful little boxes.
Supplies for A Basic Pillow Box
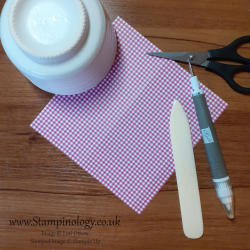
1 piece of basic card stock or heavy weight patterned paper measuring 15.2cm x 15.2cm (6″x 6″)
Bone Folder
Paper Trimmer with a scoring blade (or Simply Scored Scoring Tool)
Paper Snips Scissors
Stampin’ Seal or Tear & Tape Adhesive
A round object like a jar lid or desert plate or tea cup
Directions
Score your paper at 7cm (2-3/4″) and 14cm (5-1/2″)
Fold and burnish your score lines.
With your paper still folded up (See photo on the left.) mark an even amount on each side of your rectangle near the top. I wanted a shallow box so I marked 1 cm on each side. I used these marks to help me center the cup that we are going to trace around. In this example I used a large Japanese tea cup.* However, if you are good at centering things up by eye, go for it! The cup or plate should just touch the center of the rectangle’s edge and show an even amount of paper off each side. Draw around your object making a nice half moon shape. Trim around your curve and discard the corners. Likewise, do this on each end of your box (see photos below).


Next we will cut notches out of one side of each end. These notches will allow the box to be opened and closed. The traditional shape is a half circle big enough to get a finger tip into. On this box I have used a 2p coin to draw my notch before cutting it out. (see photos below) If you are lucky enough to have a 1″ circle punch that would be ideal to use here. Slot your paper into the punch half way to make the notch.
While you have those scissors out cut off the little triangular bits on the “glue” flap. Because ultimately they will interfere with the box closure if you leave them there (see photo below).


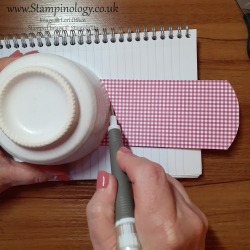
Now we are going to mark the inside score line. Place your folded paper on a slightly padded surface. In the photo I used a spiral bound notebook. It is not strictly necessary to do this but, the result will give you a clearer and cleaner score line.
Place your round object on the edges, where you just cut off the excess. This time you will have the curve facing inward, the opposite of your first curve. Using a scoring tool or a bone folder draw firmly around the cup. You will do this a total of four times, scoring each side and each end of your box (see photo, right).
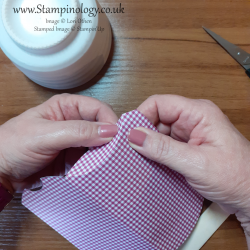
Using both hands carefully pinch along these score line folding the curve to the inside. (See photo on ) I find doing this before you adhear the sides together makes for a neater curve.
Place your adhesive on the little flap and press to the other side of the box. A little note about adhesive: I usually use something pretty strong like Stampin’Up’s Stampin’ Seal or the Tear & Tape Adhesive. You can use a multipurpose liquid glue but before folding up your box be extra sure it is dry.
Fold in the notched side first and fold the smooth side over it and you are done. Ready to decorate!
Product List


