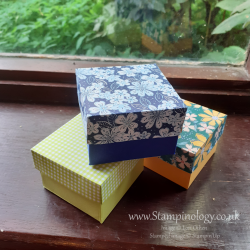
In the lead up to the holidays, I thought I would feature some gift packaging ideas for you. (Yes, at the risk of sounding like a Coca-Cola advertisement; Holidays Are Coming.) This post is about a basic box with a lid. Once you know the basics, I will show you how to easily make this style of box in any size. So grab that pretty paper and let’s get going! All measurements are in metric with the imperial measurements following in the parenthesis.
Supplies
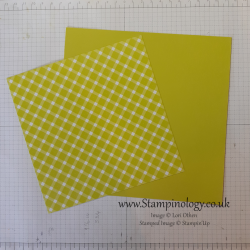
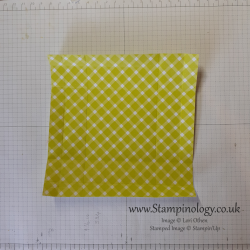
1 piece of 15cm x 15cm patterned paper (6″ x 6″) *Please note if you are using pre-cut patterned paper be sure to check the size, if it is larger than 15cm x 15cm, cut off the excess so you have the exact size. Most pre-cut paper is sold as six inch by six inch which is usually 15.2cm. If you do not shave this off your lid will be a little loose.
1 piece of solid card stock 17cm x 17cm (7″ x 7″)
Directions for the box bottom
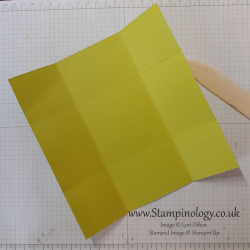
We will begin by shaving off a sliver of card stock on 2 sides. This tiny amount is difficult to measure, 2mm maybe. It you use a paper trimmer you will find that this is about the width of the cutting track. Place your paper just to the other side of the track. If you are using a guillotine style cutter it will be about the width of the blade. By doing this on two sides you can ensure that the box lid will always fit. Next score the card stock at 5cm (2″) on all sides.
Fold and burnish all of the score lines.
Using the guide sheet below, cut on the solid lines to create your tabs. It is very helpful to cut the tiny triangular slivers off of the tabs as it makes folding in the tabs and gluing a bit easier. I have designed these free guide sheets to be printed out and kept as a quick reference. All of the details to make this box are included on the first two pages.
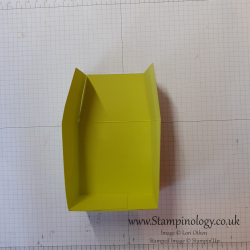
Fold the sides up and glue the tabs to the inside of the perpendicular side wall. See photo. I have used the Stampin’Up Multipurpose Liquid Glue and it works great but you do have to hold the tabs for a moment or two before moving onto the other side. The Stamp N Seal is also a good choice for gluing down the tabs as you do not have to wait for it to dry. I have used both and personally do not have a preference, it mostly depends on how fast you want to finish. Or in my case which ever type of adhesive is closest to my hand.
Directions for the box top
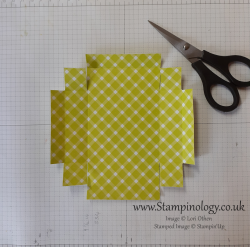
Score at 1.5cm and 3.85cm or 1/2″ and 1-1/2″ on all four sides of the patterned paper. Fold and burnish all of the score lines. It should look like the photograph on the left..
Again referring to the free cutting and scoring guide, cut out the flaps. The second page shows details of the box lid. I have included these guides because it is easier to see where to cut than to describe where to cut. Take a moment to study the guide before cutting the lid. Because we are forming a “lip” around the box top to reinforce it, the directions are a little more complicated than those for the box bottom. You will actually cut away some of the flap area for a cleaner fold. (photo graph below)
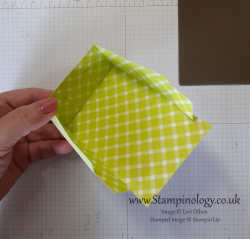
Fold the at the 3.8cm (1-1/2″) score lines first and glue your tabs down to the inside of the box top sides, as you did for the bottom of the box. If you have decided to use liquid glue be sure it is dry before moving onto the next step. Your last step is to fold in the sides at the 1.5cm ( 1/2″) and glue them down. This last step is what reinforces the lit and creates a nice clean edge both on the outside and on the inside of the lid. If you are using doubled sided patterned paper it makes it all the nicer.
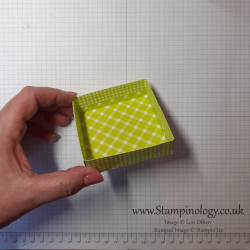
Place the lid on and decorate! Here is a fun tip, you can use a piece of embossed card stock for the lid. Be sure to cut the paper to size after embossing as embossing will slightly distort the paper. Also if you are using embossed card stock check the fit of the lid before gluing down the reinforcement strip. If your embossing is very bold you may not need to have the lid reinforced and it could make the lid too tight so check before gluing.
But wait! Where’s my best secret?
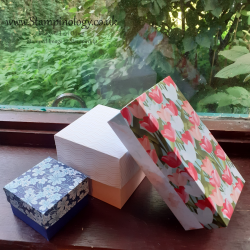
Thanks for reading this post and hanging in until the end. The box above is something nice you can do with some of your 6 x 6 patterned paper. But let’s be honest, there is not a lot you can fit into this lovely little thing. So I saved the best for last. Or should I say I saved the “secret” for last. The free cutting and scouring guide has a little something extra; a compete guide on how to make your own custom sized box…any size box. Your only limit is the size of the card stock/paper/cardboard and your ability to cut it and score it.
I have written down the formula that you will use to figure out the size of your card stock/paper/cardboard. This formula was taught to me in one of the Stampin’Up company demonstrator videos and I am sharing it with you. Print out or download the guide, I have set up blank formulas for you to fill in with your own numbers and I have given you some examples so you can see how easy it is!
As always if you have questions you can contact me by leaving a comment below or going to the about me tab and filling out one of the little forms. Also, I hope if you make the above box or go for a custom sized one you will put a photo in the comments or tag me on social media. Happy crafting!
Product List
 Designer Series Paper")


