
Crafting 3D things is so much fun. And crafting useful 3D things is even more fun. Who does not want to hear, “Wow! This is so clever! Did you make this?”
The truth is, these boxes are not very difficult to make at all. This is probably the easiest of all the boxes I have featured so far. So get out your supplies and let’s make another box!
Supplies
1 piece card stock 21.6cm x 14cm (8-1/2″ x 5-1/2″)
2 pieces patterned paper 9.5cm x 9.5cm (3-3/4 x 3-3/4)
Paper Trimmer
Tear N Tape
Multipurpose Glue
Optional Helpful Tools: Take Your Pick, Bone Folder, Tweezers’
Silicone Mat
Directions
Place your card stock in your paper trimmer with the short side against the top. Score 2.5cm (1″) on one side. Turn your paper around and score 1.25cm (1/2″) on the opposite side of the 2.5 score. Fold and score along the fold lines. Then unfold for the next step.
Place your paper in the paper trimmer so that 2.5cm (1″) score line is parallel with the top of the trimmer. We are only going to cut down to the score line. Do not cut past the score line.
- Slide your paper to the 5.1cm (2″) mark, cut down to the score line.
- Move your paper to the 10.2cm (4″) mark, SCORE all the way up and down the paper, now cut on that score line down your 2.5cm (1″) horizontal score line
- Next slide your paper to the 15.3cm (6″) mark and cut down to the vertical 2.5cm (1″) score line.
- Your last vertical cut will be on the 20.4cm or (8″) mark, however before you cut, SCORE the length of the paper and then cut down to the 2.5cm (1″) horizontal score line.
- The last cut is a very small horizontal cut along your horizontal 2.5cm (1″) score line. You will cut in until you reach the last cut you made at 2.5cm (1″) score line 20.4cm or (8″). We are getting rid of that small extra bit so the box closes neater on the bottom. (If you have made any of the other boxes you know we are creating a place for adhesive to close the box.)
Preparing for the Diagonal Score Lines

This next step can be done in two ways. The most common is to get out some padding and a small ruler and make the score lines. I tend to be a bit on the lazy side, especially when I have to make multiples of something. So I am going to show you how to get the best use of your Stampin’Up Paper Trimmer. In the photo, right, I have marked the score lines in ink so you can see what we are doing.
On your card stock, place a dot on the score 2.5cm (1″) at the junction of each cut. Be sure the mark is big enough for you to see clearly. Now turn your cardstock so the 1.25cm (1/2″) is at the top. On this score line we are going to mark the junction of the vertical score lines (3 marks). One will be at the center point, another will be on the junction of your second score at 20.4cm or (8″). The third mark will be on the edge of your paper, where the horizontal score mark ends. If you are looking at the picture, I have over emphasized these marks.

Now using our paper trimmer as a scoring tool we will join up the marks with diagonal score lines. I recommend always setting up with the 1.25cm (1/2″) score line at the top. This will give you more accurate score lines and if you over-shoot the the bottom line vertical line it will not be obvious. Take a close look at the score blade on your trimmer, you will see small marks on each side of it that are in line with a raised bump. These marks represent where the blade is in the holder. They will help you to know where to place the score blade down on your dots.
Place your paper so that you can see mark A and mark B through the center of the scoring/cutting tool track. Move the score blade to the dot at A and pressing down firmly, score down to the B mark. I usually move the score blade a couple of times up and down the score area to be sure I have a good score. Repeat this action in the same way, aligning C to B, and C to D. The last diagonal score will be aligning E to D.
Cut away the small excess tab at the bottom of the box. See the photo of the scoring guide above.
Before moving on to the next step I recommend you gently pinch the score lines creating your triangles. In the video I did not do this at this time because the card stock I was using was a little thinner than the normal high quality Stampin’Up cardstock I usually use. I had to depend on the thickness of the patterned paper to help maintain the integrity of the card stock as I pinched along the folds. This also means that this box is not quite a sturdy as the examples made with better quality card stock.
Cut Your Patterned Paper
Meanwhile back at the paper trimmer. Mark the center point on one side of your 9.5cm x 9.5cm (3-3/4 x 3-3/4) patterened paper. I have done the math for you, make your mark at 4.75cm (1-7/8″). We are now going to make diagonal cuts instead of score lines. Place your mark so it is visible in the track and rotate the bottom of the square so the point is lined up. Cut. Leaving that mark into place on the cutting trace, rotate the paper so the opposite point on the bottom now rests on the track. Cut your diagonal line. Repeat for the other 9.5cm x 9.5cm (3-3/4 x 3-3/4) patterened paper.
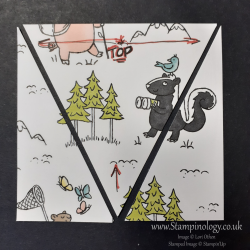
Likewise if you are sure of yourself, you can stack the two pieces of paper together and cut them both at the same time. The cutter is well able to handle this action. Just be sure you do not mix up your paper, keep the top paper’s triangles together and likewise the paper on the bottom’s triangles. As a result of doing this you will keep the patterns aligned for each side of the box. This is especially important if you are using distinctively patterned or directionally patterned paper. Another tip here is if you are using directionally patterned paper the “top” is the long part of the large center triangle. See photo above.
Glue your patterned paper to the matching triangles of your box.
Closing up
To close the the box place your Tear N Tape along the side tab. Next turn your box over and place two rows of Tear N Tape on every other tab. With your box still face down fold in your side tab, remove the barrier from the Tear N Tape, fold the box in half so the opposite edge covers the tape tab. Now turn your box bottom up and press the side seam gently to open the box. You will notice that the bottom flaps want to fold inward. Fold the two flaps that do not have tape down. Remove the barrier from the tape on one of the side tabs. Fold it over the non-tape tabs being sure to align each side of the tab with the sides of the box. Ultimately this will reinforce the box sides and bottom if your alignment is good. Next remove the tape barriers from the other flap and fold it down.
Notice that the tape is not sticking as well as it could? Turn your box over, holding it open place the bottom of the box firmly on your work surface. Now take a bone folder, chopstick, pencil end or some other blunt pointed object and run it all over those bottom tabs to get them to stick.
Let the box spring close and and admire your handy work! I could not stop there and decorated the examples. The links to all products used can be found below in the Product List.
I hope you enjoyed this tutorial and will try making one of these nifty little boxes. If you do I would love to see it. You can put a pic in the comments below or tag me on social media!
A Special Thanks to Laura Stranks at https://www.youtube.com/@creativegems2297. There are quite a few videos out there making these types of boxes but it was Laura’s video that got me so excited. At some point I hope you will visit her YouTube Channel Creative Gems, she makes fancy fold cards and other awesome crafty things!
Product List
 Designer Series Paper")


")


 Designer Series Paper")


 Bordered Ribbon")

 Designer Series Paper")


 Designer Series Paper")


